

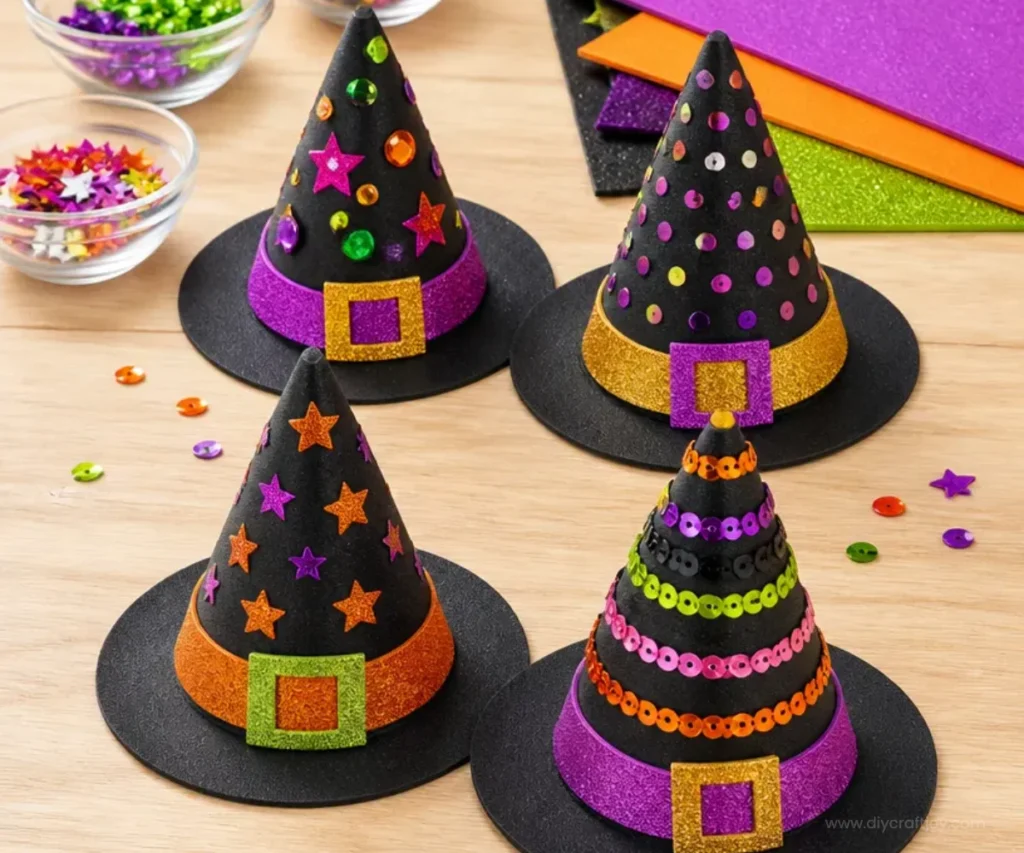
Paper Hats for Kids Craft | Halloween Witches Hats, Paper Witch Hat Craft, Autumn Halloween Crafts Kids
Getting creative with crafts is not only a fun way for kids to express themselves, but it also helps develop important skills like fine motor coordination. One exciting project that combines simplicity and whimsical fun is making paper hats, specifically Halloween witches hats. These charming crafts are perfect for a fall activity, letting kids immerse themselves in the spirit of the season. You may also find Autumn Leaf Crafts For Kids Rainbow Panda Leaf Art useful.
As you work on this paper witch hat craft, children can discover the joy of making something beautiful from ordinary materials. It’s an ideal way to channel creative energy while also developing focus and patience. Let’s dive into the details of this exciting project! You may also find Easy Paper Plate Apple Craft For Kids useful.

You may also find Paper Plate Fall Wreath Craft For Kids useful.
Why You’ll Enjoy This Project
- Easy Materials: Most supplies can be found at home, making this craft very accessible.
- Creativity Boost: Children can personalize their hats with various colors and decorations.
- Fun for Groups: It’s a great project for classrooms or playdates, encouraging collaboration.
- Seasonal Decor: The finished hats can decorate your home for Halloween or autumn.
Materials You’ll Need
- Paper plates (plain or colored)
- Black construction paper
- Scissors
- Glue or tape
- Markers and stickers for decoration
- Ribbon or string (optional for fastening)

How to Make Paper Hats for Kids Craft | Halloween Witches Hats, Paper Witch Hat Craft, Autumn Halloween Crafts Kids
Prepare the Plate: Start by taking a paper plate and cutting it in half. You will use one half to create the hat’s brim. You may also find Paper Plate Fish Craft For Kids useful.
Cut the Cone: From the remaining paper plate, cut a triangle shape to form the witch’s hat cone. The base of the triangle should align with the edge of the plate. You may also find Rainbow Paper Roll Flower Craft For Kids useful.
Shape the Cone: Roll the triangle into a cone shape. Secure it with glue so it holds its form.
Attach the Brim: To attach the cone to the brim, create a small hole in the center of the cut paper plate. Push the cone through this hole and secure it with glue or tape.
Decorate: Allow kids to color their hats, use construction paper for extra detailing, or affix stickers. This is where they can express their unique style!
Helpful Tips
- Cutting Supervision: If children are using scissors, ensure that adults supervise this part for safety.
- Flattening the Cone: For a nice finish, encourage kids to flatten the base of the cone slightly before attaching it to the brim.
- Display the Hats: Use them as decorations around the house, or even put them on display at a Halloween party.
Easy Variations
- Color Choices: Instead of the traditional black hat, allow kids to get creative with bright colors or even animal themes.
- Additional Decorations: Use fabric scraps, decorative tape, or glitter for a sparkly touch.
- Themed Parties: Incorporate different designs to fit a specific party theme, be it witches, fairies, or superheroes.
Making This Craft With Kids
This craft is great for kids of various ages, but younger children may need help with the cutting and gluing stages. Encourage older children to lead the project themselves, fostering independence and creativity.
How to Display or Use It
Once completed, these paper hats can be a delightful addition to your Halloween decor or worn during festivities. Kids can even use them in costume play, adding to their imaginative games.

Frequently Asked Questions
1. What if I don’t have paper plates?
You can use heavy cardstock or even cardboard as an alternative for the hat foundation.
2. Can we use paints?
Yes! If you have washable paint, it can add a personal touch, though be mindful of drying time.
3. How can we make the hats sturdier?
Consider using thicker paper or reinforcing the edges where the cone and brim meet with additional tape or glue.
4. What age group is this craft suitable for?
It’s appropriate for children aged 4 and up, depending on their skill level and supervision.
5. How long does this project take?
In total, expect to spend about 30 to 45 minutes, including decoration time.
Conclusion
Crafting paper hats is an enjoyable fall activity that encourages creativity in kids. This Halloween, give your children the chance to express themselves through their very own paper plate witch hats or explore unique ideas like assembling a fun witches hat bunting for parties. These simple crafts will become treasured seasonal memories!
Print
Paper Witch Hats for Kids
- Total Time: 30 minutes
- Makes: 1 hat per child
Description
A fun and easy fall craft where kids can make their own Halloween witch hats using simple materials.
Materials
- Paper plates (plain or colored)
- Black construction paper
- Scissors
- Glue or tape
- Markers and stickers for decoration
- Ribbon or string (optional for fastening)
Instructions
- Prepare the plate: Start by taking a paper plate and cutting it in half.
- Cut the cone: From the remaining paper plate, cut a triangle shape to form the witch’s hat cone.
- Shape the cone: Roll the triangle into a cone shape and secure it with glue.
- Attach the brim: Create a small hole in the center of the cut paper plate and push the cone through. Secure it with glue or tape.
- Decorate: Allow kids to color their hats or use stickers and construction paper for detailing.
Notes
Adult supervision is recommended for cutting. Use variations with colors and additional decorations for themed parties.