

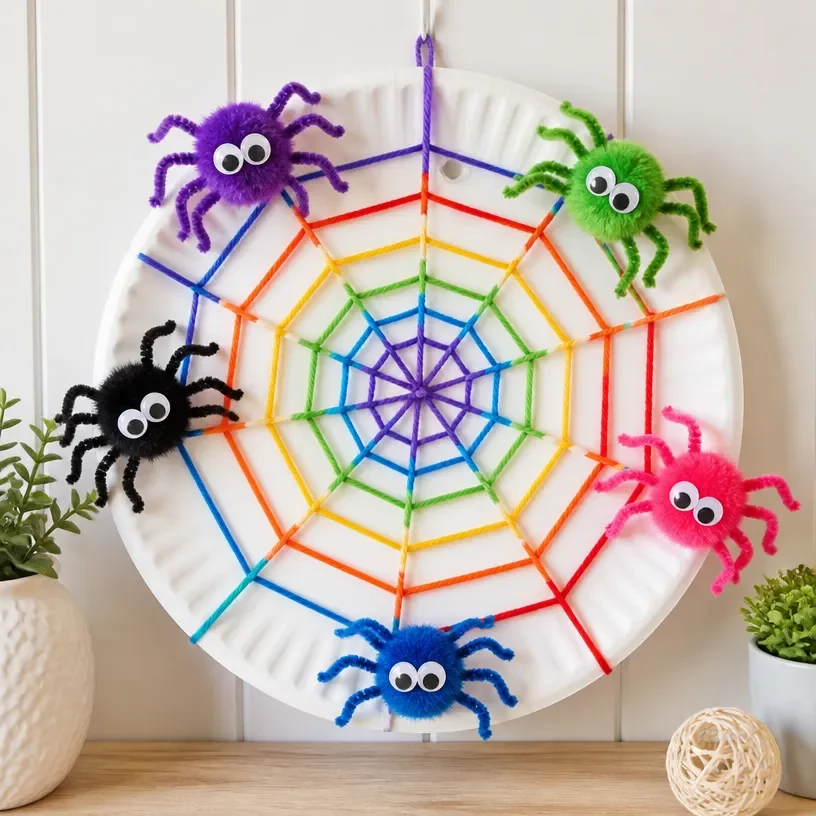
DIY Rainbow Spiderweb Paper Plate Wreath Tutorial
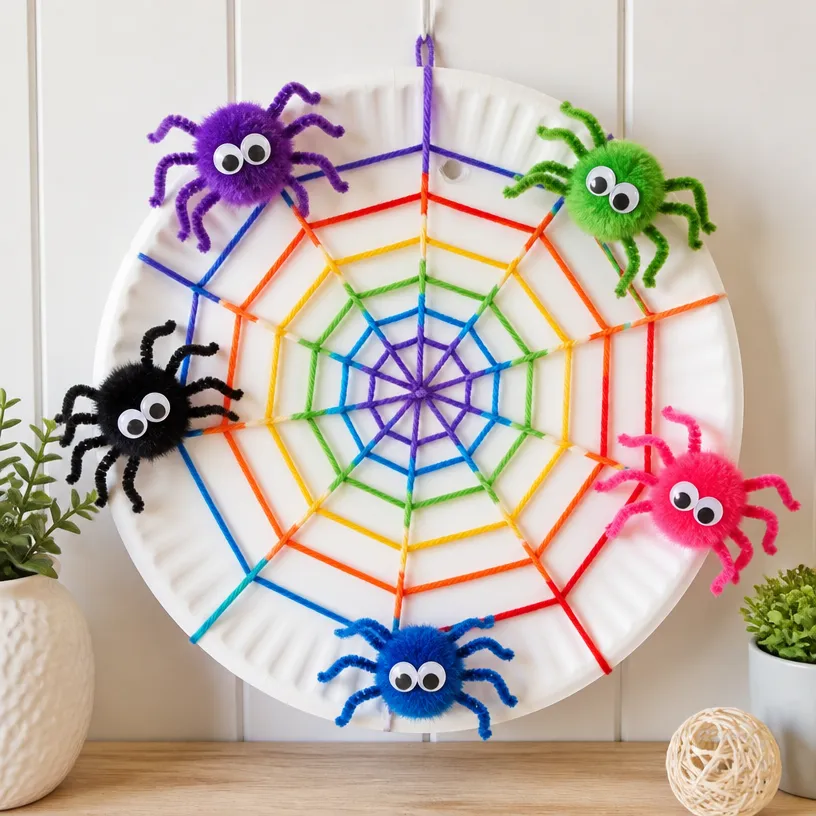
Creating a DIY Rainbow Spiderweb Paper Plate Wreath is a fun and colorful project that the whole family can enjoy. This craft brings together creativity and a bit of spookiness, perfect for celebrating the fall season or Halloween. With just a few simple materials, you can make a delightful wreath adorned with vibrant spiderwebs that can brighten any space. You may also find Diy Rainbow Sun Craft Kids Paper Plates useful.
What makes this project especially enjoyable is its accessibility to crafters of all ages. Using common items and employing straightforward techniques ensures that even beginner crafters can successfully make something beautiful. Let’s dive into the fun and get started on this DIY Rainbow Spiderweb Paper Plate Wreath. You may also find Paper Plate Fall Wreath Craft For Kids useful.
You may also find Paper Plate Organizer Rainbow Unicorn Craft Art useful.
Why You’ll Enjoy This Project
- Simple Materials: You won’t need to buy anything fancy most supplies are likely already around your home.
- Colorful Display: The cheerful colors of a rainbow brighten up any room and make for an eye-catching decoration.
- Perfect for Kids: This project is suitable for kids to assist with, making it a fantastic family activity.
- Seasonal Fun: It’s a great way to prepare for fall celebrations, inviting the spirit of Halloween without being too spooky.
- Customization: You can choose different colors or designs to match your home decor or personal taste.
Materials You’ll Need
- Paper plates (2 for each wreath)
- Colored construction paper (red, orange, yellow, green, blue, indigo, and violet)
- Scissors
- Glue stick or craft glue
- Markers or crayons (optional, for decorating)
- String or ribbon (for hanging)
How to Make DIY Rainbow Spiderweb Paper Plate Wreath Tutorial
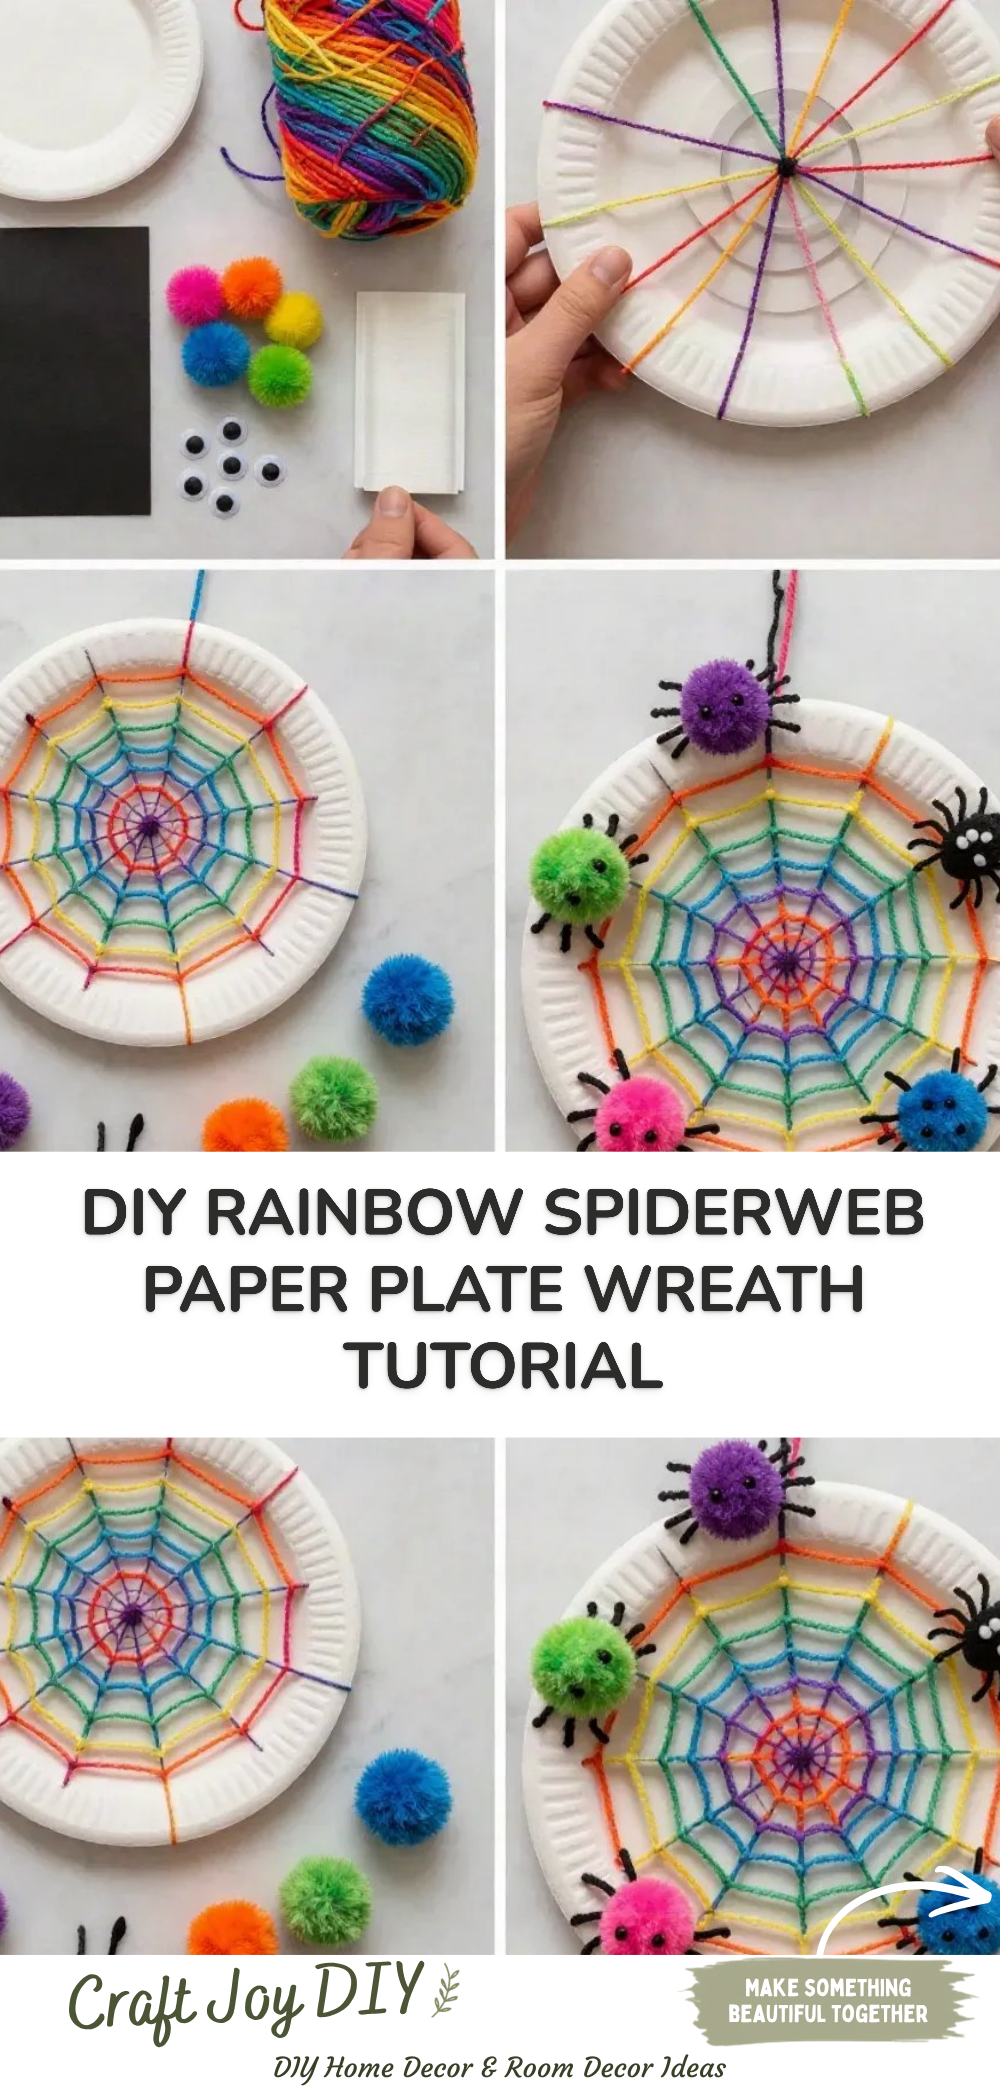
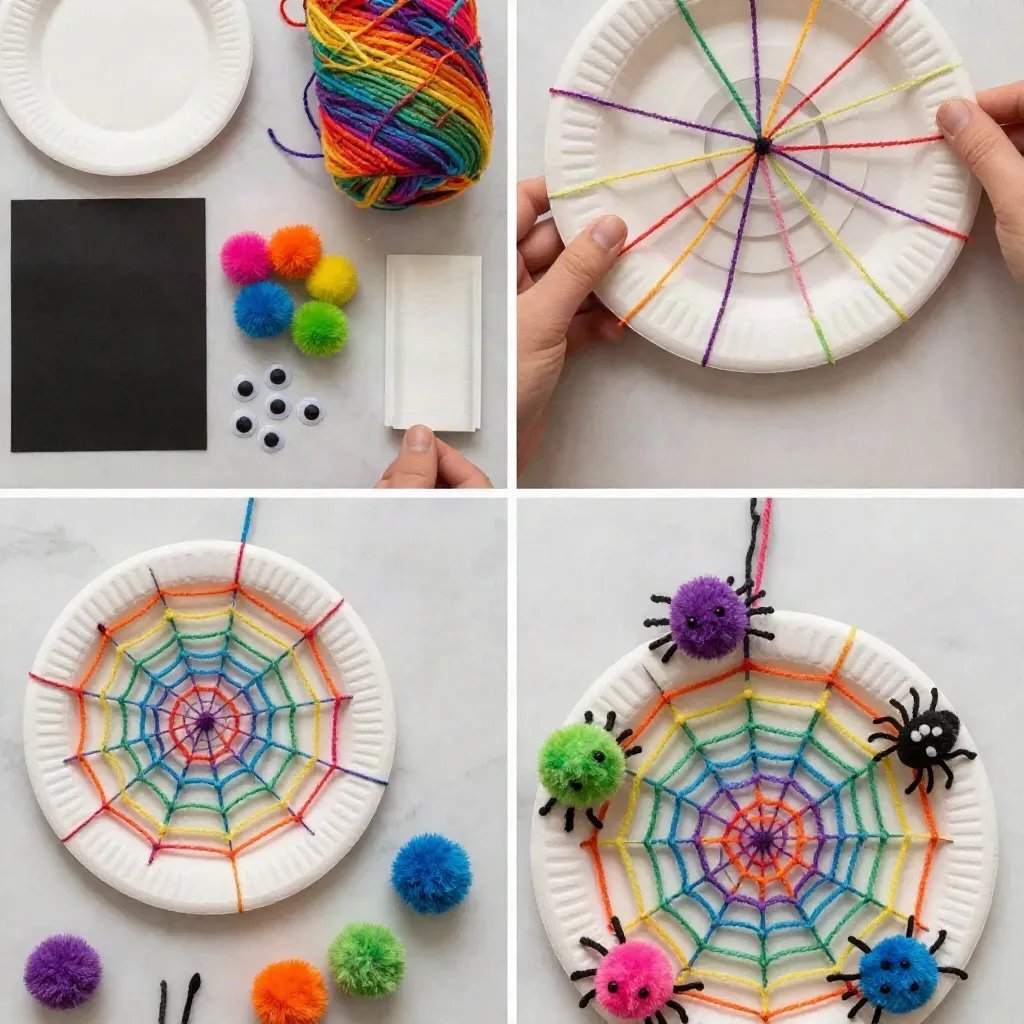
Prepare the Plates: Take two paper plates and place one on top of the other. Cut the center out of both plates to create a ring shape. This will form the base of your wreath. You may also find Paper Plate Stained Glass Fall Wreath For Kids useful.
Create the Rainbow: Cut strips of colored construction paper, approximately 1 inch wide. You’ll need pieces in red, orange, yellow, green, blue, indigo, and violet. You may also find Rainbow Apple Cupcake Liner Flower Wreath Diy Craft useful.
Assemble the Spiderweb: To form the spiderweb, take the top paper plate ring and glue the colored strips onto it in a circular, overlapping pattern. Start from the center, letting the strips radiate outward.
Secure the Web: After gluing all the colored strips, flip the plate over to ensure the web is attached well. Add more glue where needed to keep everything secure.
Add a Hanging Element: Use a piece of string or ribbon, loop it through the top of the wreath, and secure it to the back. This will allow you to hang your beautiful creation.
Helpful Tips
- For a cleaner look, use a ruler to help you cut even strips of paper.
- If working with children, supervise while they handle scissors to ensure safety.
- Allow the glue to dry thoroughly before hanging your wreath to avoid it falling apart.
- Consider using markers or crayons to add extra designs on the plates for a personalized touch.
Easy Variations
- Color Combinations: Mix shades of your chosen colors to create a unique look.
- Add Glitter: To make the spiderwebs sparkle, sprinkle glitter on the glue before it dries.
- Seasonal Themes: Adapt the colors and decorations to match other holidays or seasons.
- Different Shapes: Instead of using a standard circle, experiment with other shapes for a wreath.
- Animal Decorations: Add paper cutouts of spiders or other friendly creatures to enhance your theme.
Making This Craft With Kids
This project is a wonderful opportunity for kids to express their creativity! Adults should handle the cutting parts, while children can help in gluing and decorating. This ensures safety while still keeping it a fun shared experience.
How to Display or Use It
Once completed, hang your wreath on a door or wall to show off your masterpiece. You can also use it as a centerpiece on a table or even gift it to a friend or neighbor as a cheerful surprise.
Frequently Asked Questions
How long does this project take to complete?
It typically takes about 1-2 hours, depending on drying time.
Can I use different types of paper?
Yes! You can use recycled paper or even fabric scraps for a unique look.
What age is this project suitable for?
This project works well for children aged 5 and up, with adult supervision for cutting.
How do I store the wreath after the season?
Hang it in a cool, dry place or keep it flat in a box to prevent it from getting crushed.
Conclusion
Now that you’ve learned how to create a colorful DIY Rainbow Spiderweb Paper Plate Wreath, it’s time to embrace your creativity and make one today! This craft not only provides an entertaining activity but also results in a festive decoration you can proudly display. If you’re looking for more crafting inspiration, explore the Craft Paper Spiderweb Kirigami Spider Webs For Halloween for a fun variation, or check out the Spider Web Wreath craft activity guide for additional ideas. Happy crafting!
Print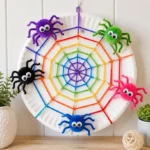
DIY Rainbow Spiderweb Paper Plate Wreath
- Total Time: 70 minutes
- Makes: 1 wreath
Description
A fun and colorful DIY project for creating a Rainbow Spiderweb Paper Plate Wreath, perfect for fall or Halloween decor.
Materials
- 2 Paper plates
- Colored construction paper (red, orange, yellow, green, blue, indigo, violet)
- Scissors
- Glue stick or craft glue
- Markers or crayons (optional)
- String or ribbon (for hanging)
Instructions
- Prepare the plates by placing one paper plate on top of the other and cutting the center out to create a ring.
- Create strips of colored construction paper, approximately 1 inch wide, in your chosen colors.
- Assemble the spiderweb by gluing the colored strips onto the top paper plate ring in a circular pattern.
- Secure the web by flipping the plate over and adding more glue as necessary.
- Add a piece of string or ribbon to the top of the wreath for hanging.
Notes
For a cleaner look, use a ruler for cutting strips. Supervise children while using scissors.