

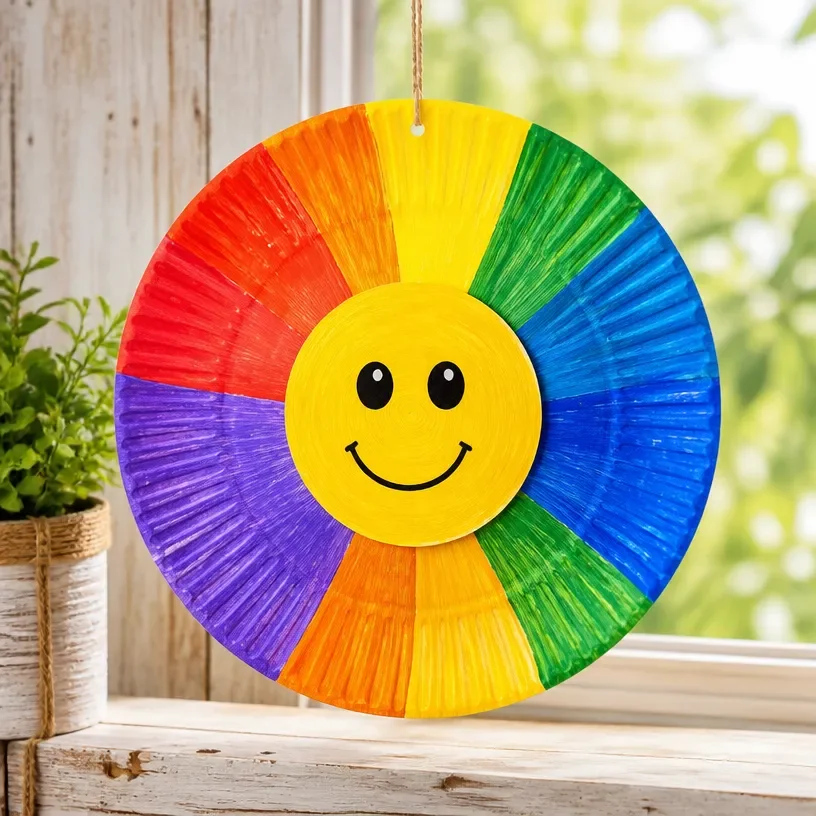
DIY Rainbow Sun Craft for Kids Using Paper Plates
Creating a cheerful rainbow sun craft using paper plates is a delightful and easy project for kids! This fun craft brings vibrant colors into your home and helps children express their creativity while enhancing their fine motor skills. It’s an enjoyable way to spend time together as a family, and the finished piece makes for a lovely decoration or gift. You may also find Rainbow Ghost Shaker Suncatcher Craft For Kids useful.
In this tutorial, you’ll find step-by-step instructions to make your own rainbow sun. Not only will you make something beautiful, but you’ll also have a blast while doing it! If you’re also looking for more fun ideas, you might be interested in exploring other rainbow-themed crafts, such as this rainbow monster pencil holder.
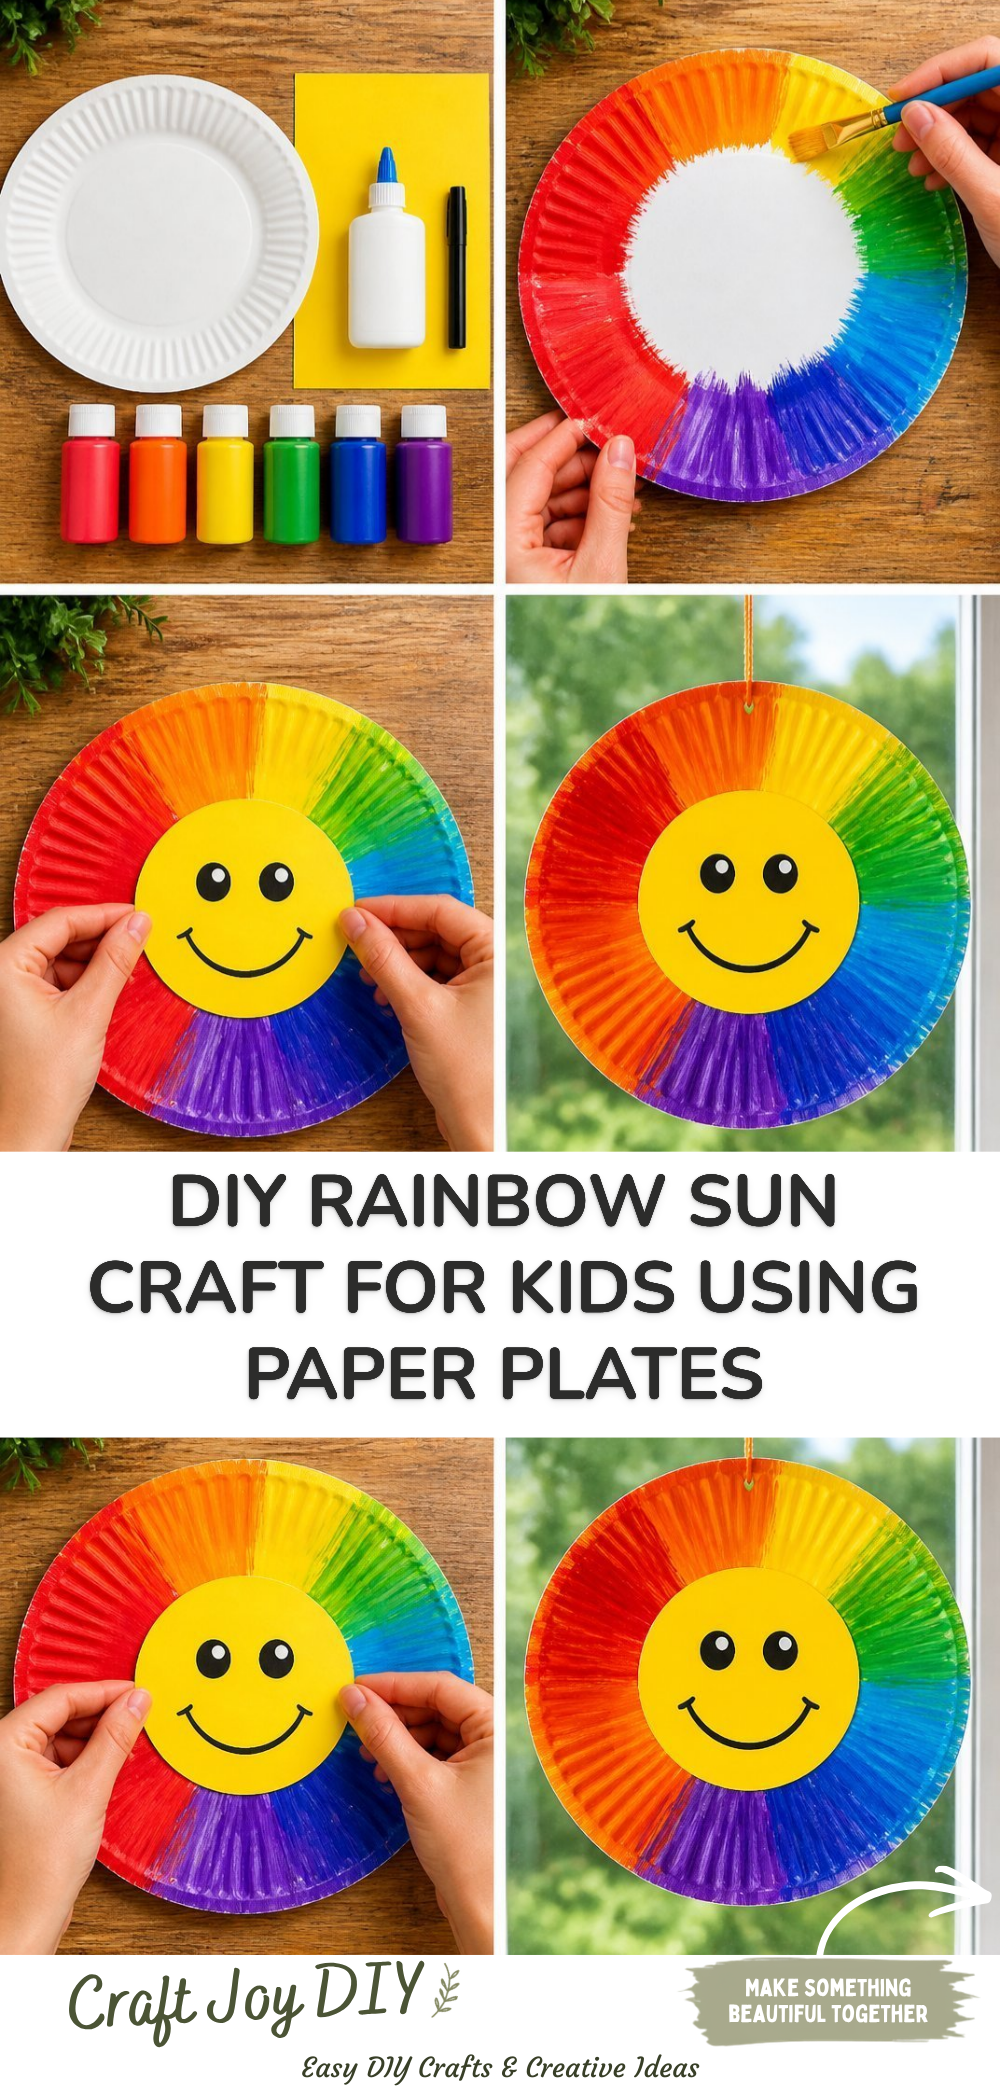
You may also find Rainbow Pencil Butterfly Suncatcher Craft For Kids useful.
Why You’ll Enjoy This Project
- Creative Expression: Children get to choose their colors and designs, allowing them to express their personality through their craft.
- Easy to Follow: The steps are simple, making this project accessible for all skill levels, including pre-schoolers.
- Family Bonding: Crafting together is a fantastic way to spend quality time as a family and create memories.
- Fun Decor: The completed craft serves as a joyful decoration, brightening up spaces such as kids’ rooms or family areas.
- Educational Value: Kids can learn about colors and shapes while engaging in a hands-on activity.
Materials You’ll Need
- Paper plates (one for the sun and another for the rainbow)
- Yellow, red, orange, green, blue, and purple paint or markers
- Scissors
- Glue
- Cotton balls (for cloud accents)
- Paintbrush (if using paint)
Using paper plates is affordable and easy. If you don’t have paper plates, you could use cardboard circles instead. You may also find Rainbow Tissue Paper Flower Lantern Diy For Kids useful.
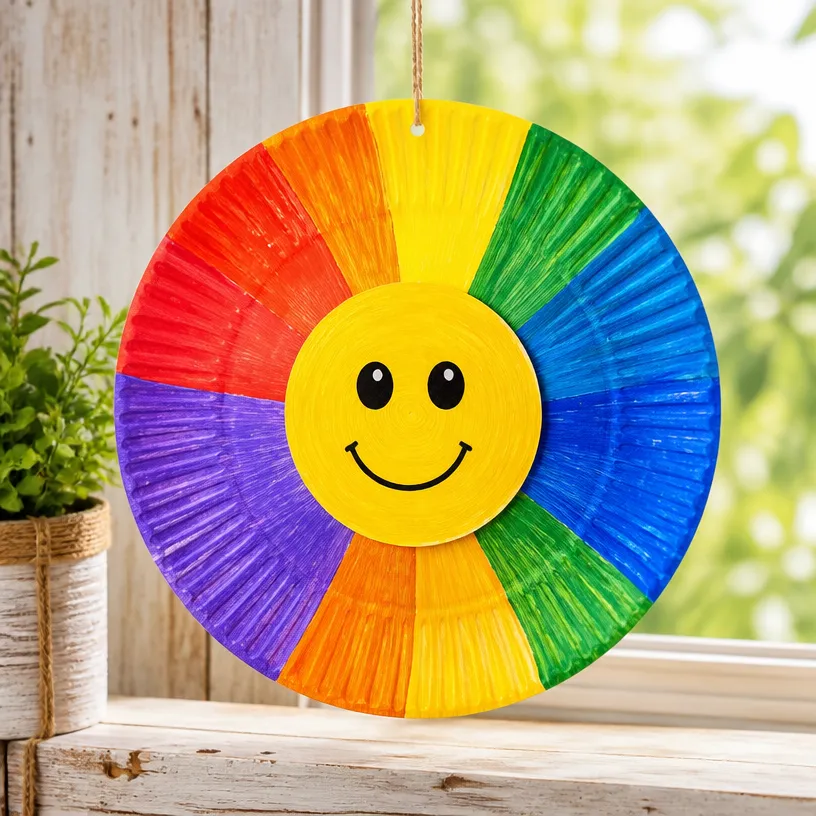
How to Make DIY Rainbow Sun Craft for Kids Using Paper Plates
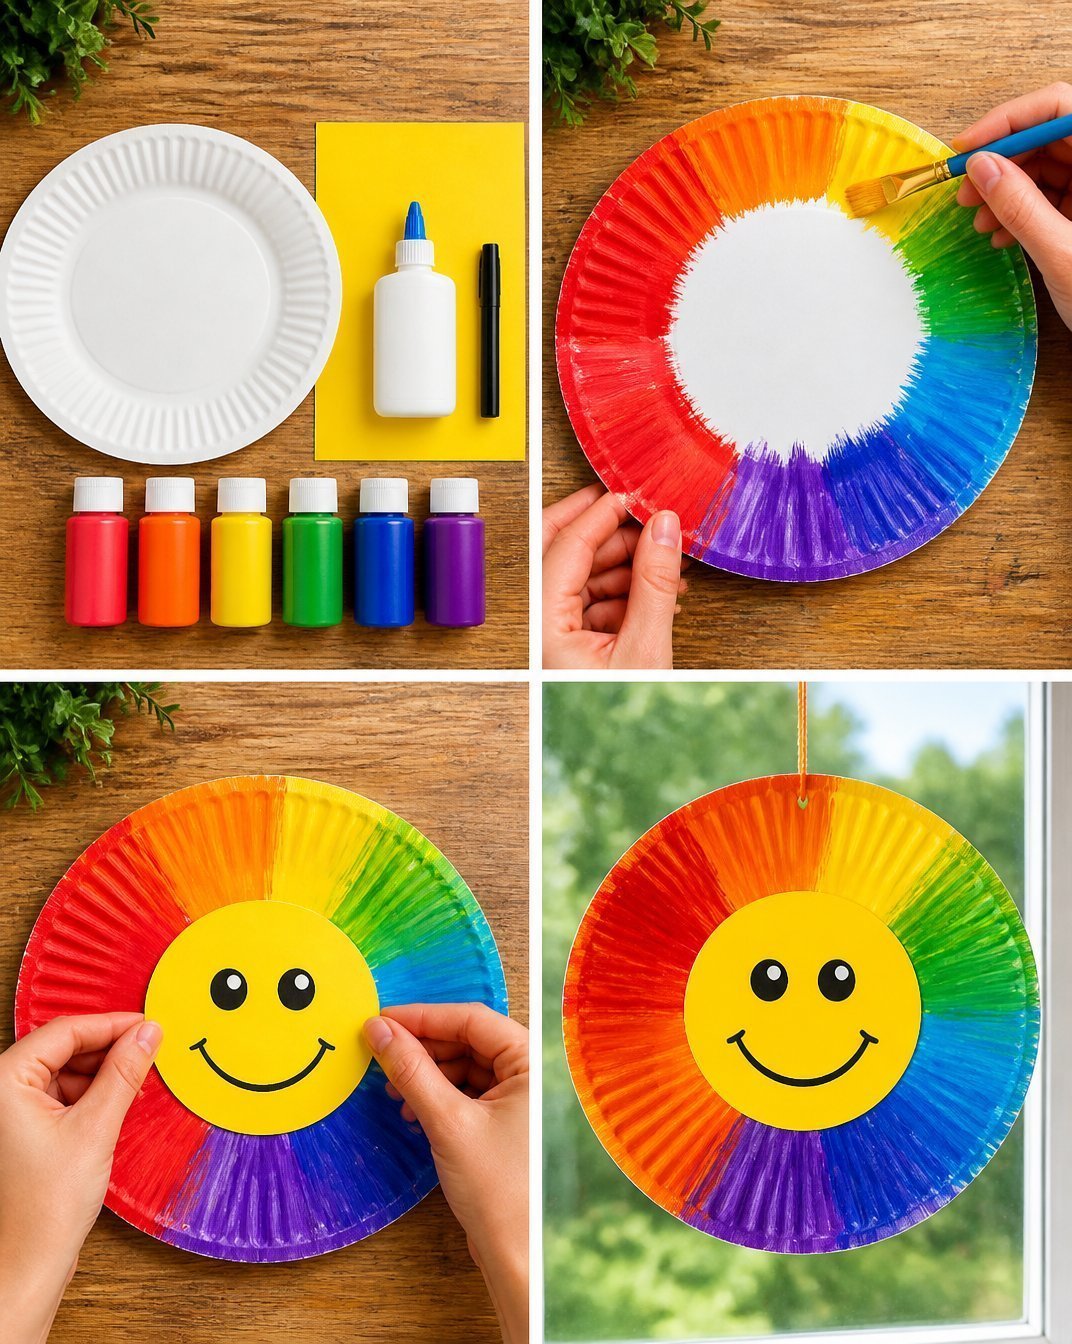
Prepare the Plates: Start by selecting one paper plate for the sun and another for the rainbow. Tear or cut the second plate to create an arch shape for your rainbow.
Paint the Sun: Use yellow paint to color the entire surface of the first paper plate. Allow it to dry completely.
Create the Rainbow: Paint or color each segment of the cut plate in the rainbow colors red, orange, yellow, green, blue, and purple starting from the outside towards the center.
Attach the Rainbow: Once both plates are dry, carefully glue the rainbow onto the bottom edge of the sun’s plate.
Add Clouds: Use cotton balls to create fluffy clouds. Glue these onto both sides of the rainbow to enhance the sun’s cheerful aesthetic.
Finishing Touches: Allow all parts to dry properly before displaying your beautiful craft.
Helpful Tips
- When painting, consider using washable paint for easier cleanup.
- If the kids want to write their names or a cheerful message, they can do so on the sun before drying.
- Encourage children to use their imagination when deciding the arrangement of the rainbow colors.
- Make a few extra sun crafts to gift to friends or family; they make wonderful handmade presents!
Easy Variations
- Seasonal Colors: Adjust the colors according to the seasons pastels for spring or bright hues for summer.
- Bigger or Smaller: Use larger or smaller plates depending on the size you want your sun to be.
- Add Glitter: Sprinkle glitter on the wet paint for a sparkling finish.
- Different Materials: Try using colored tissue paper or fabric instead of paint for a unique texture.
- Theme Crafting: Create variations for different occasions, like a winter sun with snowflake decorations.
Making This Craft With Kids
This project is perfect for children of various ages, although adult supervision might be necessary while using scissors or glue. Allow kids to experiment with colors and designs, and provide help only when needed to encourage independence.
How to Display or Use It
Once completed, hang your rainbow sun craft in a window to catch the light or display it on a wall to brighten the room. You can even attach a string to the top and use it as a mobile!
Frequently Asked Questions
1. Can I use different colors?
Absolutely! Feel free to choose any colors you like for your rainbow.
2. How do I keep the cotton balls from falling off?
Ensure the glue is wet enough, and press down firmly when attaching them.
3. How long does the paint take to dry?
Drying time can vary based on the type of paint used, generally around 30 minutes to an hour.
4. Can we make more than one sun?
Yes, you can easily make additional suns in different sizes or colors.
5. What other crafts can I do with paper plates?
Explore a variety of projects like the rainbow school bus photo frame or rainbow tissue paper lanterns.
Conclusion
The DIY Rainbow Sun Craft is a delightful activity that encourages creativity in children. Through simple steps and accessible materials, you can create a colorful decoration that adds joy to any space. If you’re interested in more creative paper plate crafts, check out these ideas: Craft Summer DIY Paper Plate Sun And Rainbow Craft Fun Summer and Easy Paper Plate Sunshine Craft. Happy crafting!
Print
DIY Rainbow Sun Craft for Kids Using Paper Plates
- Total Time: 45 minutes
- Makes: 1 craft
Description
Create a cheerful rainbow sun craft using paper plates that enhances creativity and fine motor skills for kids.
Materials
- 1 paper plate for the sun
- 1 paper plate for the rainbow
- Yellow, red, orange, green, blue, and purple paint or markers
- Scissors
- Glue
- Cotton balls for cloud accents
- Paintbrush (if using paint)
Instructions
- Prepare the plates: Start by selecting one paper plate for the sun and another for the rainbow. Tear or cut the second plate to create an arch shape for your rainbow.
- Paint the sun: Use yellow paint to color the entire surface of the first paper plate. Allow it to dry completely.
- Create the rainbow: Paint or color each segment of the cut plate in the rainbow colors—red, orange, yellow, green, blue, and purple—starting from the outside towards the center.
- Attach the rainbow: Once both plates are dry, carefully glue the rainbow onto the bottom edge of the sun’s plate.
- Add clouds: Use cotton balls to create fluffy clouds. Glue these onto both sides of the rainbow to enhance the sun’s cheerful aesthetic.
- Finishing touches: Allow all parts to dry properly before displaying your beautiful craft.
Notes
When painting, consider using washable paint for easier cleanup. Kids can write their names or a cheerful message on the sun before drying.