

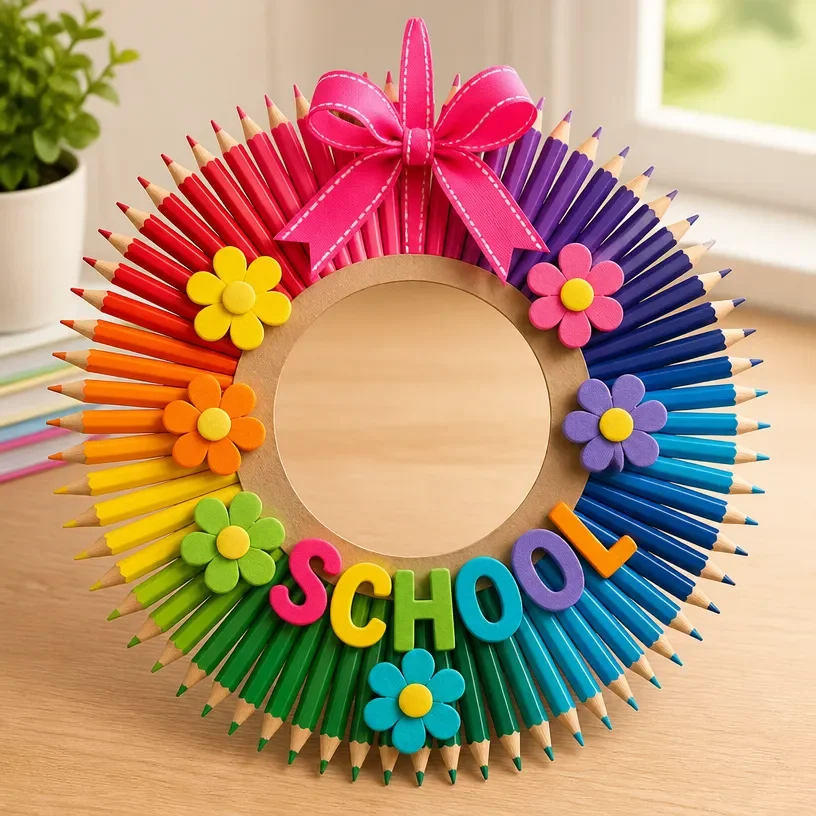
Rainbow Pencil Wreath for the First Day of School
Creating a Rainbow Pencil Wreath for the first day of school is a delightful way to welcome a new year. This craft is not only visually appealing but also practical, as it can serve as a colorful decoration for your home or classroom. The process involves using simple materials, making it accessible for families looking for engaging activities. You may also find Rainbow Apple Suncatcher First Day Of School useful.
In this tutorial, I’ll guide you through every step of making this cheerful wreath, ensuring it’s enjoyable for both adults and kids. Let’s get started! You may also find Diy Rainbow School Bus Photo Frame Craft For Kids useful.
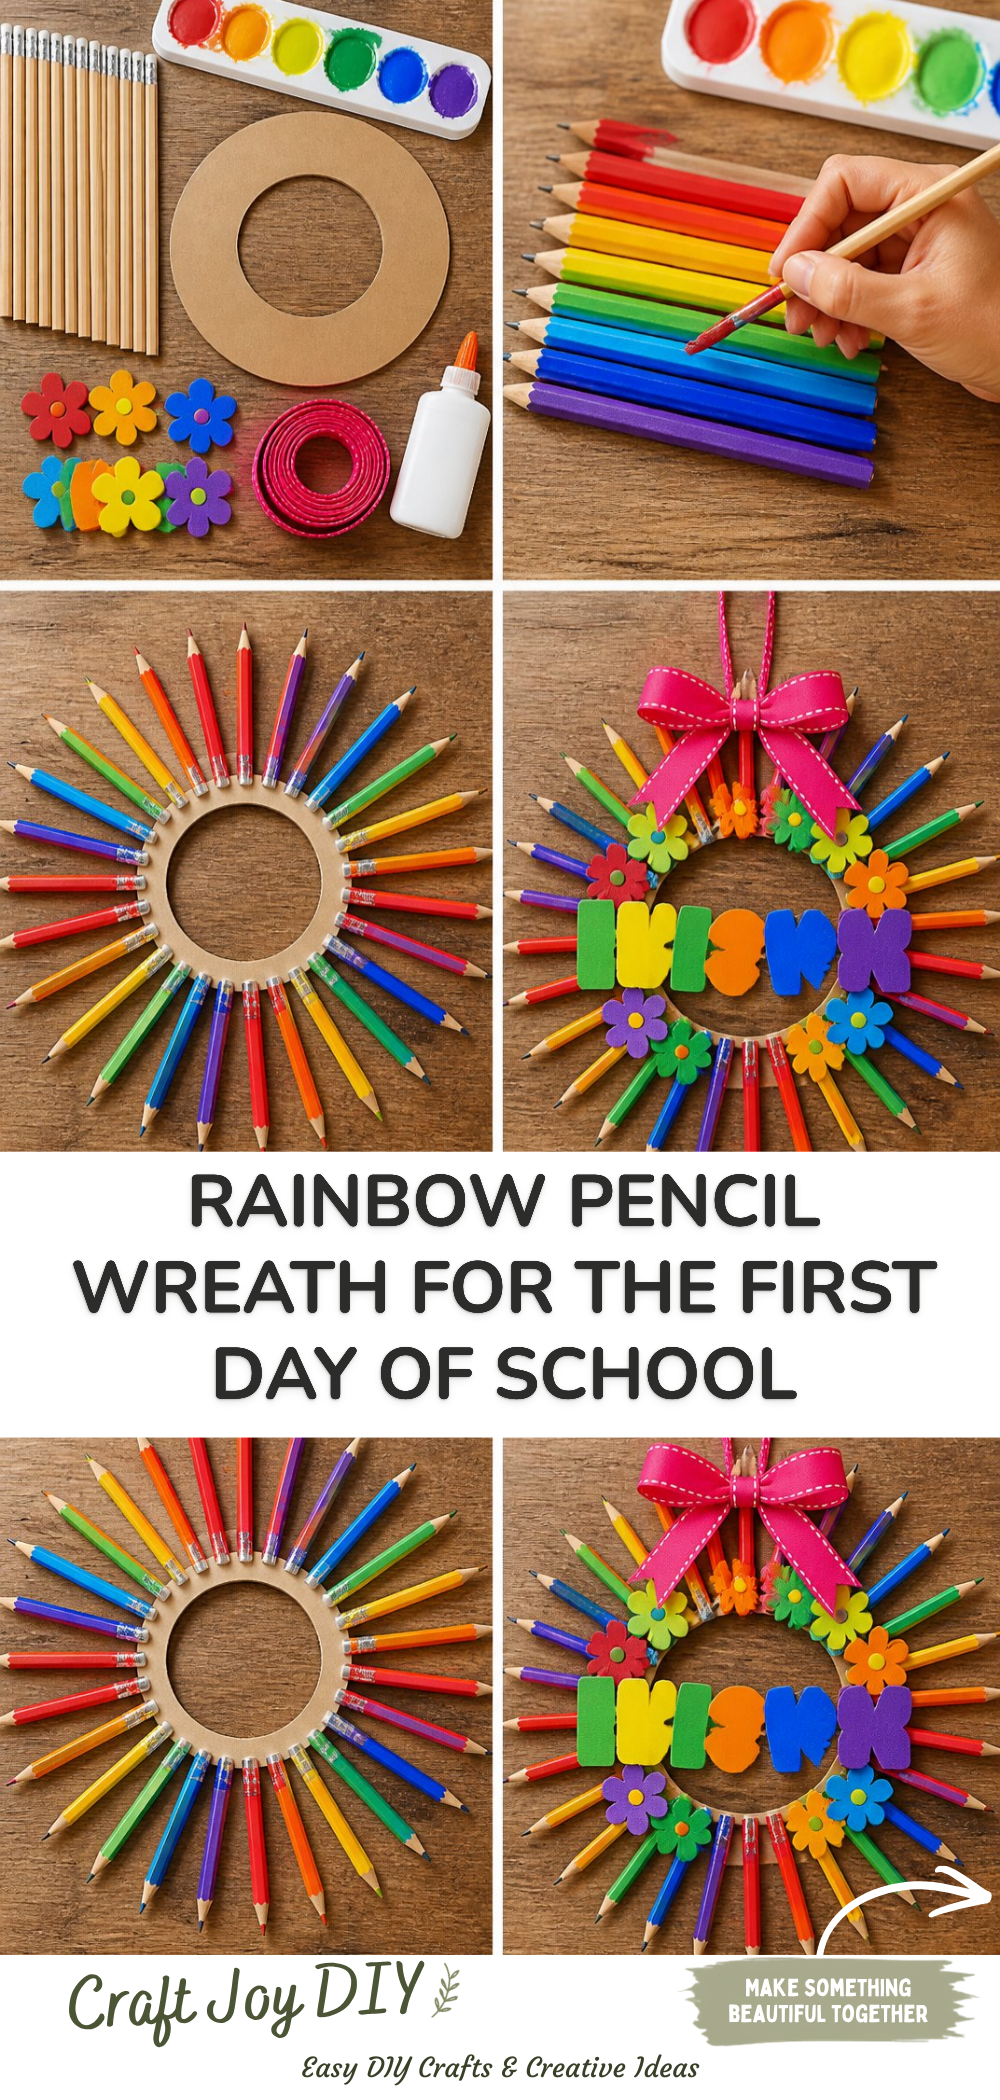
You may also find Rainbow Monster Pencil Holders Diy Craft For Kids useful.
Why You’ll Enjoy This Project
- Creative Expression: This project promotes creativity as you can choose colors and design elements that reflect personal styles.
- Celebratory Decor: The resulting wreath makes for a festive decoration to celebrate the start of a new school year.
- Engaging for Kids: Children will love the hands-on experience of assembling a colorful wreath that brightens any space.
- Recyclable Materials: You can use old pencils and paper, promoting recycling and sustainable crafting practices.
- Simple Steps: Each step is straightforward, making it an ideal project for beginner crafters or families.
Materials You’ll Need
- Thick cardboard or a foam wreath base
- Colored pencils (make sure to have a variety)
- Hot glue gun and glue sticks
- Ribbon or string for hanging
- Scissors
- (Optional) Decorative items like stickers or washi tape
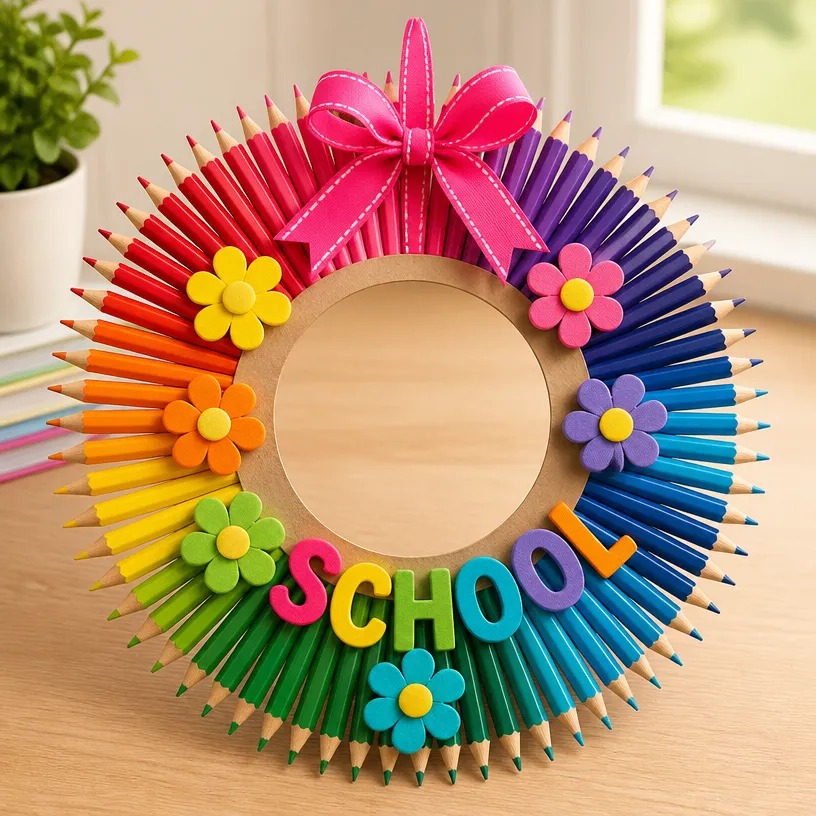
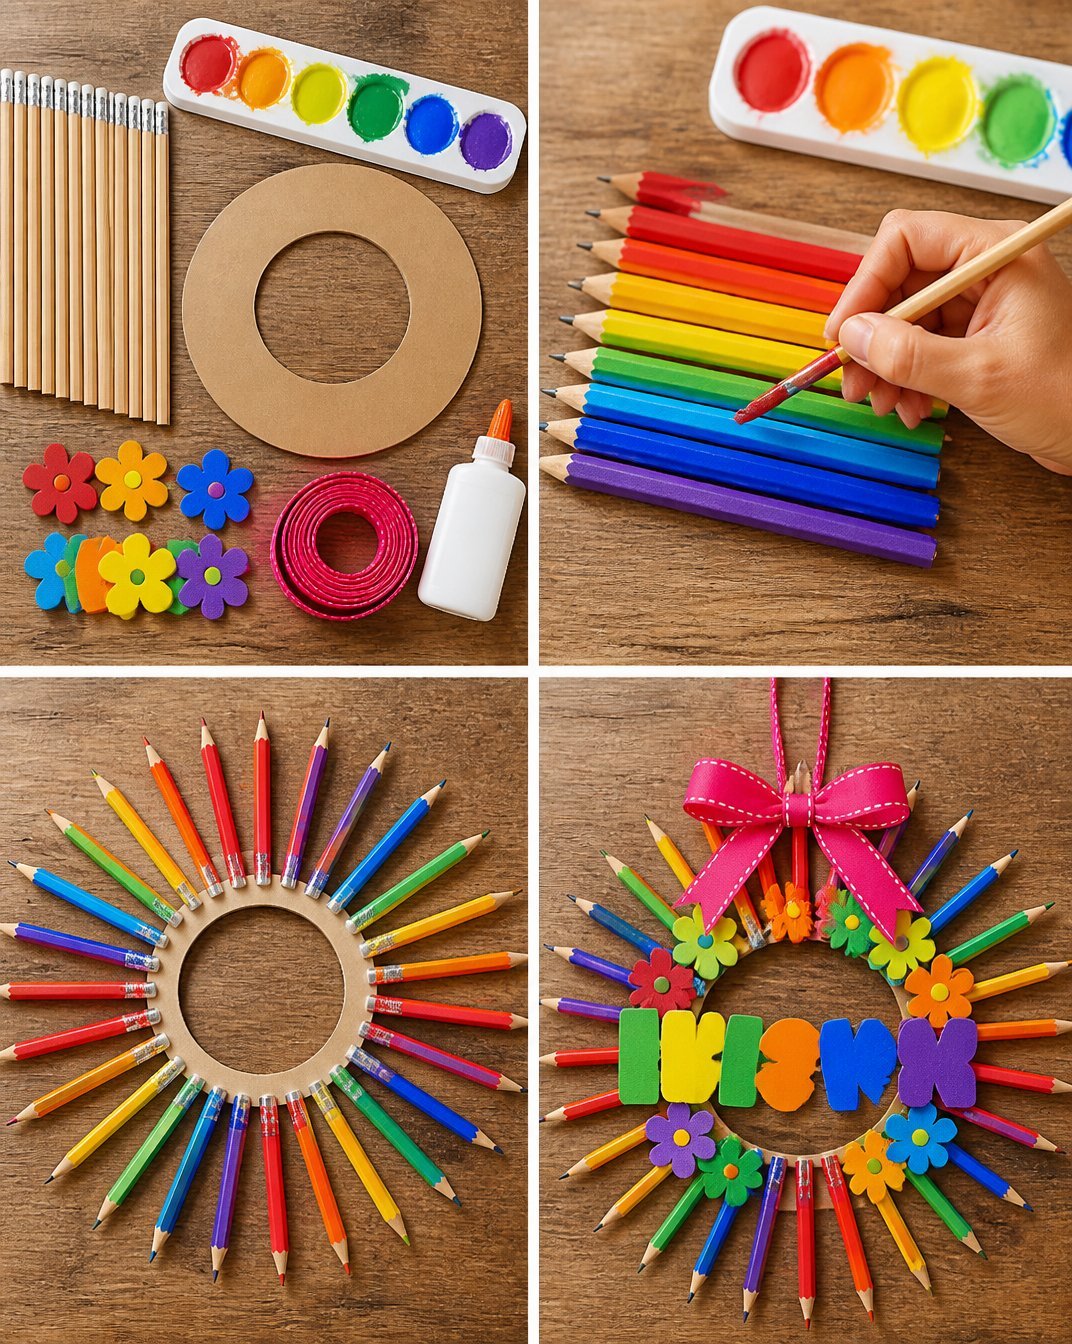
How to Make Rainbow Pencil Wreath for the First Day of School
Step 1: Prepare Your Base
Begin by cutting your cardboard or foam into a circular shape to create the wreath base. A diameter of around 12 inches is usually suitable. You may also find Rainbow Pencil Butterfly Suncatcher Craft For Kids useful.
Step 2: Sort the Pencils
Organize your colored pencils by color. This will help you plan the rainbow pattern that you will use on your wreath. You may also find Rainbow Pencil Crayon Suncatcher Craft For Kids useful.
Step 3: Glue on the Pencils
Using your hot glue gun, start attaching the colored pencils to the wreath base. Begin at one side and work your way around, making sure to alternate colors for a vibrant rainbow effect. Remove any pencils that are too short or place them towards the back.
Step 4: Secure Everything
Once you’ve covered the base with pencils, go over any loose ones and add more glue if necessary. Allow the glue to dry thoroughly to ensure everything stays in place.
Step 5: Add a Ribbon
Cut a piece of ribbon or string, and attach it to the top of your wreath for hanging. This can also add a decorative touch, so choose a ribbon that complements the colors of your pencils.
Step 6: Finishing Touches
Feel free to personalize your wreath with additional decorative items such as stickers or washi tape. This step allows for more creativity and makes your wreath uniquely yours.
Step 7: Display Your Wreath
Once everything is securely attached and dry, your wreath is ready to be hung! Consider hanging it on a door or a wall as a joyful start to the school year.
Helpful Tips
- When applying glue, use a small amount to prevent excess from seeping out and causing mess.
- For a smoother finish, ensure that the pencils are evenly spaced and arranged nicely.
- If kids are helping, supervise during glue application as hot glue can cause burns.
- Plan ahead on where you want to display your wreath to ensure proper length for the ribbon.
Easy Variations
- Seasonal Themes: Change the colors based on seasonal themes, like autumn hues for fall or bright pastels for spring.
- Mini Wreaths: Make smaller versions of the wreath as gifts for teachers or friends using fewer pencils.
- Different Bases: Experiment with other bases like a floral foam or even a metal ring for a different look.
- Adding Names: Personalize by adding a name tag or initial with colorful paper.
- Decorative Alternatives: Substitute some pencils with crayons or markers for a varied texture and look.
Making This Craft With Kids
This craft is perfect for kids to participate in under adult supervision, particularly when using the glue gun. Kids can help with sorting the pencils, planning the arrangement, and decorating, allowing them to take ownership of their artwork. Be sure to supervise when handling scissors and the hot glue gun.
How to Display or Use It
The Rainbow Pencil Wreath can be displayed prominently on your front door or inside your home. It also makes a fantastic decoration for classrooms, announcing the start of the school year. You could even use it as a unique centerpiece for a celebration or as a photo prop during the first day of school.
Frequently Asked Questions
1. Can I use different materials instead of pencils?
Yes! You can use crayons or even fabric scraps for a softer look.
2. How long will the wreath last?
If stored properly and out of direct sunlight, the wreath can last through the school year.
3. Is it suitable for children of all ages?
While younger children can assist, adult supervision is recommended during hot glue application.
4. How do I store the wreath after the school year?
Store it in a dry place, ideally in a box to prevent any damage.
5. Can I create a themed wreath?
Absolutely! Feel free to choose colors that match your child’s classroom or personal interests.
Conclusion
Creating a Rainbow Pencil Wreath is a fun and engaging project that sets a bright tone for the school year. For additional crafting ideas, you might want to check out this project on a Colored Pencil Wreath or consider making a festive DIY Back to School Wreath Using Pool Noodles for a different twist. Happy crafting!
Print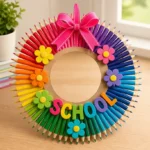
Rainbow Pencil Wreath for the First Day of School
- Total Time: 15 minutes
- Makes: 1 wreath
Description
A vibrant and fun wreath crafted from colored pencils, perfect for celebrating the start of a new school year.
Materials
- Thick cardboard or foam wreath base
- Colored pencils (variety of colors)
- Hot glue gun and glue sticks
- Ribbon or string for hanging
- Scissors
- (Optional) Decorative items like stickers or washi tape
Instructions
- Prepare your base by cutting your cardboard or foam into a circular shape for the wreath.
- Sort the colored pencils by color to plan your rainbow pattern.
- Glue the colored pencils onto the wreath, alternating colors for a vibrant effect.
- Secure everything by adding more glue to loose pencils and let it dry thoroughly.
- Add a piece of ribbon or string at the top for hanging.
- Finish the wreath by personalizing it with stickers or washi tape.
- Display your wreath by hanging it on a door or wall.
Notes
This craft is great for kids with adult supervision, especially when using hot glue.