

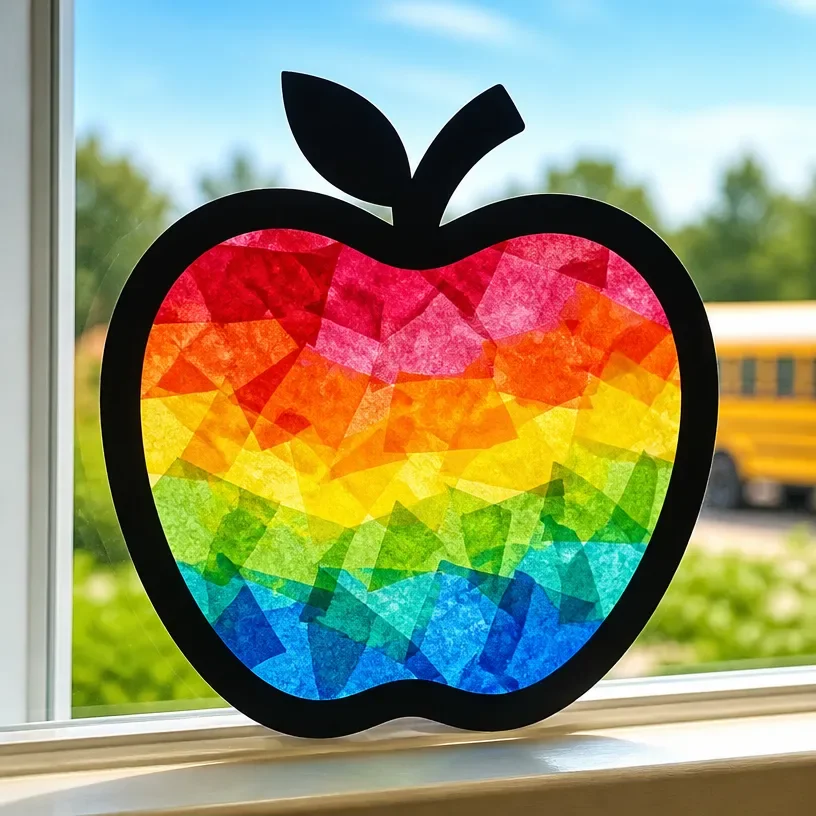
Rainbow Apple Suncatcher for the First Day of School
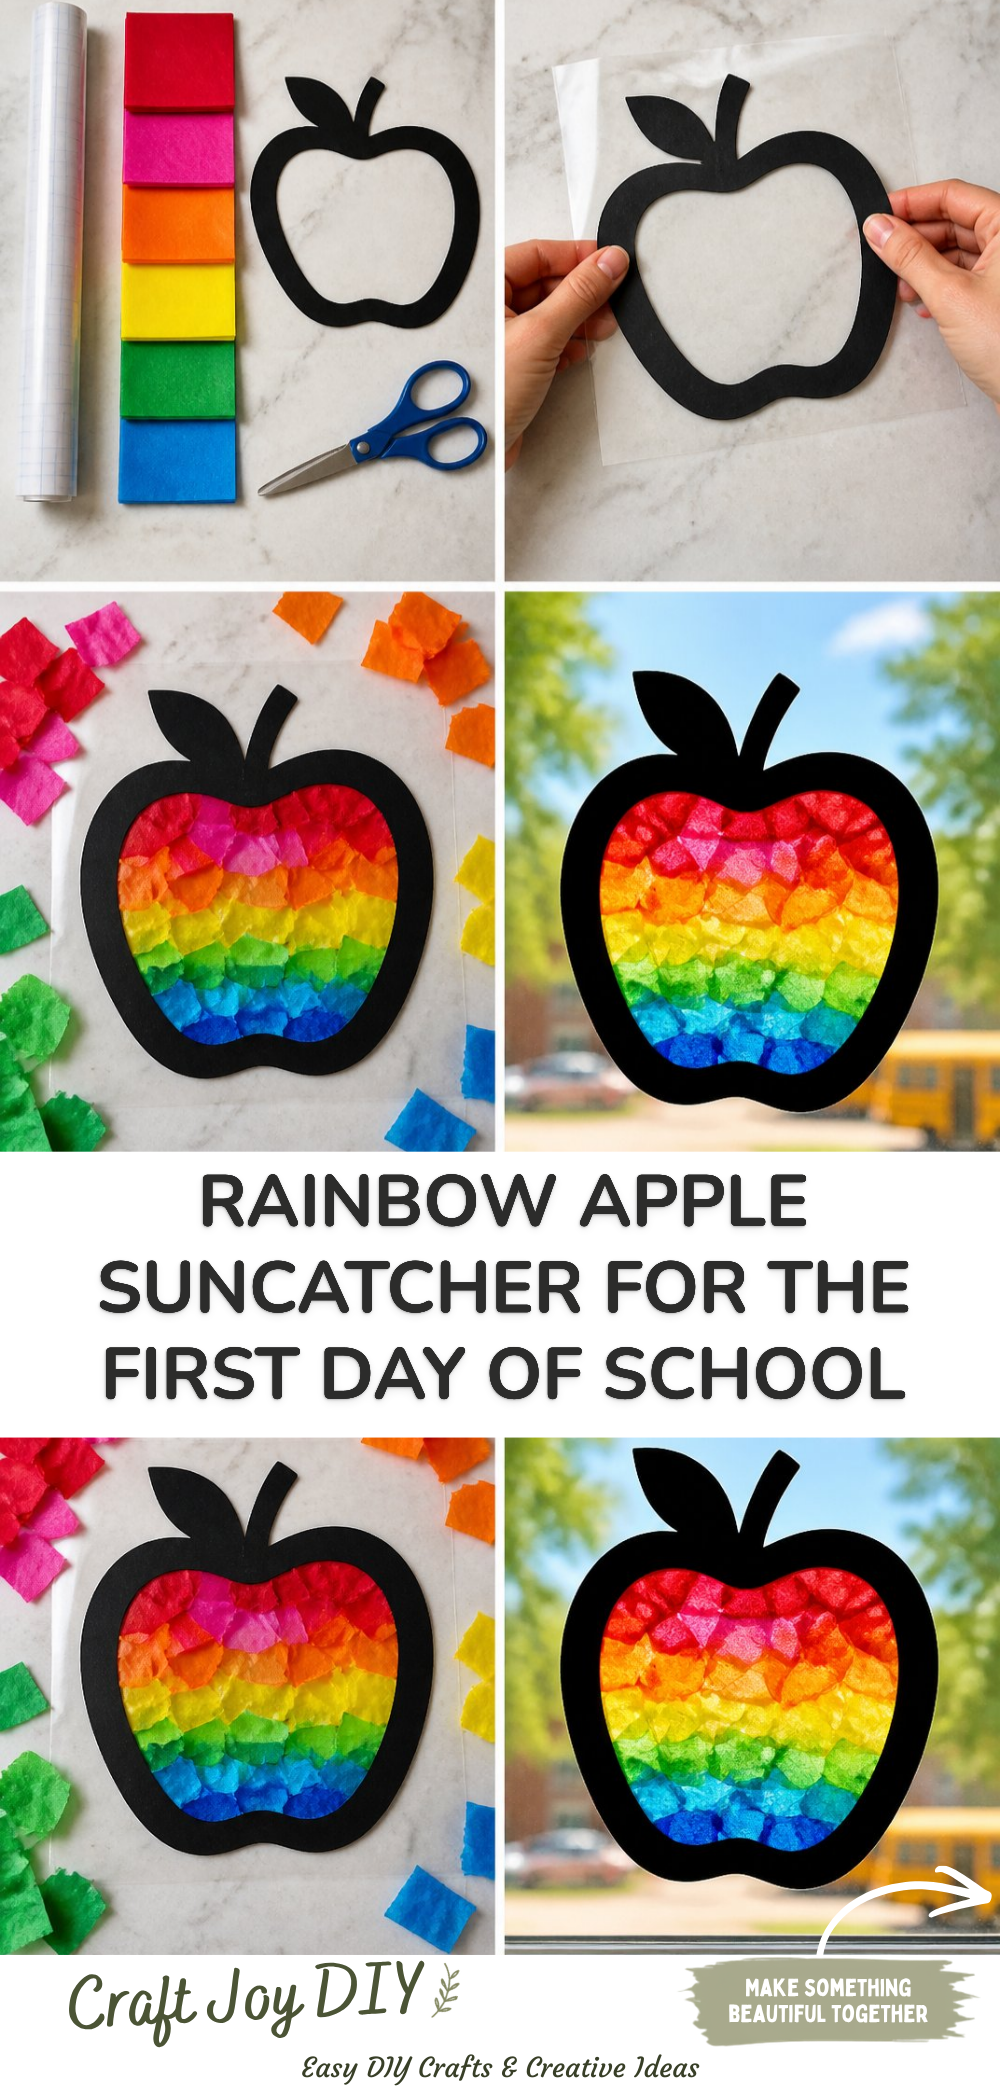
Creating a Rainbow Apple Suncatcher is a delightful way to celebrate the start of the school year. This colorful craft not only brightens up your space but also serves as a fun project to engage kids as they return to classes. The combination of vibrant colors and the apple shape makes it a perfect representation of new beginnings and learning. With this Rainbow Apple Suncatcher, you’ll make a cheerful decoration that brings joy and warmth to your home or classroom. You may also find Melted Crayon Rainbow Butterfly Suncatcher For Kids useful.
You’ll find that making this suncatcher is simple, making it an enjoyable experience for the whole family. Gather your materials, roll up your sleeves, and let’s get started on this exciting craft! You may also find Melted Crayon Rainbow Heart Suncatcher For Kids useful.
Why You’ll Enjoy This Project
- Brightens Up Your Space: The vivid colors of this suncatcher will brighten any window, adding a cheerful atmosphere perfect for the first day of school.
- Creative Expression: This craft encourages creativity, allowing kids to choose their own colors and designs.
- Quality Time: It’s an excellent opportunity for families to work together, building connections through a shared creative process.
- Easy Materials: You don’t need fancy supplies for this project; everyday materials will do just fine, making it accessible for everyone.
- Perfect for Gifts: This suncatcher can also make a thoughtful gift or a lovely decoration for classrooms, sharing the spirit of learning.
You may also find Rainbow Ghost Shaker Suncatcher Craft For Kids useful.
Materials You’ll Need
- Wax paper or transparency sheets
- Colored tissue paper (red, green, yellow, etc.)
- Scissors
- Mod Podge (or regular glue)
- Paintbrush
- String or fishing line (for hanging)
Using colored tissue paper adds a wonderful stained-glass effect, but you can also use cut-out colored paper if you prefer. You may also find Rainbow Melted Crayon Ghost Suncatcher For Kids useful.
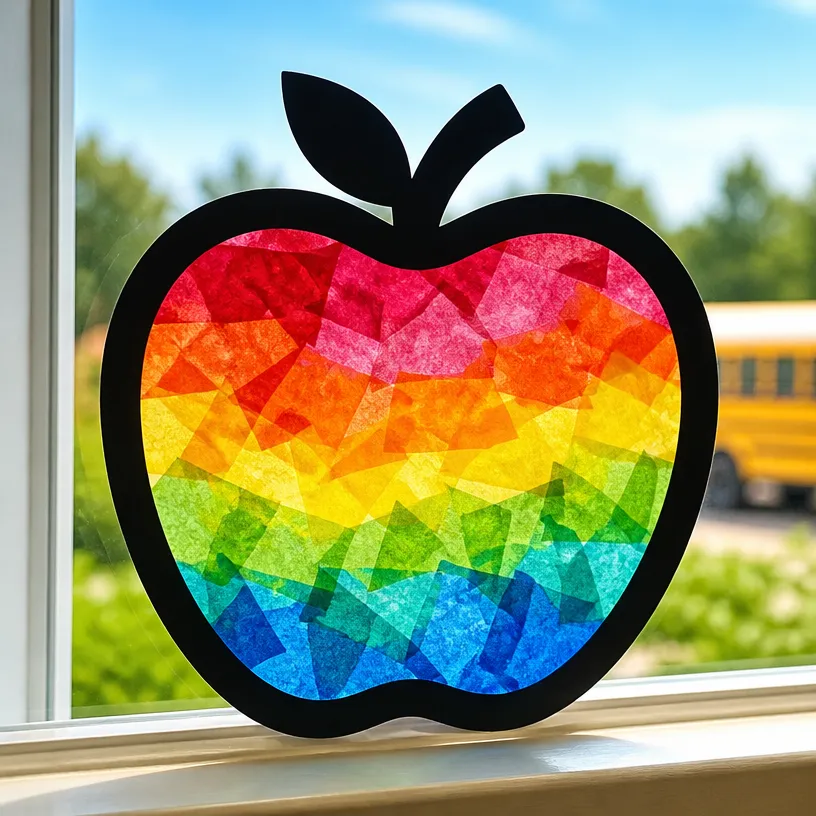
How to Make Rainbow Apple Suncatcher for the First Day of School
- Template Preparation: Draw or print an apple shape template on a piece of paper. This will guide you in cutting the tissue paper.
- Cut the Wax Paper: Cut two pieces of wax paper about the same size as your apple template.
- Tissue Paper Preparation: Cut your colored tissue paper into small pieces or squares. Use colors you love; we recommend red, green, yellow, and orange for that vibrant rainbow effect.
- Glue the Tissue Paper: Lay one piece of wax paper flat and start gluing the tissue paper pieces onto it, filling in the apple shape.
- Seal With Another Wax Paper: Once you have your design, place the second piece of wax paper on top to seal the tissue paper in between.
- Trim the Edges: Cut around the apple shape to remove any excess wax paper and give it a neat finish.
- Add the Hanging Line: Use a paintbrush to apply a light coat of Mod Podge around the edges to secure it further and attach the string or fishing line for hanging.
- Let It Dry: Allow the suncatcher to dry completely. This might take a few hours depending on the glue’s drying time.
Helpful Tips
- Layering Colors: Encourage kids to layer different colors of tissue paper to create depth and variations in the final look.
- Clean Up: Use a paintbrush to apply glue neatly to reduce mess and improve the overall appearance.
- Hanging Placement: Once dry, hang the suncatcher in a spot where it can catch the sunlight, enhancing its colorful effect.
Easy Variations
- Seasonal Colors: Change tissue paper colors according to the seasons red and orange for autumn or pastel colors for spring.
- Different Shapes: Instead of an apple, try making other shapes like a rainbow or a school bus. You can find inspiration from various crafts, such as this DIY rainbow school bus frame.
- Layered Suncatchers: Create two or three layers of designs to make a more complex suncatcher.
- Collage Style: Allow kids to add their own drawings or patterns on the tissue paper before sealing.
- Mini Versions: Make smaller suncatchers to decorate desk spaces or give out as gifts.
Making This Craft With Kids
This craft is perfect for school-age children, but younger kids may need more supervision, particularly with scissors and glue. Adults should assist with cutting the shapes and handling the glue to make the process smoother and ensure safety.
How to Display or Use It
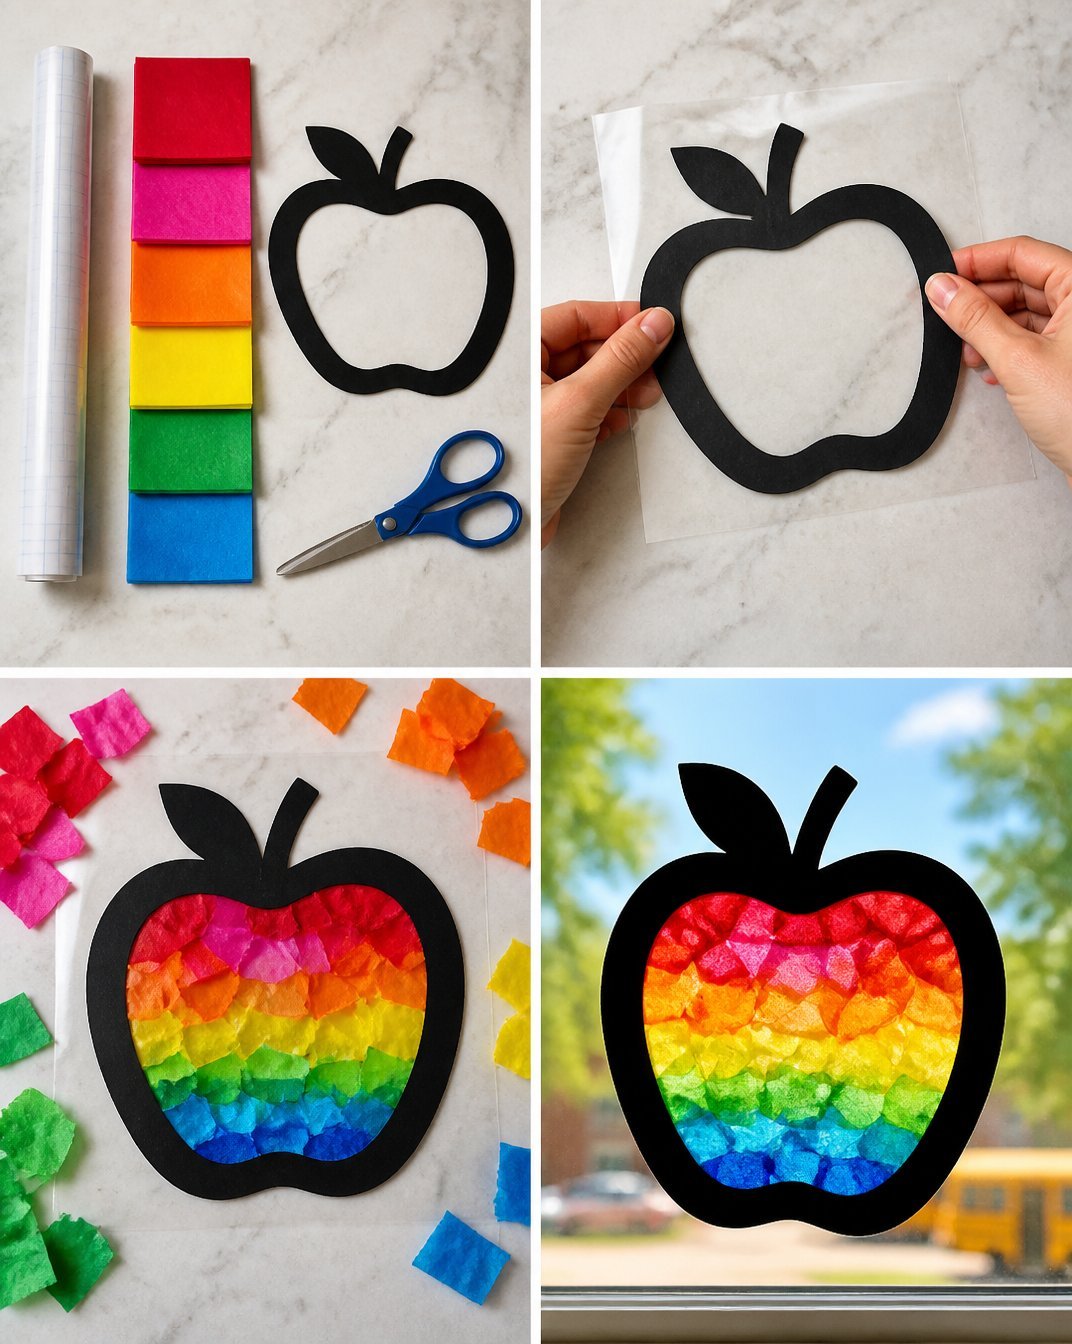
Once your Rainbow Apple Suncatcher is ready and dry, hang it in a window where sunlight can shine through. It can grace your classroom or home, adding a fun touch that signals the excitement of a new school year. Consider giving one to a teacher or making more to decorate a whole classroom with joy!
Frequently Asked Questions
1. How long does it take to dry?
Drying time may vary depending on the type of glue used, but generally, it takes around 2-4 hours for Mod Podge.
2. Can I use regular paper?
Regular paper can work, but tissue paper provides a better translucent effect for the suncatcher.
3. How do I store it?
Store your suncatcher flat and in a cool, dry place to avoid any damage from bending.
4. What if I don’t have wax paper?
If you don’t have wax paper, transparency sheets can be a great alternative.
5. Can we use this craft for other seasons?
Absolutely! Switch out the colors and shapes to match different holidays and seasons.
Conclusion
Crafting a Rainbow Apple Suncatcher is not only a fantastic way for kids to express their creativity but also a joyful way to celebrate the new school year. For related craft supplies, you might explore the selection of school crowns to engage young learners further. If you’re looking to add more colorful window items to your collection, consider checking out the suncatcher kits available online. Happy crafting!
Print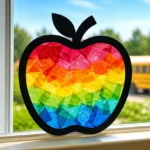
Rainbow Apple Suncatcher for the First Day of School
- Total Time: 180 minutes
- Makes: 1 suncatcher
Description
Create a colorful Rainbow Apple Suncatcher to celebrate the start of the school year, bringing joy and creativity into your home or classroom.
Materials
- Wax paper or transparency sheets
- Colored tissue paper (red, green, yellow, etc.)
- Scissors
- Mod Podge (or regular glue)
- Paintbrush
- String or fishing line (for hanging)
Instructions
- Draw or print an apple shape template on a piece of paper.
- Cut two pieces of wax paper about the same size as your apple template.
- Cut your colored tissue paper into small pieces or squares.
- Lay one piece of wax paper flat and start gluing the tissue paper pieces onto it.
- Place the second piece of wax paper on top to seal the tissue paper in between.
- Trim around the apple shape to remove any excess wax paper.
- Apply a light coat of Mod Podge around the edges and attach the string or fishing line for hanging.
- Allow the suncatcher to dry completely, which may take a few hours.
Notes
Encourage kids to layer different colors of tissue paper for a beautiful effect. Use a paintbrush to apply glue neatly to reduce mess.