

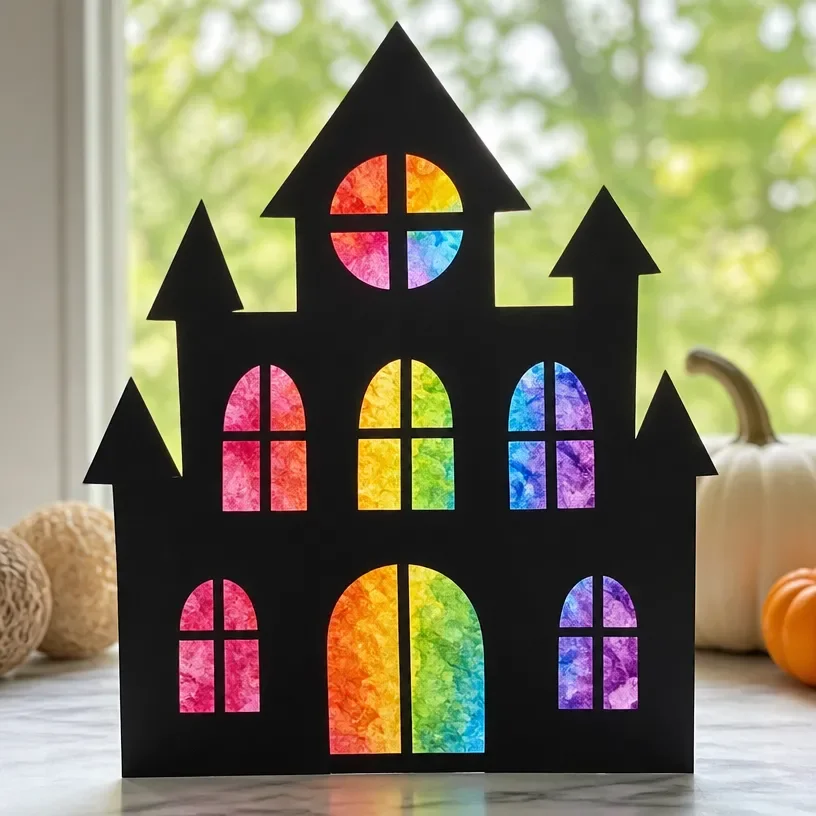
Rainbow Crayon Haunted-House Window Art for Kids
Creating colorful window art is a fun way to express creativity while adding festive flair to your home. In this project, we’ll show you how to make Rainbow Crayon Haunted-House Window Art. This craft not only encourages artistic expression but also embraces the playful spirit of Halloween. It’s an engaging activity for kids, allowing them to experiment with colors and shapes while creating a beautiful decoration for your windows. You may also find Melted Crayon Rainbow Heart Suncatcher For Kids useful.
This project is enjoyable because it combines simple materials with imaginative designs, allowing children to create something unique. Once finished, the beautiful rainbow colors can liven up your home and become a source of pride as kids admire their handiwork. You may also find Melted Crayon Rainbow Butterfly Suncatcher For Kids useful.
You may also find Rainbow Milk Art Colorful Swirl Prints For Kids useful.
Why You’ll Enjoy This Project
- Creative Expression: Kids can unleash their creativity by choosing their favorite colors and styles for the haunted house.
- Sensory Experience: Working with crayons, paper, and a heat source provides a tactile and visual experience that can be both calming and exciting.
- Seasonal Decor: This artwork serves as a festive decoration that changes with the seasons, making it a fun addition to anyone’s Halloween decorations.
Materials You’ll Need
- Assorted crayon shavings (preferably in vibrant colors)
- Wax paper
- An iron (with supervision for younger children)
- Scissors
- A template of a haunted house
- Clear tape or a glue stick
Using vibrant crayons will make your artwork really pop! You can even substitute crayon shavings for similar colored bits from old crayons. You may also find Flower Petal Window Suncatcher Craft For Kids useful.
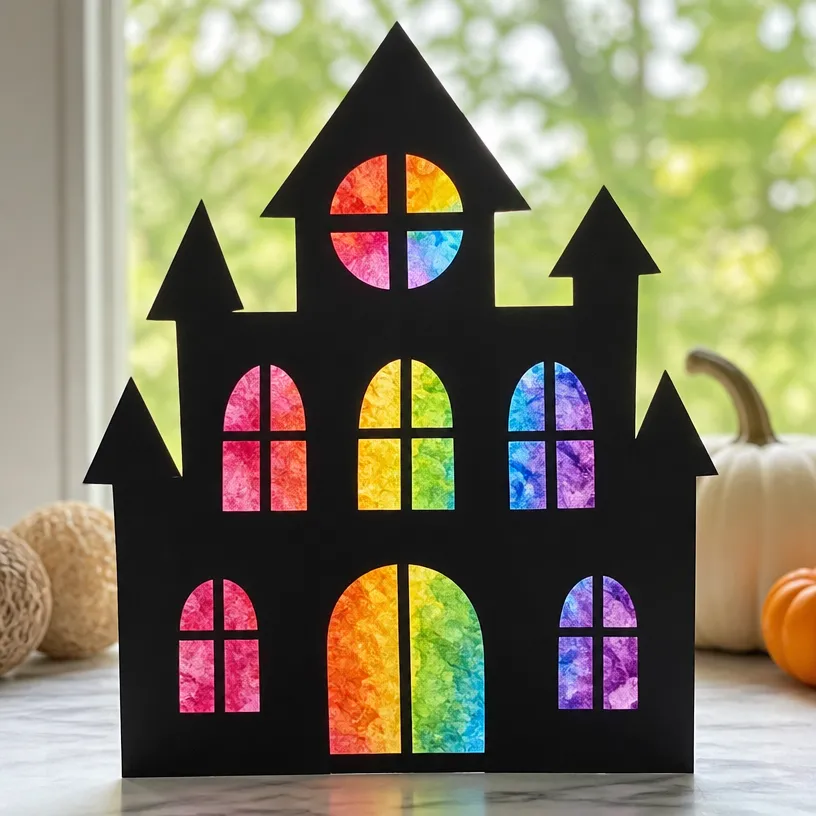
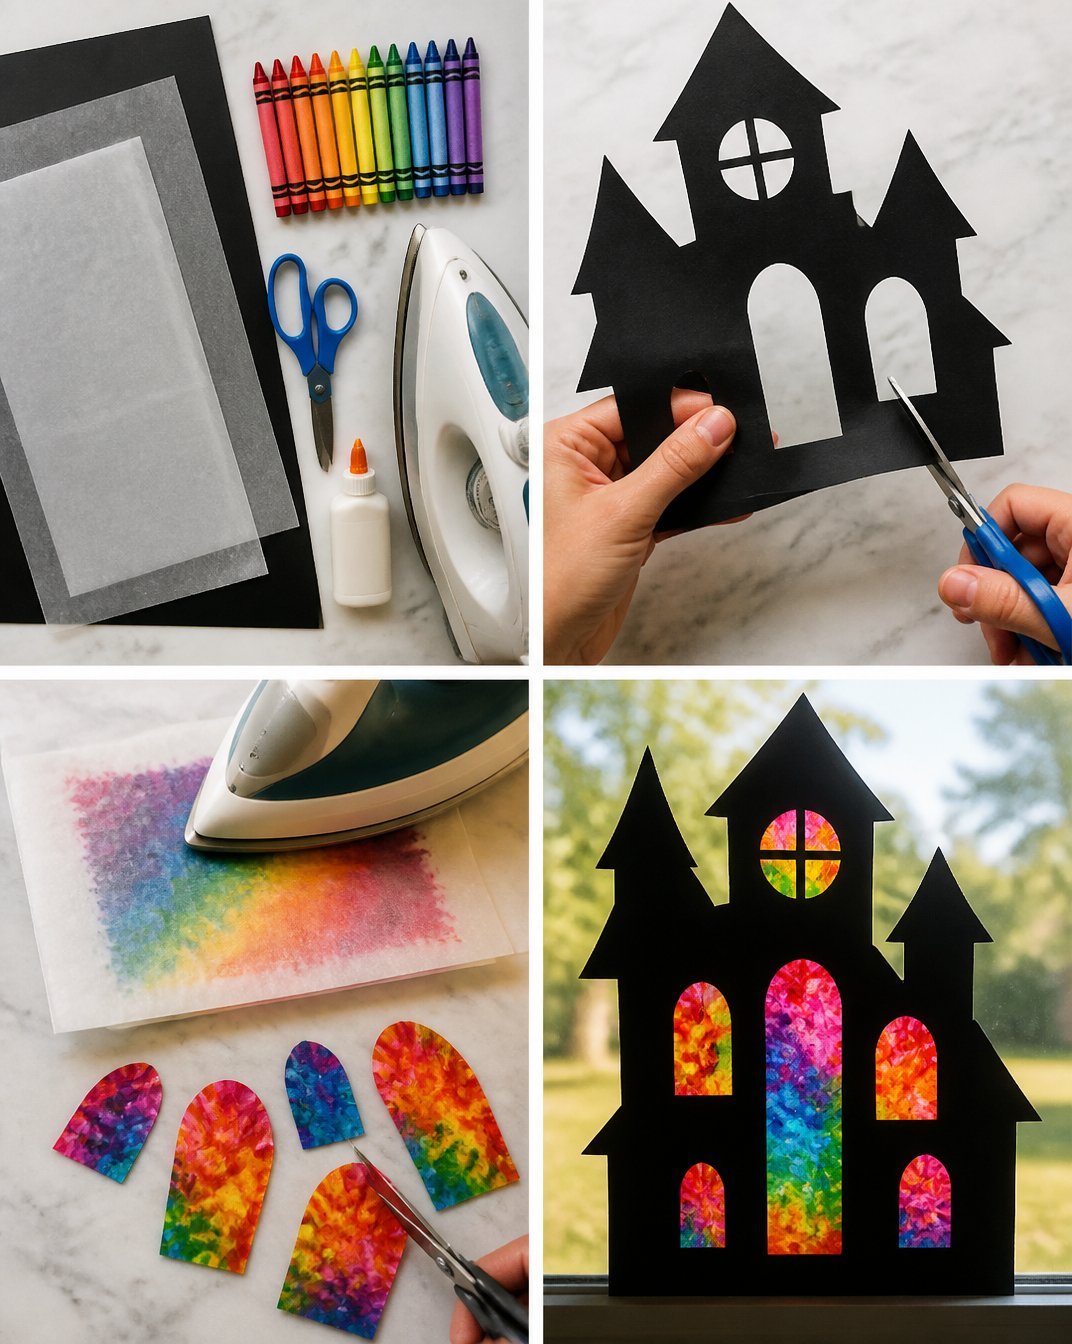
How to Make Rainbow Crayon Haunted-House Window Art for Kids
Prepare the Template: Start by printing out or drawing a haunted house outline on a piece of paper. This will be your guide for how big to make your art. You may also find Melted Crayon Fall Leaf Garland Craft For Kids useful.
Create Crayon Shavings: Use a sharpener to create crayon shavings in various colors. You can even use a few colors to create a unique mix!
Layer the Wax Paper: Cut two pieces of wax paper slightly larger than your haunted house template. Place one piece on your work surface.
Add the Crayon Shavings: Spread a thin layer of crayon shavings across the center of the wax paper. Avoid overloading it to prevent a mess during the melting process.
Cover with the Second Layer: Place the second piece of wax paper on top of the shavings, ensuring it covers them completely.
Melt the Crayons: With adult supervision, gently press an iron on a low setting over the top layer of wax paper. The heat will melt the crayon shavings, creating a beautiful blend of colors between the wax paper layers.
Trim the Design: Once cooled, carefully trim around the haunted house outline, ensuring that it fits well in your window.
Display Your Art: Use clear tape or a glue stick to adhere your colorful facade to the window. The sunlight will shine through, creating a magical display!
Helpful Tips
- Supervise the Ironing: Always have an adult handle the ironing step to ensure safety, as the iron gets very hot.
- Temperature Control: Keep the iron on a low setting to prevent the wax paper from burning.
- Experiment with Placement: Try sticking the decorated window art in different spots to see where it shines best!
Easy Variations
- Different Shapes: Instead of a haunted house, try making pumpkins, ghosts, or bats using similar designs.
- Color Themes: You can stick to a single color theme for a monochromatic effect or use pastels for a softer look.
- Layered Effects: Create multiple layers of melted crayon art and stack them for a 3D effect.
Making This Craft With Kids
This project is a fantastic way for children to explore their artistic skills, but adults should supervise during the ironing process. Make sure to explain the importance of safety when using heat!
How to Display or Use It
The finished artwork makes a vibrant addition to any window, reflecting light beautifully. You can also create a collection of these artworks and rotate them for different seasons or holidays.
Frequently Asked Questions
Can I use broken crayons for this project?
Yes! Broken crayons are perfect for this craft, and they can be repurposed into beautiful art.
How long does it take for the crayon art to cool?
Allow the melted crayon art to cool for about 15 minutes or until it is solid.
Will the crayon melting smell?
There may be a slight waxy smell while melting, but it should dissipate quickly.
How do I clean up if I spill crayon shavings?
Use a damp cloth to easily collect crayon shavings without scratching your work surface.
Conclusion
Creating Rainbow Crayon Haunted-House Window Art provides a delightful and colorful way to celebrate the Halloween season. If you’re looking for more spooky art inspiration, check out Symmetrical Smoosh Haunted House Art – Friends Art Lab and learn about engaging mixed media projects like Mixed Media Haunted Houses – The Pinterested Parent. Enjoy crafting!
Print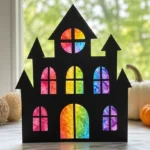
Rainbow Crayon Haunted-House Window Art for Kids
- Total Time: 25 minutes
- Makes: 1 decoration
Description
Create vibrant Halloween decorations with this fun and engaging crayon melting project for kids.
Materials
- Assorted crayon shavings (preferably in vibrant colors)
- Wax paper
- An iron (with supervision for younger children)
- Scissors
- A template of a haunted house
- Clear tape or a glue stick
Instructions
- Prepare the Template: Start by printing out or drawing a haunted house outline on a piece of paper.
- Create Crayon Shavings: Use a sharpener to create crayon shavings in various colors.
- Layer the Wax Paper: Cut two pieces of wax paper slightly larger than your haunted house template.
- Add the Crayon Shavings: Spread a thin layer of crayon shavings across the center of the wax paper.
- Cover with the Second Layer: Place the second piece of wax paper on top of the shavings.
- Melt the Crayons: With adult supervision, gently press an iron on a low setting over the top layer of wax paper.
- Trim the Design: Once cooled, carefully trim around the haunted house outline.
- Display Your Art: Use clear tape or a glue stick to adhere your colorful facade to the window.
Notes
Always supervise children during the ironing step to ensure safety.