


Rainbow Spiderweb Paper Plate Suncatcher DIY
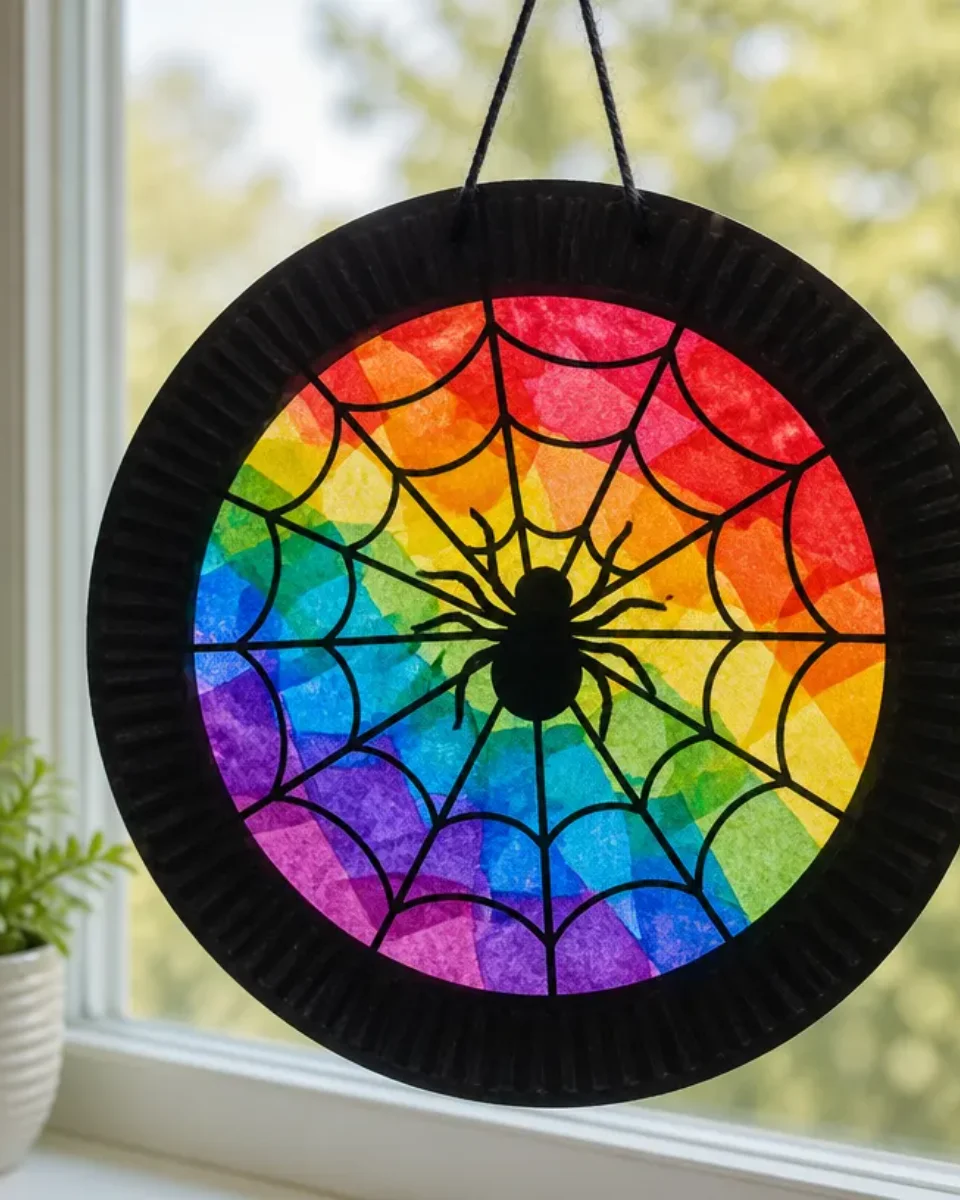
Creating a Rainbow Spiderweb Paper Plate Suncatcher is a fun and engaging craft suitable for both kids and adults. This project combines creativity with an easy-to-follow process that results in a beautiful decoration to brighten up any window. The vibrant colors of the rainbow will catch and reflect light, bringing joy and cheerfulness to your home. You may also find Diy Rainbow Sun Craft Kids Paper Plates useful.
In this guide, you’ll learn not only how to make this delightful suncatcher, but also enjoy the experience of crafting something special with your loved ones. You can definitely include your little crafters in this project it’s a fantastic way to explore colors and patterns while making a unique piece of art. Let’s dive into this wonderful crafting experience! You may also find Diy Butterfly Craft Kids Paper Wing Suncatcher useful.
You may also find Paper Plate Organizer Rainbow Unicorn Craft Art useful.
Why You’ll Enjoy This Project
- Simple and Fun: This project utilizes materials you likely already have at home, making it accessible and enjoyable for everyone.
- Creative Expression: Encourages creativity as you can choose various colors and designs for the web.
- Visual Appeal: Once completed, the suncatcher is visually stunning and adds a personal touch to your home decor.
- Learning Opportunity: Kids can learn about shapes, colors, and even a bit about light and shadow through this craft.
Materials You’ll Need
- Paper Plates
- Black Construction Paper
- Scissors
- Colored Tissue Paper (red, orange, yellow, green, blue, violet)
- Glue
- Clear Plastic Wrap (or contact paper)
- Tape (optional)

How to Make Rainbow Spiderweb Paper Plate Suncatcher DIY
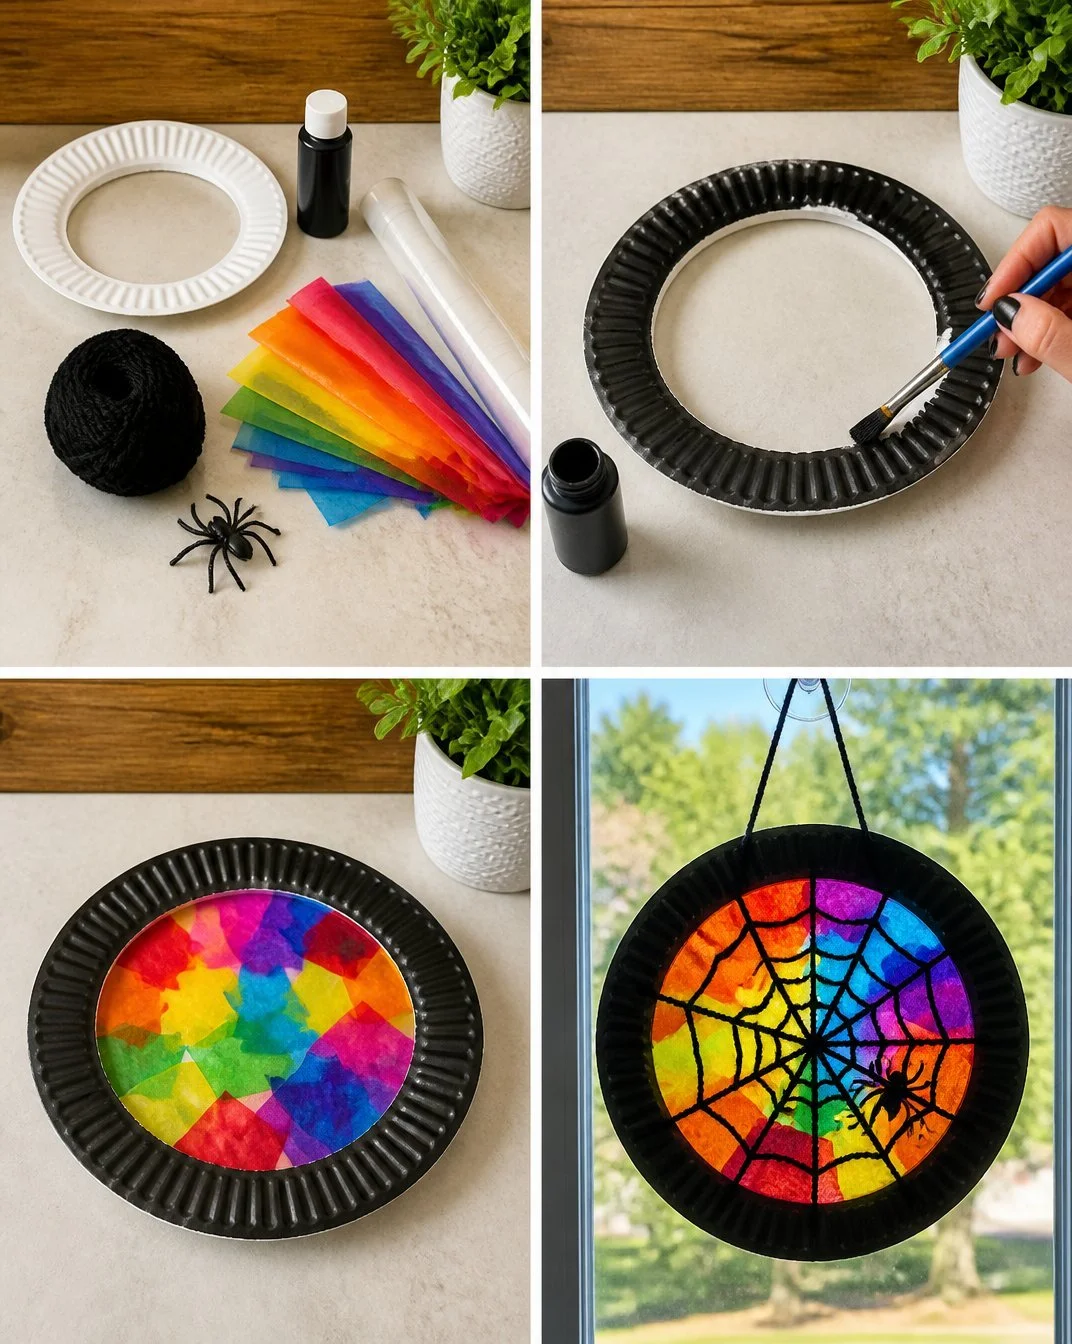
Prepare the Paper Plate: Start by taking a paper plate and cutting out the center, leaving a circular frame. This will be the base of your suncatcher. You may also find Rainbow Melted Crayon Maple Leaf Suncatcher Diy useful.
Create the Spiderweb: Cut strips from the black construction paper to create a web design. You can use straight lines or curves be creative! You may also find Rainbow Tissue Paper Flower Lantern Diy For Kids useful.
Adhere the Web: Use glue or tape to attach your spiderweb design to the back of the paper plate frame. Make sure it’s secure so it holds up well.
Cut Tissue Paper Squares: Cut the colored tissue paper into small squares. This is where the rainbow colors come into play!
Stick the Tissue Paper: Glue the tissue paper squares onto the center of your suncatcher, covering the black web. Feel free to choose any pattern you like, and remember that each color will shine through beautifully.
Seal It Up: Once the tissue paper is in place, cut a piece of clear plastic wrap or contact paper and lay it over the colored tissue. This will keep it safe and help it last longer.
Finishing Touches: If you want, you can add a string or ribbon at the top for hanging. Just punch a small hole and loop the string through.
Helpful Tips
- Use Safety Scissors: If crafting with younger children, consider using safety scissors to avoid any accidents.
- Make it Neater: For cleaner results, apply glue sparingly to avoid excess goo.
- Display Brightly: Hang your suncatcher in a spot that gets direct sunlight to see the colors radiate beautifully.
Easy Variations
- Seasonal Colors: Change the colors of the tissue paper for different seasons think pastels for spring or warm tones for autumn.
- Different Shapes: Instead of a circle, try making other shapes for the frame. Stars or hearts can be lovely alterations.
- Add Glitter: For sparkle, sprinkle some glitter over the tissue paper before sealing it.
Making This Craft With Kids
Crafting this suncatcher with kids is not only possible but highly recommended! Make sure to supervise during cutting and gluing, especially with younger children. Let them choose their favorite colors, and enjoy watching their excitement as they create.
How to Display or Use It
Once your suncatcher is complete, find the perfect window to hang it. It looks lovely in kitchens, playrooms, or even front entryways. You can even gift it to someone special or use it as a unique decoration for a party.
Frequently Asked Questions
Can I use regular paper instead of construction paper?
Yes, but construction paper is thicker and holds up better for the web.
What if I don’t have clear plastic wrap?
Contact paper can be a great substitute and is easier for kids to handle.
How do I clean the suncatcher after it’s displayed for a while?
Use a soft, damp cloth to gently wipe it down to keep it looking fresh.
Is this project suitable for very young children?
It can be, but adult supervision is recommended for cutting and handling glue.
Conclusion
The Rainbow Spiderweb Paper Plate Suncatcher DIY is a wonderful project that not only sparks creativity but also brings warmth to your home with its vibrant colors. For more fun and imaginative ideas, check out these 25+ Rainbow Crafts for Kids: Perfect for St. Patrick’s Day. If you’re looking for other captivating craft projects, you might be interested in Suncatcher Stickers for varied seasons and celebrations. Happy crafting!
Print
Rainbow Spiderweb Paper Plate Suncatcher DIY
- Total Time: 15 minutes
- Makes: 1 suncatcher
Description
Create a vibrant Rainbow Spiderweb Suncatcher using simple materials to brighten up your home decor.
Materials
- Paper Plates
- Black Construction Paper
- Scissors
- Colored Tissue Paper (red, orange, yellow, green, blue, violet)
- Glue
- Clear Plastic Wrap (or contact paper)
- Tape (optional)
Instructions
- Prepare the paper plate by cutting out the center, leaving a circular frame.
- Create the spiderweb by cutting strips from the black construction paper.
- Adhere the spiderweb design to the back of the paper plate frame using glue or tape.
- Cut the colored tissue paper into small squares.
- Stick the tissue paper squares onto the center of the suncatcher.
- Seal it up by laying clear plastic wrap or contact paper over the colored tissue.
- Finishing touches include adding a string or ribbon at the top for hanging.
Notes
Use safety scissors for children and make sure to supervise during cutting and gluing.