

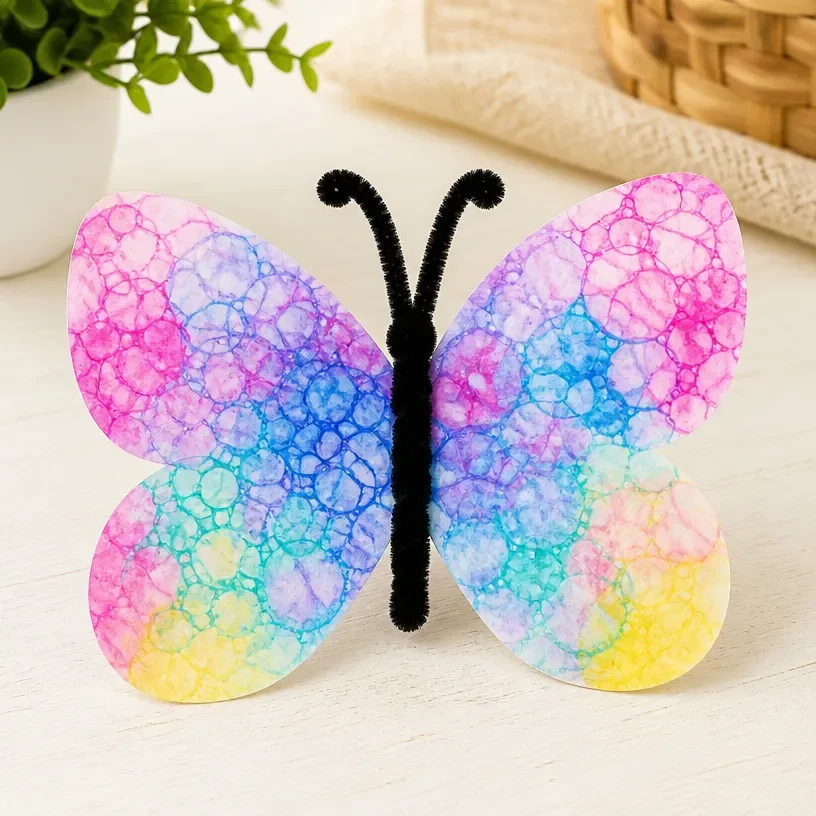
DIY Bubble-Printed Butterfly Wings Craft for Kids
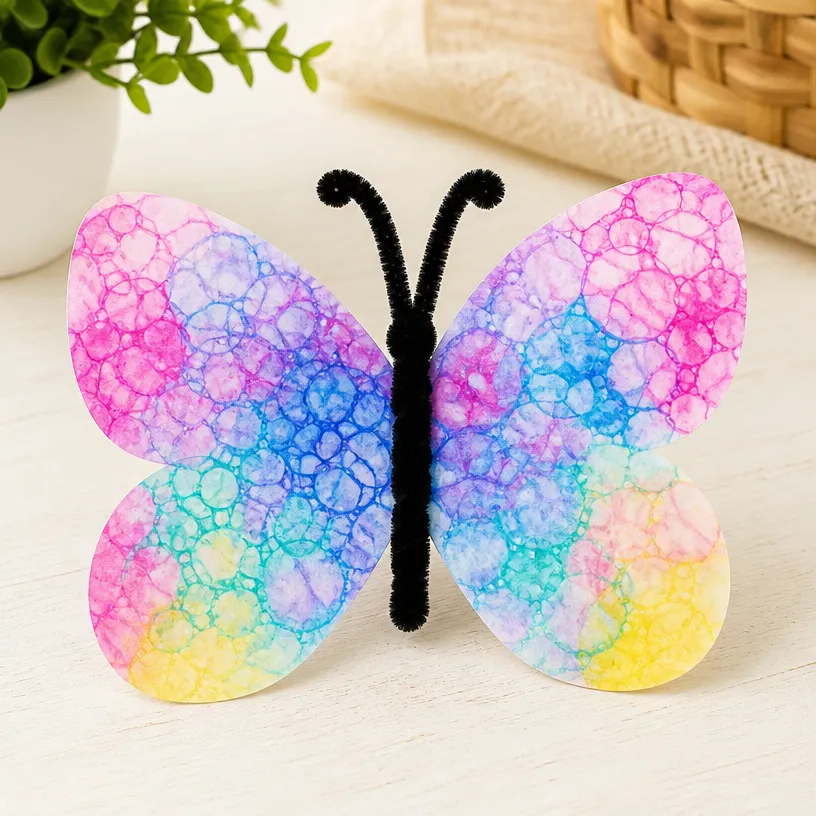
This engaging craft project allows children to create beautiful butterfly wings using the fun technique of bubble printing. It’s a fantastic way for kids to express their creativity while learning about colors and patterns. Not only are the wings visually appealing, but they also make for wonderful decorations or playful costumes. Let’s dive into the process of making these delightful DIY Bubble-Printed Butterfly Wings! You may also find Coffee Filter Butterfly Chromatography Craft For Kids useful.
You may also find Diy Butterfly Craft Kids Paper Wing Suncatcher useful.
Why You’ll Enjoy This Project
- Creative Expression: Kids can experiment with colors and patterns, making each pair of wings unique.
- Sensory Experience: The bubble printing technique is sure to be a hands-on favorite, engaging children as they blow bubbles and watch the colors mix.
- Simple Materials: Using readily available materials means less hassle for parents and more fun for kids.
- Learning Opportunity: This craft can be a great way to introduce children to basic science concepts, such as color mixing.
Materials You’ll Need
- Bubble solution (store-bought or homemade)
- Food coloring or washable paint
- Paper (thick paper or lighter cardstock works best)
- Straw (for blowing bubbles)
- Plastic tray or shallow dish
- Scissors (for wing shapes)
- Markers or crayons (for detailing)
How to Make DIY Bubble-Printed Butterfly Wings Craft for Kids
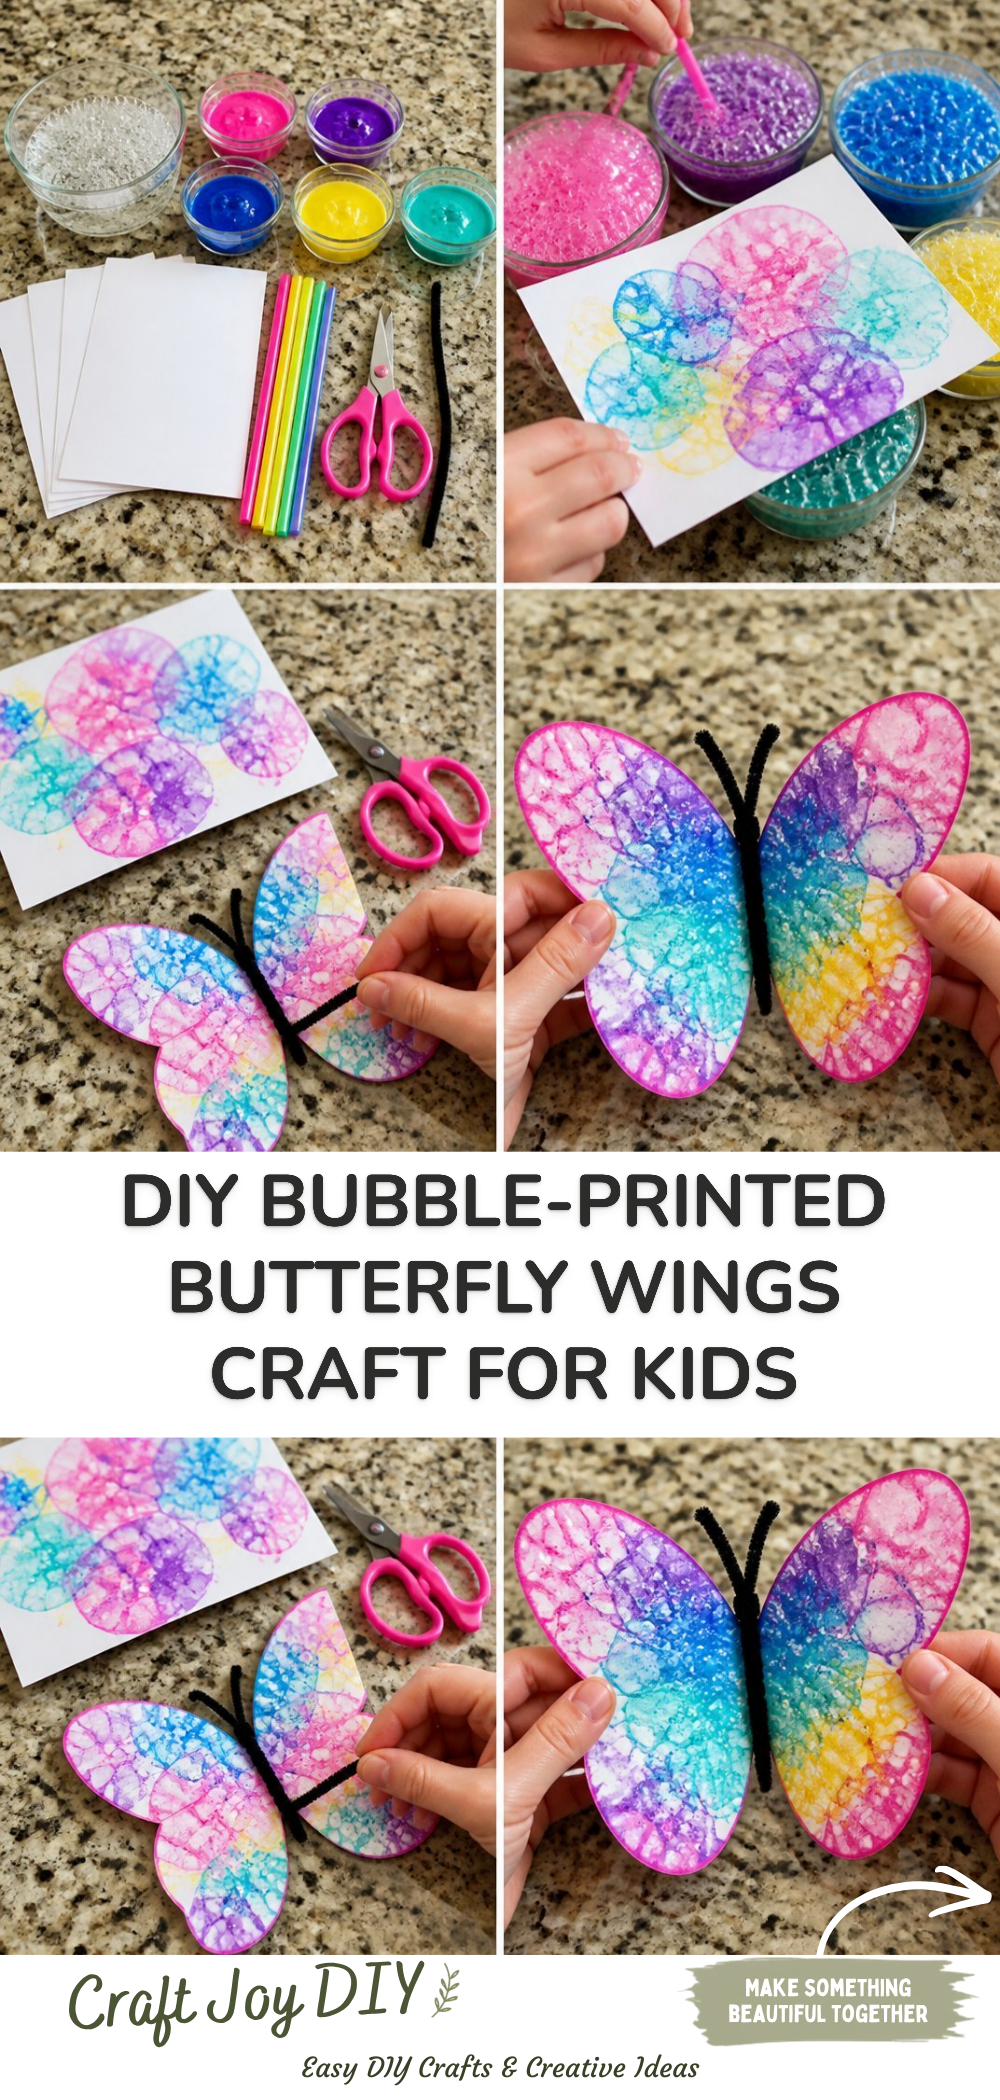
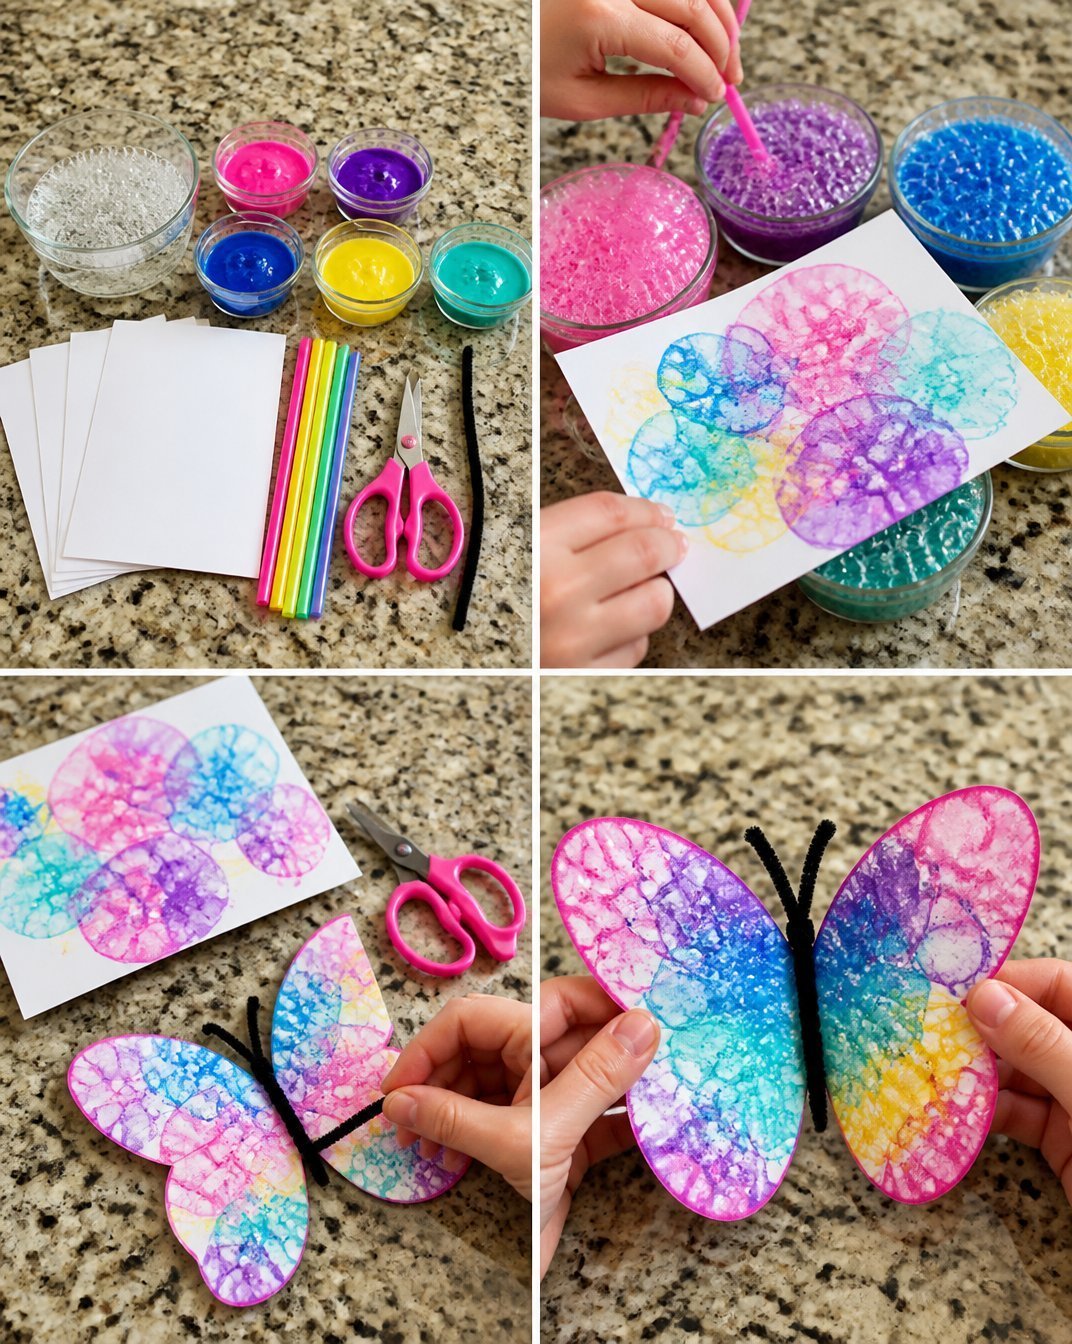
Prepare the Bubble Mixture: In a plastic tray, mix the bubble solution with food coloring or paint to create colorful bubbles. A good ratio is about 1 cup of bubble solution to a few drops of food coloring. You may also find Diy Rainbow School Bus Craft For Kids useful.
Blow Bubbles: Using the straw, blow bubbles into the mixture. Aim for bubbles to pile up high without overflowing. You may also find Diy Rainbow School Bus Photo Frame Craft For Kids useful.
Print the Wings: Press a piece of paper over the bubbles. The bubbles will pop and leave an imprint, creating a colorful design. You may also find Easy Pipe Cleaner Butterfly Craft For Kids useful.
Cut Out the Wings: Once the paper is dry, cut out wing shapes. You can make them large or small, depending on your preference.
Add Details: Use markers or crayons to embellish the wings, adding patterns or additional colors for a more personal touch.
Helpful Tips
- Choose a location with good ventilation, as the bubble solution can be a bit messy.
- If the bubbles aren’t popping enough on the paper, try using a little more paint or food coloring.
- Display the finished wings on a window for beautiful sunlight patterns or hang them as decorations at a butterfly-themed party.
Easy Variations
- Color Themes: Try using different color combinations based on seasons, like pastels for spring or bright colors for summer.
- Wing Size: Experiment with large wings for a dramatic look or smaller ones for dolls or puppets.
- Nature Mix: Incorporate leaves or flowers in the bubble print process to create more natural designs.
- Suncatcher: Use transparent paper to create wings that double as suncatchers.
Making This Craft With Kids
This butterfly wings project is absolutely suitable for children, but adult supervision is recommended, especially when blowing bubbles and using scissors. Encourage them to explore their creativity while guiding them through the cutting and detailing process.
How to Display or Use It
Once the butterfly wings are made, you can use them for a variety of occasions! Hang them in a garden, use them for a costume party, or create a butterfly-themed display in your home. You can also have the kids wear them while playing outdoors for a touch of whimsy during imaginative play.
Frequently Asked Questions
1. Can I use any type of paint for this project?
Yes, just ensure it’s washable and safe for kids.
2. How can I make the bubbles pop more easily?
Try using a wider straw or blowing gently to create larger bubbles.
3. What if my children want wings that are not butterfly-shaped?
Encourage creativity! They can shape their wings however they like!
4. How long should I wait for the bubble prints to dry?
Typically, an hour should allow them to dry, but thicker paint may need longer.
5. Is this craft messy?
Like all bubble-related activities, it’s slightly messy. Cover the work area with old newspapers or a tablecloth for easier cleanup.
Conclusion
Creating DIY Bubble-Printed Butterfly Wings is a fantastic crafting experience for kids. It combines creativity with fun techniques and allows for some splendid educational tools about colors and nature. For more inspiration, you might also enjoy exploring additional butterfly-themed projects like this bubble art butterfly craft from Red Ted Art or the bubble print butterfly craft featured on Happy Toddler Playtime. Happy crafting!
Print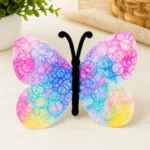
DIY Bubble-Printed Butterfly Wings Craft for Kids
- Total Time: 15 minutes
- Makes: 1 pair of butterfly wings
Description
An engaging craft project for kids to create beautiful butterfly wings using bubble printing techniques.
Materials
- Bubble solution (store-bought or homemade)
- Food coloring or washable paint
- Thick paper or lighter cardstock
- Straw (for blowing bubbles)
- Plastic tray or shallow dish
- Scissors (for wing shapes)
- Markers or crayons (for detailing)
Instructions
- Prepare the bubble mixture: In a plastic tray, mix the bubble solution with food coloring or paint.
- Blow bubbles using the straw to pile them up high.
- Print the wings by pressing a piece of paper over the bubbles.
- Cut out wing shapes from the dry paper.
- Add details with markers or crayons to embellish the wings.
Notes
Choose a well-ventilated location, and use washable paint for easy cleanup.