

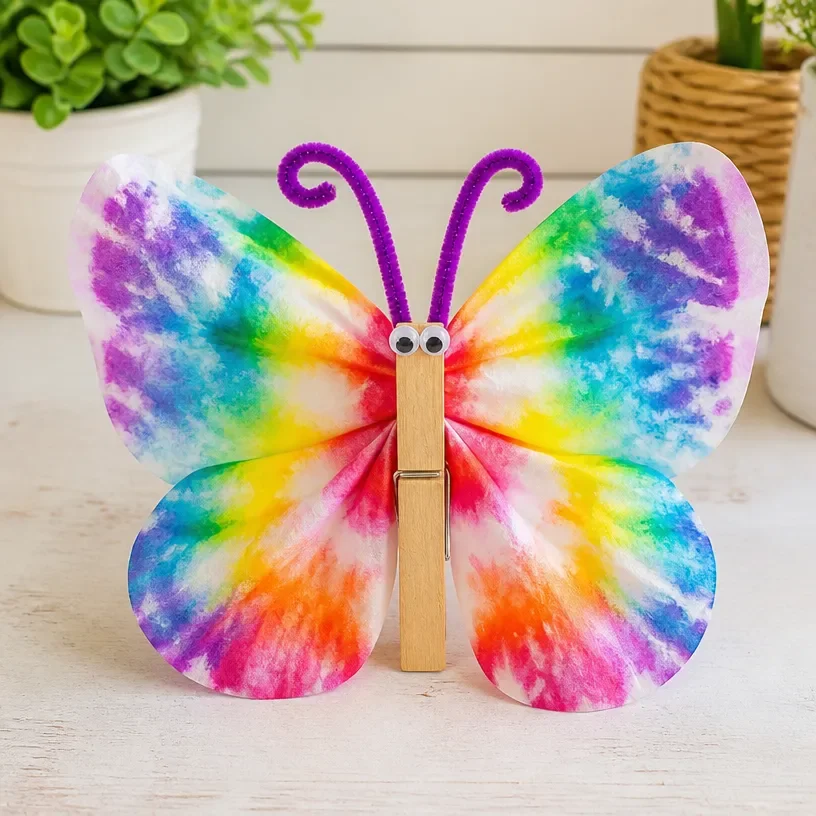
Coffee Filter Butterfly Chromatography Craft
Crafting is a delightful way to explore creativity, especially with kids. With this Coffee Filter Butterfly Chromatography Craft, you’ll create vibrant and eye-catching butterflies that can flutter their way into your home decor. This project is not only fun but also educational, introducing the basics of chromatography – a fascinating scientific technique that separates colors. Let’s dive in and make some colorful butterflies together! You may also find Rainbow Crystal Butterfly Suncatcher Craft useful.
Why You’ll Enjoy This Project
- Educational Fun: Engaging kids in a visually stimulating way while teaching them about colors and science.
- Simple Materials: All you need are everyday supplies that you likely already have at home.
- Creative Expression: Kids can experiment with colors and design, making each butterfly unique.
- Great for All Ages: Perfect for families, classrooms, or even solo crafting moments.
- Decorative Appeal: These beautiful butterflies can be used to decorate windows, bulletin boards, or even as gifts.
You may also find Rainbow Cupcake Liner Butterfly Garden Craft useful.
Materials You’ll Need
- Coffee filters
- Washable markers (various colors)
- A spray bottle filled with water
- Scissors
- Pipe cleaners (for antennae)
- A paper towel or cloth (for drying)
Using washable markers is essential as they blend well when wet, creating vibrant colors. If you don’t have coffee filters, you can also use paper napkins. You may also find Beaded Pipe Cleaner Snail Craft For Kids useful.
How to Make Coffee Filter Butterfly Chromatography Craft
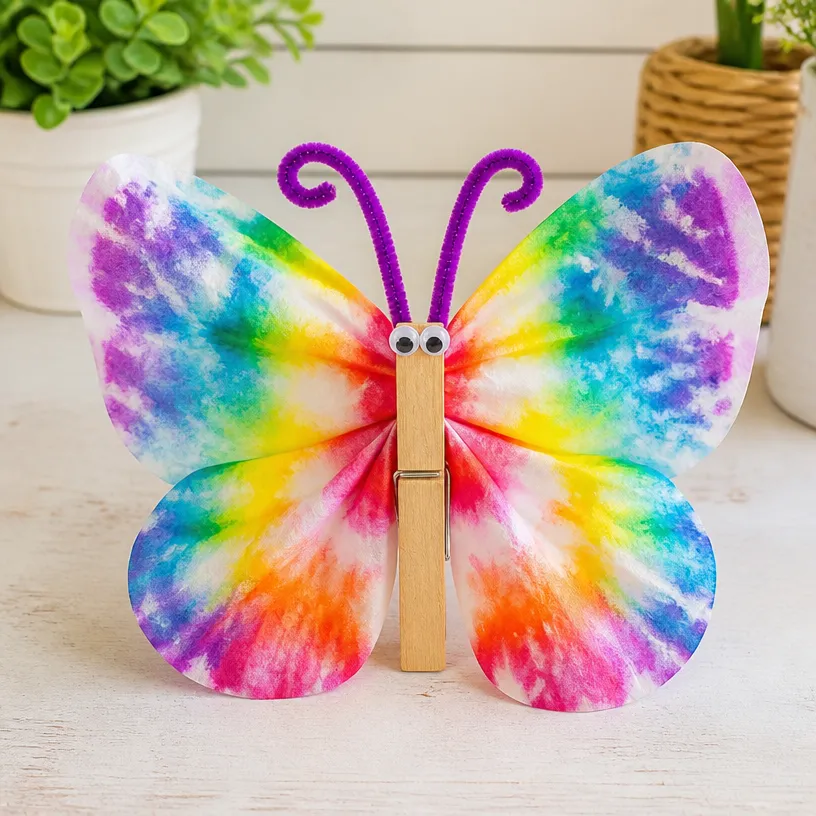
Color the Coffee Filter: Lay the coffee filter flat and use washable markers to create a design. You can make patterns or simply fill it with colors. The more vibrant the colors, the better the end result will be! You may also find Colorful Cupcake Liner Witch Flower Bouquet Craft useful.
Spray the Filter: Once you’ve colored the filter, lightly spritz it with water using the spray bottle. This will cause the colors to spread and blend, creating a beautiful design. You may also find Crystal Wedding Rose Craft Elegant Centerpieces useful.
Let It Dry: Carefully place the damp filter on a paper towel or cloth to dry completely. This may take a few minutes, so be patient.
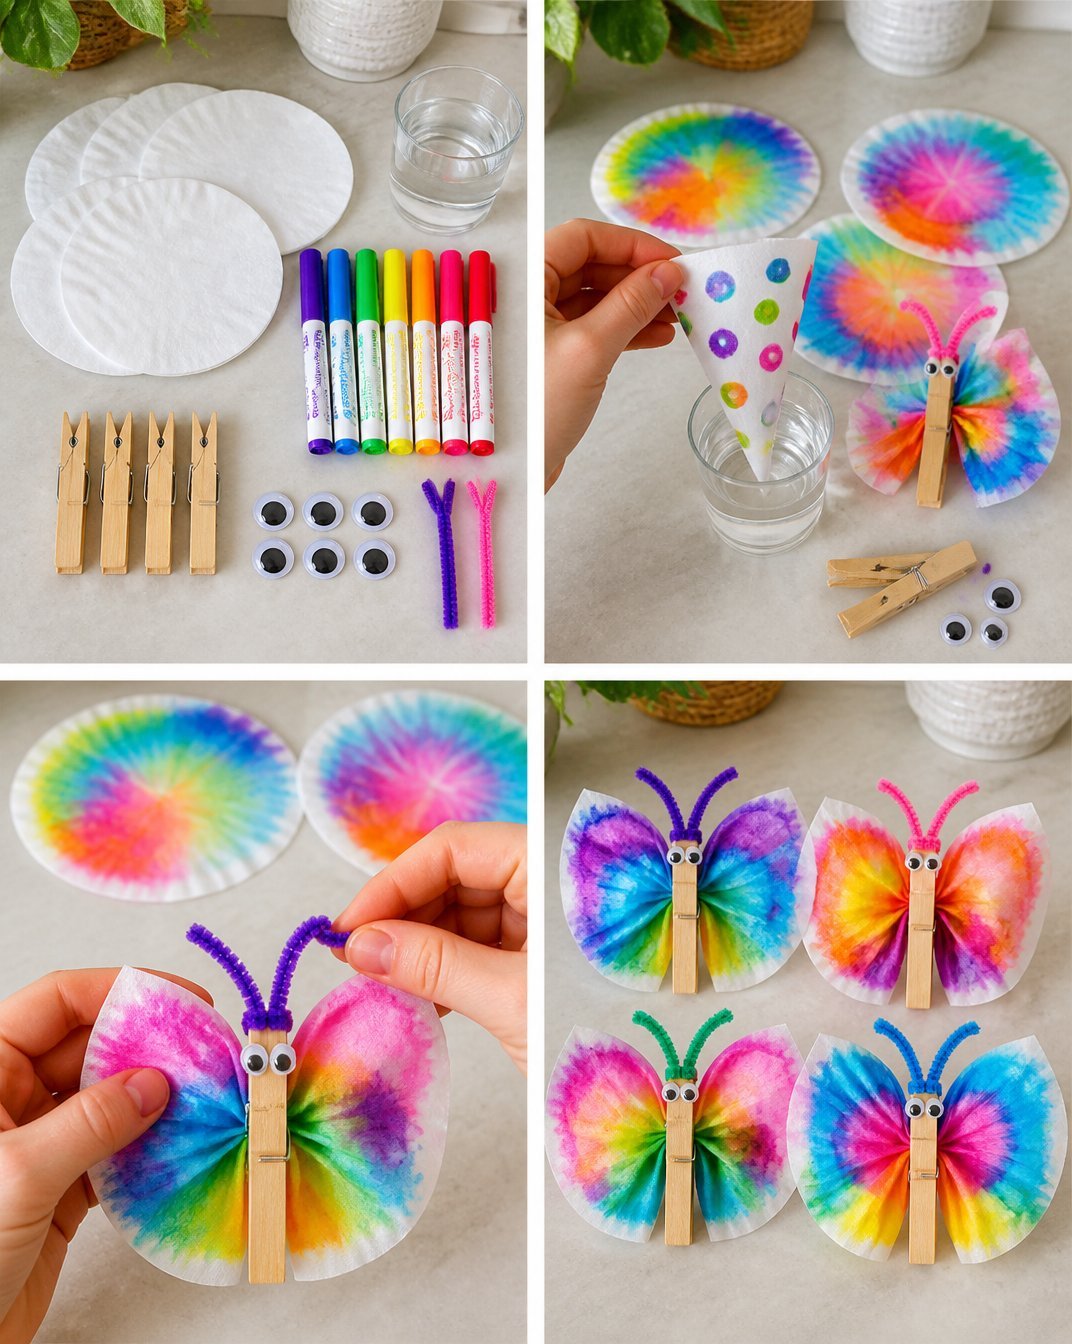
Shape the Butterfly: Once dry, fold the coffee filter in half. Then, gather the middle and pinch it together to create the butterfly shape.
Add Antennae: Take a pipe cleaner and wrap it around the center where you pinched the filter. Twist it to secure it and bend the ends to form antennae.
Display Your Creation: Your coffee filter butterfly is now ready! You can hang it in a window, attach it to a craft stick, or even use it in a fun display like a butterfly garden.
Helpful Tips
- To avoid excess water during the spraying process, hold the spray bottle a few inches away from the filter.
- If making this project with multiple children, consider setting up a color station to allow them to explore different color combinations.
- For cleaner results, have a paper towel handy to absorb any excess water or color that may bleed onto surfaces.
Easy Variations
- Change the Shape: Instead of a traditional butterfly, use the same technique to create other insects by adjusting the cutting and folding.
- Seasonal Themes: Use colors that correspond with the seasons, such as yellows and oranges for fall.
- Add Decorations: Glue on sequins or glitter to add sparkle to your butterflies.
- Larger Butterflies: Use larger filters for giant butterflies perfect for window displays.
- Themed Colors: Create butterflies that match special occasions like birthdays or holidays using themed colors.
Making This Craft With Kids
This project is great for kids of various ages, especially those in elementary school. While they can handle most parts of the craft independently, adults may want to supervise when using the spray bottle and scissors.
How to Display or Use It
These bright butterflies can serve as beautiful window hangings, brighten up a classroom, or even be used in handmade cards for loved ones. You can also create a butterfly garland by stringing several together.
Frequently Asked Questions
Can I use other types of paper?
Yes, you can use paper napkins or even thin construction paper, but coffee filters yield the best results.
How do I store the finished butterflies?
Store them flat in a box or display them in a way that keeps their shape intact.
Can I use permanent markers instead of washable ones?
It’s best to stick with washable markers for this project to ensure the colors blend properly.
What if I don’t have a spray bottle?
You can lightly sprinkle water over the design with your fingers or pour a small amount of water carefully.
How can I make this project more challenging?
Use more complex designs or introduce concepts like color mixing by having children use primary colors to create secondary ones.
Is this craft suitable for very young children?
Yes, though younger kids may need supervision to help with spraying and folding, they can enjoy the coloring and watching the colors blend.
Conclusion
Making Coffee Filter Butterfly Chromatography Crafts is a fantastic way to combine art and science in one delightful project. If you’re interested in exploring more fun arts and crafts with a similar scientific angle, check out this chromatography butterfly craft from Buggy and Buddy or delve into the informative methods offered in the Butterfly Chromatography Craft from the Carnegie Museum of Natural History. Happy crafting!
Print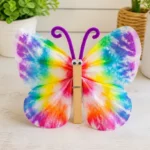
Coffee Filter Butterfly Chromatography Craft
- Total Time: 20 minutes
- Makes: Varies with the number of filters used
Description
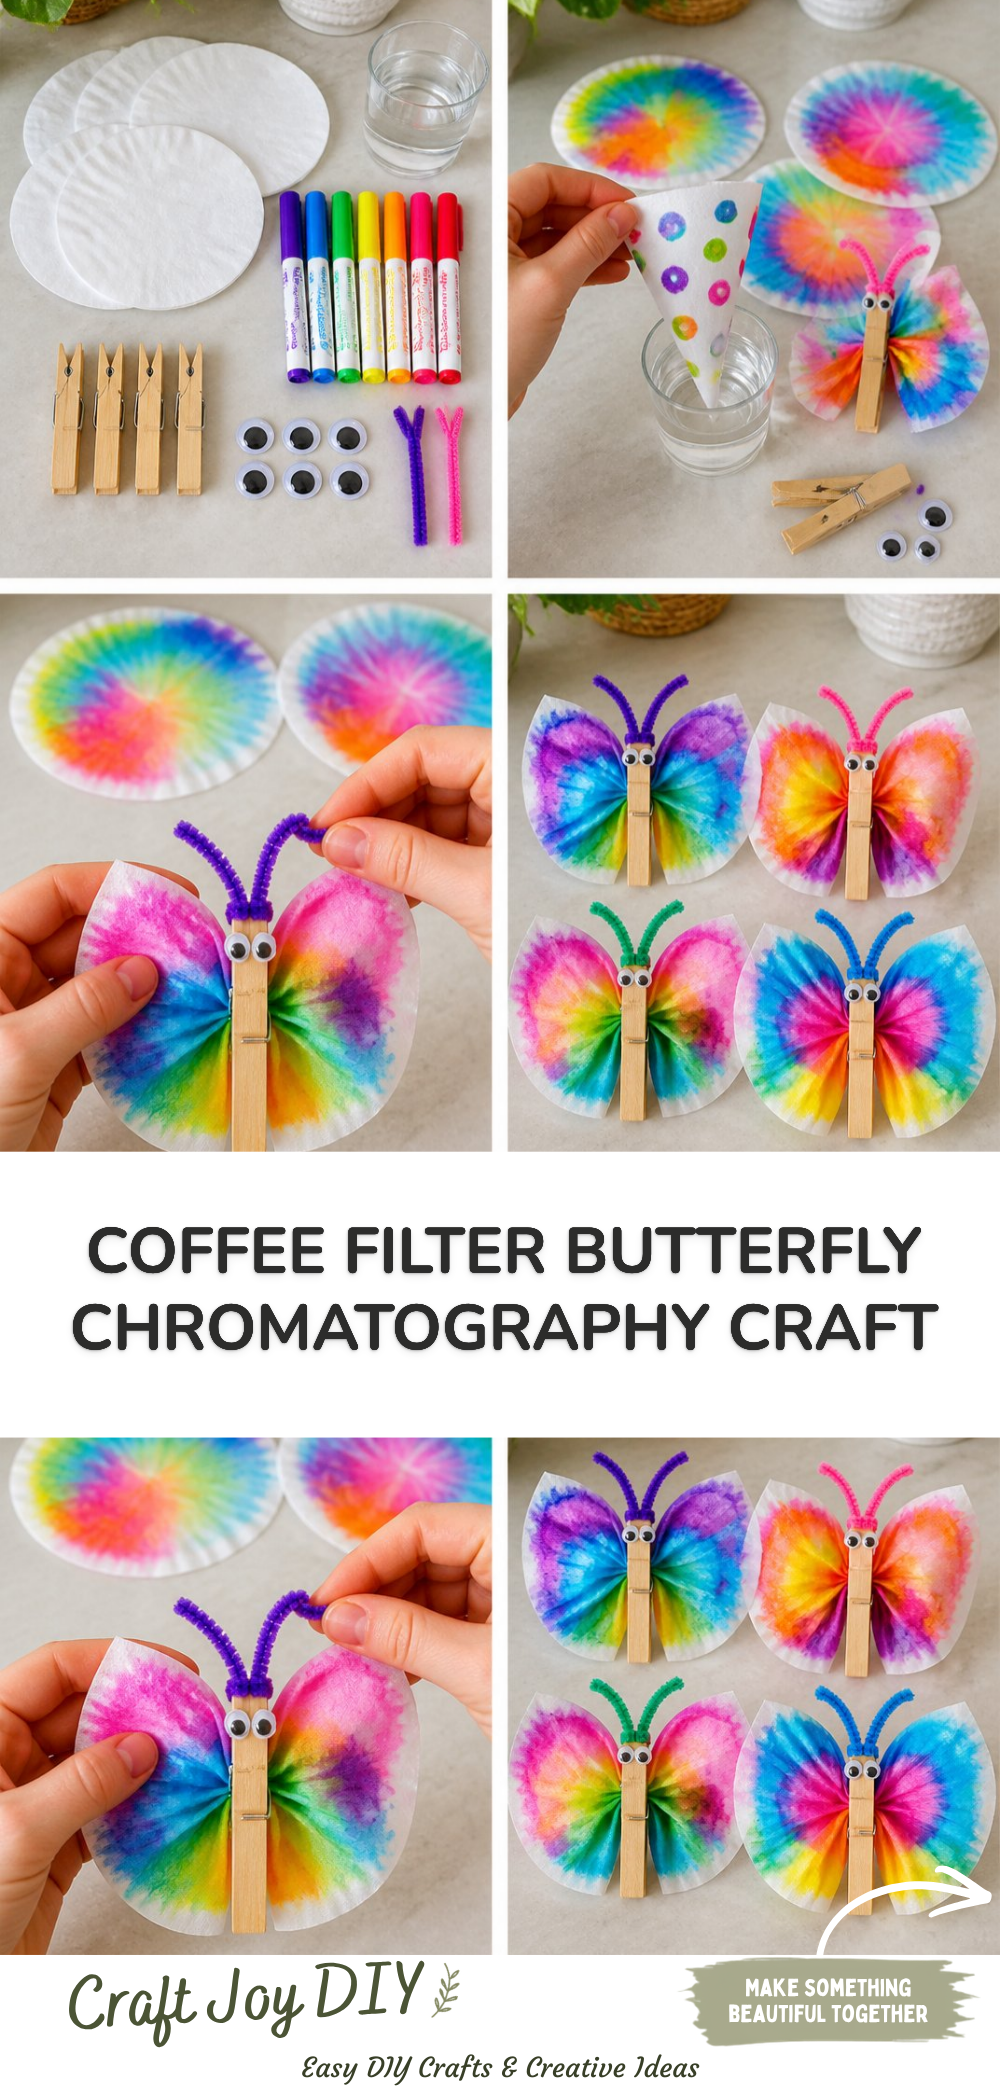
Create vibrant butterflies using coffee filters and washable markers while exploring the science of chromatography.
Materials
- Coffee filters
- Washable markers (various colors)
- A spray bottle filled with water
- Scissors
- Pipe cleaners (for antennae)
- A paper towel or cloth (for drying)
Instructions
- Color the coffee filter: Lay the coffee filter flat and use washable markers to create a design.
- Spray the filter: Lightly spritz it with water using the spray bottle to spread colors.
- Let it dry: Place the damp filter on a paper towel or cloth to dry completely.
- Shape the butterfly: Fold the coffee filter in half and pinch it to create the butterfly shape.
- Add antennae: Wrap a pipe cleaner around the center and twist to secure it.
- Display your creation: Hang it in a window or use it in a butterfly garden display.
Notes
Washable markers work best for vibrant colors. Consider varying the shapes or themes of the butterflies for more creative fun.