


Simple Yarn-Wrapped Pumpkins from Recycled Cardboard
Creating cosy yarn-wrapped pumpkins from recycled cardboard is a delightful craft that brings the spirit of fall indoors. These charming pumpkins are not only fun to make, but they also allow you to repurpose materials you may already have on hand. Using simple yarn crafts, you can easily create decorations that add warmth and creativity to your home this autumn season. You may also find Recycled Cardboard Tube Ocean Mobile Craft For Kids useful.
With just a few materials and steps, anyone can make these lovely pumpkins. They’ll make a perfect addition to your Thanksgiving decor or seasonal crafts with kids. So, let’s gather our supplies and get crafting! You may also find Recycled Cardboard Tube Ocean Mobile For Kids useful.

You may also find Autumn Leaf Crafts For Kids Rainbow Panda Leaf Art useful.
Why You’ll Enjoy This Project
- Easy to Make: With just cardboard and yarn, you can complete this craft in a short amount of time.
- Eco-Friendly: Utilizing recycled materials helps you contribute to a sustainable crafting practice.
- Kids Can Join In: This project is perfect for children to express their creativity while developing fine motor skills.
- Customizable: You can choose your favorite yarn colors to personalize each pumpkin for your decor.
- Versatile Use: These pumpkins can be displayed on shelves, table centerpieces, or even used as festive gifts.
Materials You’ll Need
- Cardboard (from boxes or packaging)
- Yarn (any colors you like)
- Scissors
- Hot glue gun (for adults to use)
- Markers (optional for decoration)
- Decorative items (e.g., leaves, twine, to enhance your pumpkins)
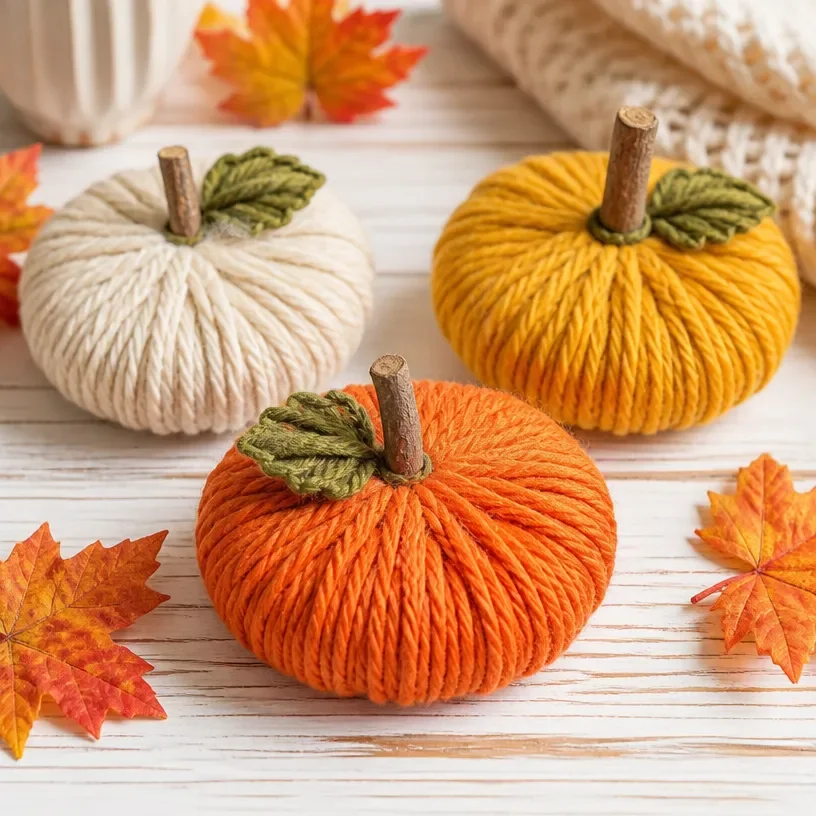
How to Make Simple Yarn-Wrapped Pumpkins from Recycled Cardboard
- Cut Out Your Pumpkin Shape: Start by drawing and cutting a pumpkin shape from the cardboard. Make it as big or small as you want!
- Snip Slots: Use scissors to cut small slots around the edge of the pumpkin. This will help the yarn to grip better.
- Wrap the Yarn: Choose your yarn color and begin wrapping it around the pumpkin. Start at one end and move to the other, ensuring you cover all visible areas.
- Secure the Yarn: Once the pumpkin is fully covered, use a bit of hot glue to secure the yarn in place, especially at the start and end.
- Add Decorations: Once the yarn is secured, feel free to add any decorative items like leaves or twine to your pumpkin.
For more inspiration, check out this cardboard yarn craft for kids that uses similar techniques to create fun projects.
Helpful Tips
- Choose Quality Yarn: Opt for thick yarn to achieve a fuller look for your pumpkins.
- Work Neatly: Keep the yarn wrapping tight and even to avoid gaps in the coverage.
- Supervise Children: Adults should handle the hot glue gun while kids focus on wrapping the yarn.
- Experiment with Colors: Mixing and matching yarn colors can create unique and vibrant pumpkins.
Easy Variations
- Color Combinations: Use glittery or multicolored yarn for a sparkling pumpkin.
- Different Shapes: Instead of just pumpkins, try creating other shapes such as gourds or squash.
- Size Adjustments: Make mini pumpkins or giant ones for different visual effects in your displays.
- Additional Textures: Layer with fabric or felt to create interesting textures on your pumpkins.
Making This Craft With Kids
This craft is engaging for children, but it’s important to supervise them during the cutting and gluing parts. Prevent any accidents by handling sharp items, ensuring they use safety scissors, and guiding them with the hot glue gun. You may also find Rainbow Kitten Pumpkin Suncatcher For Kids useful.
How to Display or Use It
These yarn-wrapped pumpkins can be placed on mantels, dining tables, or as part of a seasonal display. You can also gift them as handmade fall treats for family and friends. They look lovely nestled among other autumn decorations or even in a cozy corner of your living room.

Frequently Asked Questions
1. Can I use different types of yarn?
Yes! You can use any type of yarn, but thicker yarn will provide better coverage.
2. Is this project safe for young children?
While the wrapping can be done by kids, adult supervision is necessary for cutting and gluing.
3. How long does it take to complete this project?
This project can usually be completed in about an hour, depending on how detailed you want to get.
4. Can I paint my yarn-wrapped pumpkin?
Yes, painting the pumpkin before wrapping can give a fun base color and add to the overall design.
5. How should I store my pumpkins?
To keep them looking good, store them in a dry area, away from direct sunlight to prevent fading.
Conclusion
These cosy yarn-wrapped pumpkins are a simple yet effective way to celebrate the fall season creatively. For more spooky inspiration, consider browsing this collection of easy DIY Halloween costumes to complete your festive decor. You might even find other fun crafting ideas like the Cardboard Tube Ocean Mobile for an exciting weekend project! Happy crafting!
Print
Simple Yarn-Wrapped Pumpkins from Recycled Cardboard
- Total Time: 60 minutes
- Makes: 1 pumpkin
Description
Create charming yarn-wrapped pumpkins using recycled cardboard, perfect for autumn decor and family crafts.
Materials
- Cardboard (from boxes or packaging)
- Yarn (any colors you like)
- Scissors
- Hot glue gun (for adults to use)
- Markers (optional for decoration)
- Decorative items (e.g., leaves, twine, to enhance your pumpkins)
Instructions
- Cut out your pumpkin shape from the cardboard.
- Snip small slots around the edge of the pumpkin.
- Wrap the yarn around the pumpkin, covering all visible areas.
- Secure the yarn in place with hot glue.
- Add any decorative items like leaves or twine to your pumpkin.
Notes
Choose thick yarn for fuller coverage and supervise children with scissors and glue.