

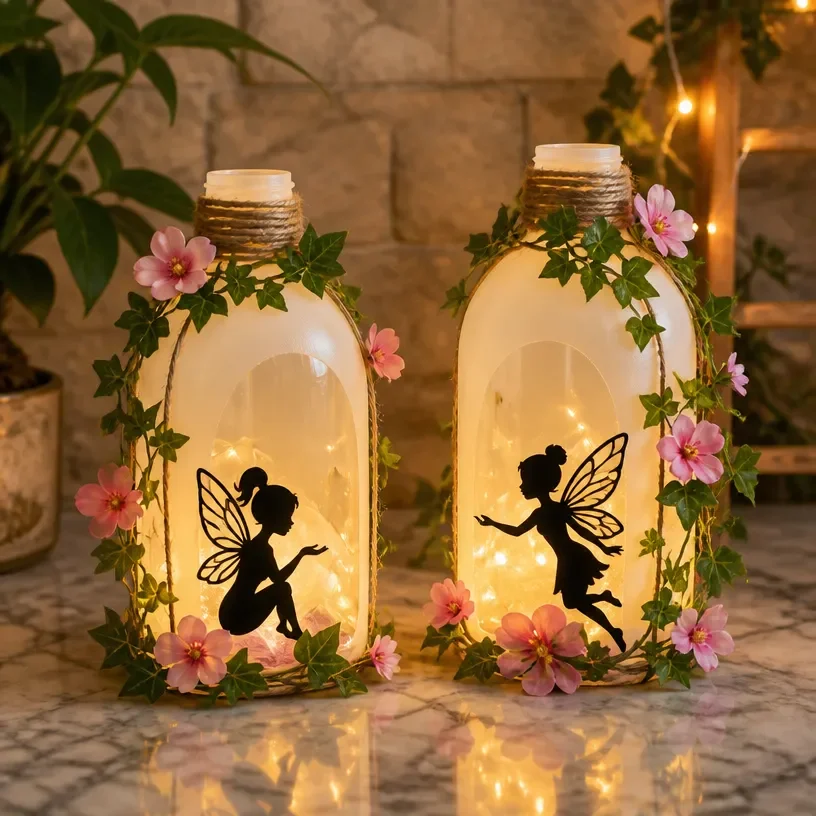
Milk Jug Fairy Lanterns Become Cozy
Creating a cozy atmosphere in your home or garden can be delightful, especially when it involves a simple craft project like making Milk Jug Fairy Lanterns. This project combines creativity with function, lighting your space with a magical glow. You’ll love how easy and fun it is to transform ordinary plastic milk jugs into enchanting lanterns. You may also find Diy Frozen Fairy Garden Ice Bowl useful.
Not only are these fairy lanterns charming, but they’re also an excellent way to repurpose materials that would otherwise be thrown away. By utilizing items you already have at home, you can create beautiful décor that adds a whimsical touch to your surroundings. Let’s dive into this fantastic DIY project that your family will adore! You may also find Mini Moss Fairy Garden Glass Bowl useful.

You may also find Pressed Flower Cornstarch Charms Cozy Keepsakes useful.
Why You’ll Enjoy This Project
- Eco-Friendly: You’re repurposing plastic milk jugs, which helps reduce waste.
- Customizable: You can choose colors, designs, and embellishments to suit your personal style.
- Fun for All Ages: This craft can be a wonderful family activity, allowing everyone to join in on the fun.
- Creates Ambiance: Once completed, these lanterns provide a warm and inviting glow for your home or garden.
- Easy to Make: You don’t need specialized skills! Just follow the simple steps for great results.
Materials You’ll Need
To get started, gather the following materials: You may also find Radiant Rainbow Ghost Glow Lanterns useful.
- Empty plastic milk jug (1-gallon size)
- Led tealight candle or battery-operated light
- Acrylic paints (optional for decoration)
- Paintbrush or sponge
- Craft knife or scissors
- Decorations (like glitter, stickers, or ribbon)
- Protective gloves (if using paints)
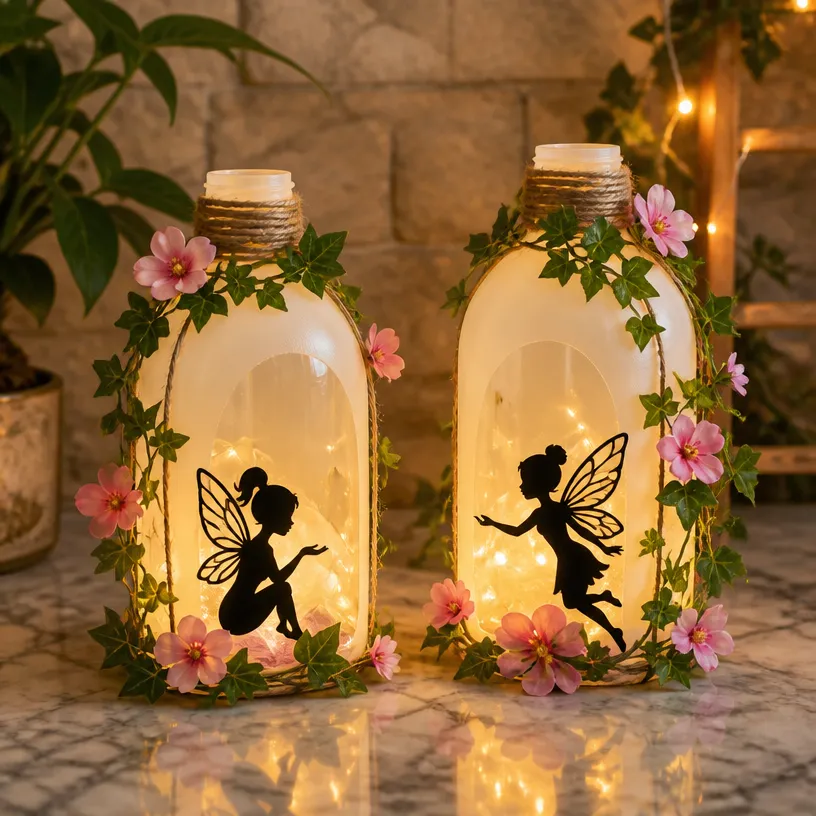
How to Make Milk Jug Fairy Lanterns Become Cozy
Follow these simple steps to create your very own Milk Jug Fairy Lanterns:
- Prepare the Jug: Clean the milk jug thoroughly and remove any labels. Make sure it’s completely dry before proceeding.
- Cut the Lid: Use the craft knife or scissors to carefully cut open the top of the jug, creating an opening for placing your light inside. The cut should be large enough to fit the LED tealight.
- Decorate the Jug: If you want to paint your jug, apply a layer of acrylic paint using a brush or sponge. You might want to use light colors for a soft glow or dark shades to create a contrast with the light.
- Add Embellishments: While the paint is drying, you can add decorations like glitter, stickers, or ribbon to personalize your lantern further.
- Insert the Light: Once your decorations are finished and dried, place the LED tealight candle inside the jug. Make sure it sits securely at the bottom.
- Display Your Lantern: Place your fairy lantern in your garden, on your porch, or in any indoor space where you want to add a cozy glow.
Helpful Tips
- Supervising Kids: If children are helping with this project, adult supervision is recommended while using sharper tools like scissors or craft knives.
- Avoiding Smudges: To prevent smudging your paint, allow it to dry completely before handling the jug.
- Weatherproofing: If you plan to use the lanterns outdoors, consider sealing the paint with a waterproof sealant to protect it from the elements.
- Creating Multiple Lanterns: Making several lanterns of different sizes or colors can create a stunning display, especially during evening gatherings.
Easy Variations
- Seasonal Themes: Decorate your lanterns according to the season think snowflake designs for winter or flowers for spring.
- Color Schemes: Use different combinations of paints like pastels for a soft look or neon for a vibrant feel.
- Use String Lights: Instead of tealights, try using battery-operated string lights for a twinkling effect inside the lanterns.
- Size Variety: Experiment with different-sized jugs, such as half-gallon or quart sizes, for a playful assortment.
- Create a Fairy Garden: Combine your lanterns with other DIY fairy garden elements, like moss and tiny figurines, to create a magical scene.
Making This Craft With Kids
This project is ideal for family craft time, especially with older kids who can safely handle scissors and craft knives. Adults should assist younger children in cutting the jug and handling paints. Encourage kids to express their creativity by choosing their favorite colors and decorations.
How to Display or Use It
These Milk Jug Fairy Lanterns can be placed indoors on tables or windowsills, or outdoors as part of your garden décor. They work wonderfully for parties, gatherings, or simply to enjoy a cozy evening under the stars. To ensure they last longer, especially outdoors, you might consider bringing them in during inclement weather.

Frequently Asked Questions
Can I use real candles?
It’s not recommended to use real candles due to the plastic’s flammability; always opt for LED lights.
How long will these lanterns last?
They should last as long as the paint remains intact and the LED lights are functional; remember to store them properly.
Can I use other decorations?
Yes! Feel free to use items like natural twine, fabric scraps, or pressed flowers for a unique touch.
What if I make a mistake while cutting?
If the cut is uneven, you can decorate over it to hide imperfections, or use washi tape for a decorative edge.
How do I clean the jug before using it?
A simple rinse with soap and water will suffice; ensure it’s fully dried before painting or decorating.
Are there alternatives to painting?
Yes, you can also use colored cellophane or tissue paper to wrap around the jug for a different look.
Conclusion
Making Milk Jug Fairy Lanterns is a fantastic way to create cozy lighting while also being environmentally friendly. If you’re looking for more creative ideas to brighten your home or enhance your craft skills, check out enchanted jar lanterns or consider building a mini moss fairy garden for added charm at home. For a delightful outing, visit< a href=”https://fofarms.com/”>Fair Oaks Farms for family fun and fresh food!
Print
Milk Jug Fairy Lanterns
- Total Time: 20 minutes
- Makes: 1 Fairy Lantern
Description
Transform ordinary plastic milk jugs into enchanting fairy lanterns with this simple and fun DIY project. Perfect for creating a cozy atmosphere in any space.
Materials
- 1-gallon empty plastic milk jug
- LED tealight candle or battery-operated light
- Acrylic paints (optional for decoration)
- Paintbrush or sponge
- Craft knife or scissors
- Decorations (glitter, stickers, or ribbon)
- Protective gloves (if using paints)
Instructions
- Prepare the jug: Clean the milk jug thoroughly and remove any labels.
- Cut the lid: Use the craft knife or scissors to create an opening for placing your light inside.
- Decorate the jug: Apply a layer of acrylic paint using a brush or sponge.
- Add embellishments: While the paint is drying, personalize your lantern with decorations.
- Insert the light: Place the LED tealight candle inside the jug.
- Display your lantern: Place your fairy lantern indoors or outdoors to add a cozy glow.
Notes
Adult supervision is recommended for kids when using sharp tools. Allow paint to dry completely to avoid smudging and consider sealing outdoor lanterns with waterproof sealant.