

DIY Egg Carton Tulip Bouquet
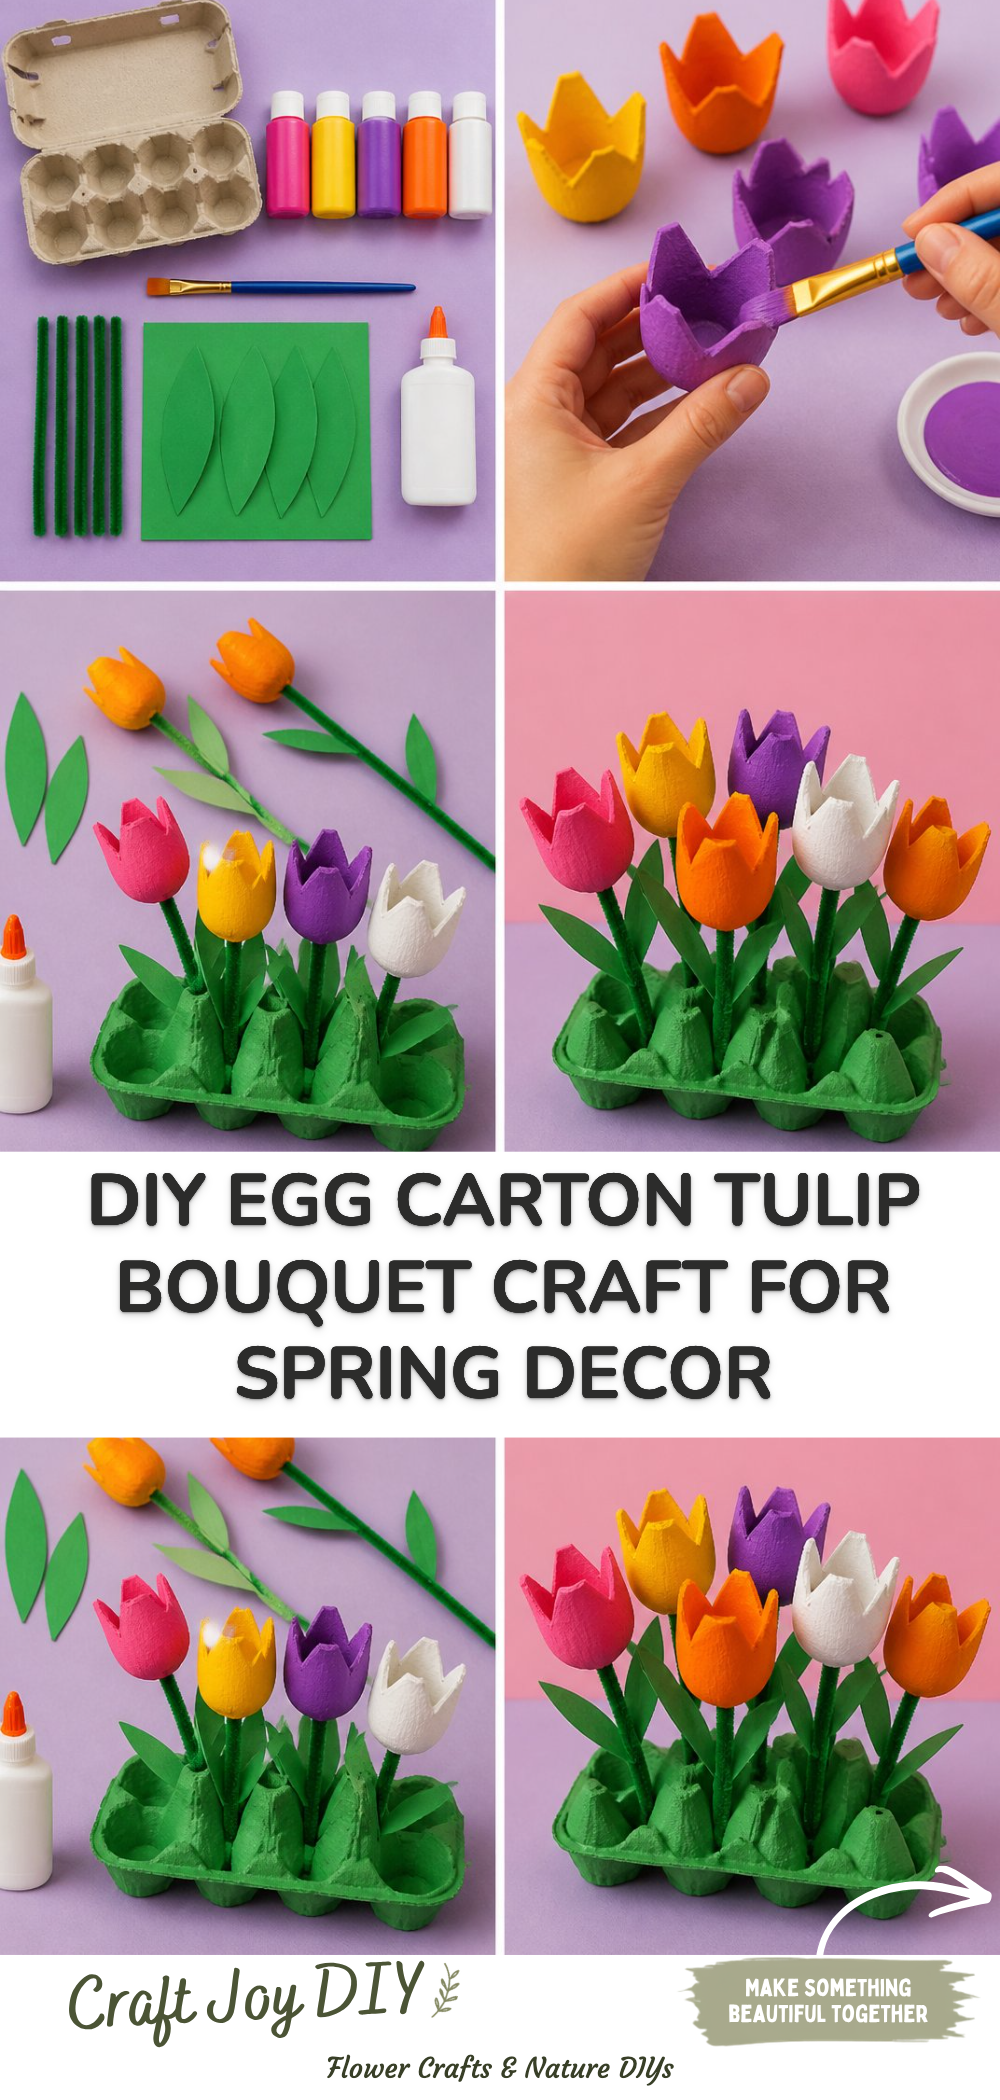
Creating a DIY Egg Carton Tulip Bouquet is a delightful craft project that combines creativity and sustainability. Not only does it allow you to repurpose everyday materials, but it also provides a charming way to beautify your home or gift to a loved one. This project is perfect for crafters of all ages and skill levels, and it’s a fun activity to do with kids or during family gatherings. You may also find Colorful Cupcake Liner Flower Bouquet useful.
In this tutorial, you’ll explore how to transform regular egg cartons into beautiful tulips that can brighten up any space. Join me in this enjoyable crafting adventure where you can add a personal touch to your decor! You may also find Colorful Cupcake Liner Witch Flower Bouquet Craft useful.
You may also find Rainbow Monster Pencil Holders Diy Craft For Kids useful.
Why You’ll Enjoy This Project
- Eco-Friendly Fun: This craft uses recycled materials, making it a great way to teach kids about sustainability.
- Customizable Colors: You can paint the tulips in any color you like, making them perfect for any occasion.
- Simple Steps: The process of making these tulips is straightforward, making it an excellent beginner project.
Materials You’ll Need
- Empty egg cartons
- Acrylic paint (in desired colors)
- Paintbrushes
- Scissors
- Hot glue gun (or non-toxic glue)
- Floral wire or pipe cleaners
- Green construction paper (for leaves)
How to Make DIY Egg Carton Tulip Bouquet
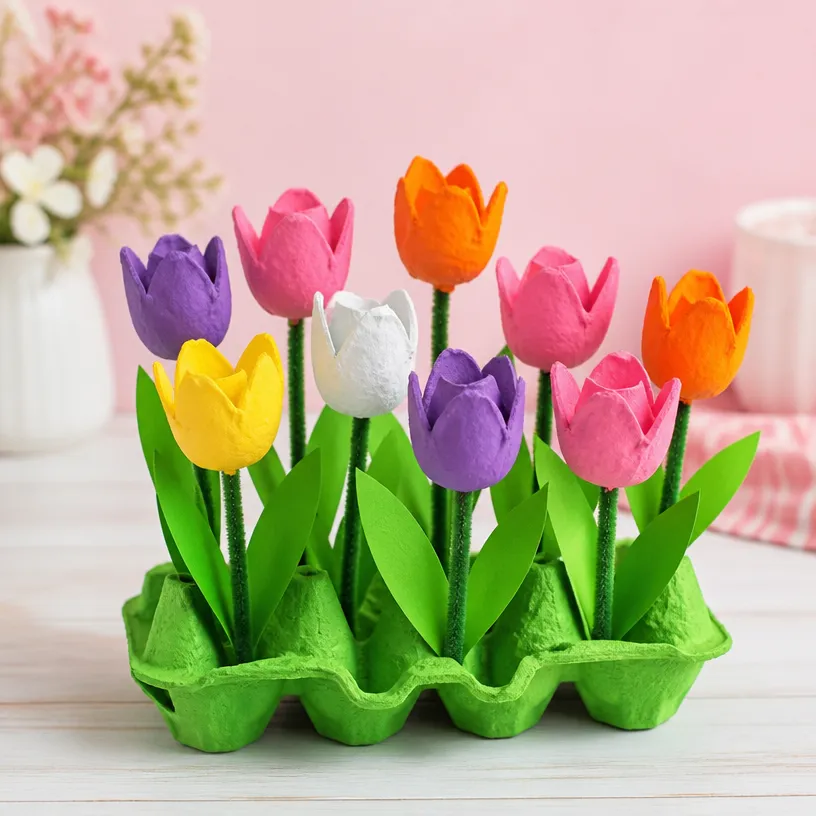
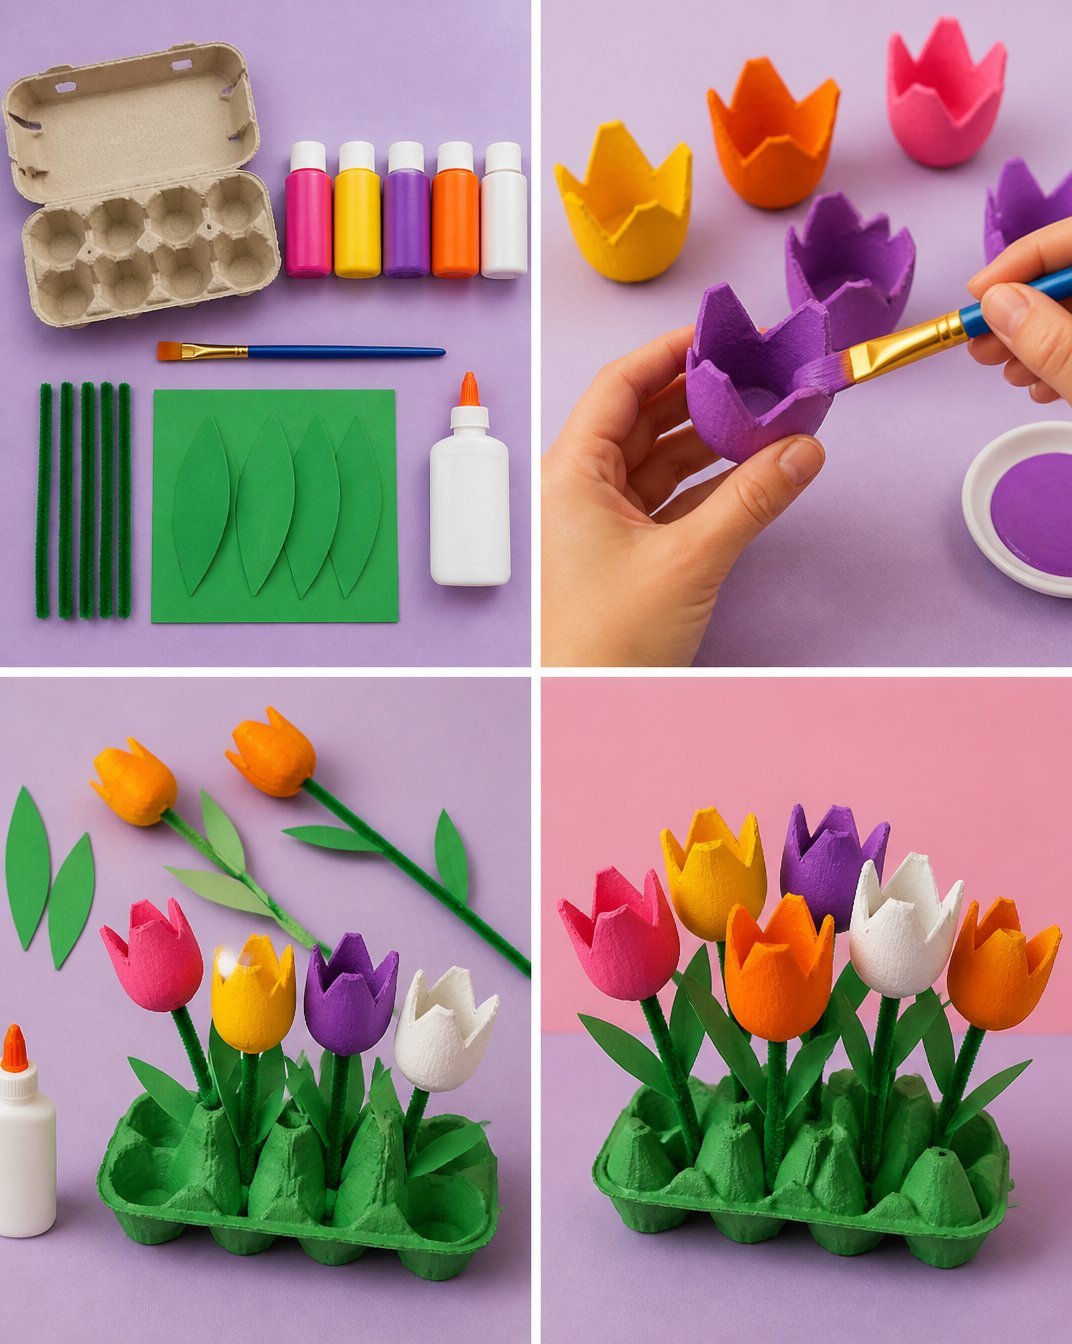
- Prepare the Egg Cartons: Cut individual cups from the egg carton, leaving some attached to create a tulip shape.
- Paint the Tulip Cups: Use acrylic paint to color each cup in your chosen shades. Allow them to dry completely before proceeding.
- Shape the Flowers: Once dry, gently pinch and twist the open edges of each cup to resemble tulip petals.
- Make the Stems: Take a piece of floral wire or a pipe cleaner and insert it into the bottom of the painted cup. Secure it with hot glue for stability.
- Add Leaves: Cut leaf shapes from green construction paper and glue them to the base of the flower where the stem meets the flower cup.
- Assemble the Bouquet: Group your tulips together and tie them with a ribbon or place them in a vase for display.
This child-friendly project can be further enhanced by adding glitter, or by using patterned paper for the leaves. If you’re interested in more creative ideas, check out this cupcake liner dahlia bouquet tutorial for a fun variation!
Helpful Tips
- Use Washable Paint: If working with young children, consider using washable paint for easy cleanup.
- Be Mindful of Glue Gun Safety: Adults should handle the hot glue gun while children assist with painting and assembling.
- Create a Display: Arrange your tulips in a colorful pot or a mason jar for a splash of charm.
Easy Variations
- Seasonal Colors: Change the colors according to the season; pastel shades for spring or warm hues for autumn.
- Gift Wrapping: Use these tulips as a gift topper or in a bouquet for a special occasion.
- Mixed Crafts: Combine your egg carton tulips with other crafts, like making a rainbow popsicle stick flower wheel from this popsicle stick tutorial.
Making This Craft With Kids
This DIY project is exceptionally kid-friendly! Adults may need to supervise the use of scissors and hot glue. Encourage kids to express their creativity by choosing their colors and adding their personal touches to each flower.
How to Display or Use It
The finished egg carton tulip bouquet can be a lovely centerpiece for your dining table or a charming addition to a home office. You can also gift it to friends or family as a thoughtful, handmade creation.
Frequently Asked Questions
1. Can I use different types of paint?
Yes, you can use tempera or watercolor paints, but acrylic is the most vibrant and durable option.
2. How long will my tulips last?
Since these flowers are made from egg cartons, they won’t wilt, making them a long-lasting decoration!
3. Can I display them outdoors?
It’s best to keep them indoors since moisture can affect the paint and the egg carton material.
4. Are there any other supplies I can use?
You can also use fabric scraps for added texture or embellishments like buttons for the center of your flowers.
5. How can I encourage kids’ creativity in this project?
Allow children to mix colors and paint with sponges or brushes to create unique designs on each flower.
Conclusion
Creating a DIY Egg Carton Tulip Bouquet is a wonderful way to engage in a fun, educational crafting session that celebrates creativity and recycling. If you’d like to explore further crafting ideas, you may find inspiration in resources such as Make Your Own Egg Carton Tulips – Carefree Crafts and How to Make Egg Carton Tulips: Mother’s Day Spring Craft. Happy crafting!
Print
DIY Egg Carton Tulip Bouquet
- Total Time: 15 minutes
- Makes: 1 bouquet
Description
Create a charming and eco-friendly tulip bouquet using recycled egg cartons. Perfect for all ages!
Materials
- Empty egg cartons
- Acrylic paint (in desired colors)
- Paintbrushes
- Scissors
- Hot glue gun (or non-toxic glue)
- Floral wire or pipe cleaners
- Green construction paper (for leaves)
Instructions
- Prepare the Egg Cartons: Cut individual cups from the egg carton, leaving some attached to create a tulip shape.
- Paint the Tulip Cups: Use acrylic paint to color each cup in your chosen shades. Allow them to dry completely before proceeding.
- Shape the Flowers: Once dry, gently pinch and twist the open edges of each cup to resemble tulip petals.
- Make the Stems: Take a piece of floral wire or a pipe cleaner and insert it into the bottom of the painted cup. Secure it with hot glue for stability.
- Add Leaves: Cut leaf shapes from green construction paper and glue them to the base of the flower where the stem meets the flower cup.
- Assemble the Bouquet: Group your tulips together and tie them with a ribbon or place them in a vase for display.
Notes
Consider using washable paint for easy cleanup, and supervise kids when using scissors and hot glue.