


How to Make Pipe Cleaner Butterflies – Easy DIY Craft
Creating beautiful pipe cleaner butterflies is a delightful and simple craft that brings joy to both children and adults. Not only is this project fun and creative, but it also offers a great way to practice fine motor skills and express artistic flair. By using just a few materials, you can make charming decorations, fun toys, or even personalized gifts. You may also find Diy Rainbow School Bus Photo Frame Craft For Kids useful.
In this tutorial, we will guide you through the process of crafting your own pipe cleaner butterflies. This project is perfect for family crafting sessions or classroom activities. Let’s get started! You may also find Pipe Cleaner Butterfly Craft For Kids useful.
Why You’ll Enjoy This Project
This pipe cleaner butterfly craft is perfect for many reasons:
- Simplicity: The project uses basic materials that are easy to find at home or at craft stores, making it an accessible choice for anyone.
- Creativity: You can customize the butterflies in any way you like, experimenting with colors and designs.
- Fun for All Ages: Kids and adults alike can engage with this craft, making it a versatile activity for family gatherings or playdates.
- Quick to Complete: You can create these butterflies in a short amount of time, so they are ideal for group activities or whenever you’re short on time.
- Educational Value: This craft helps with fine motor skills development, as twisting and bending the pipe cleaners can enhance hand-eye coordination.

Materials You’ll Need
Gather the following materials before starting your craft:
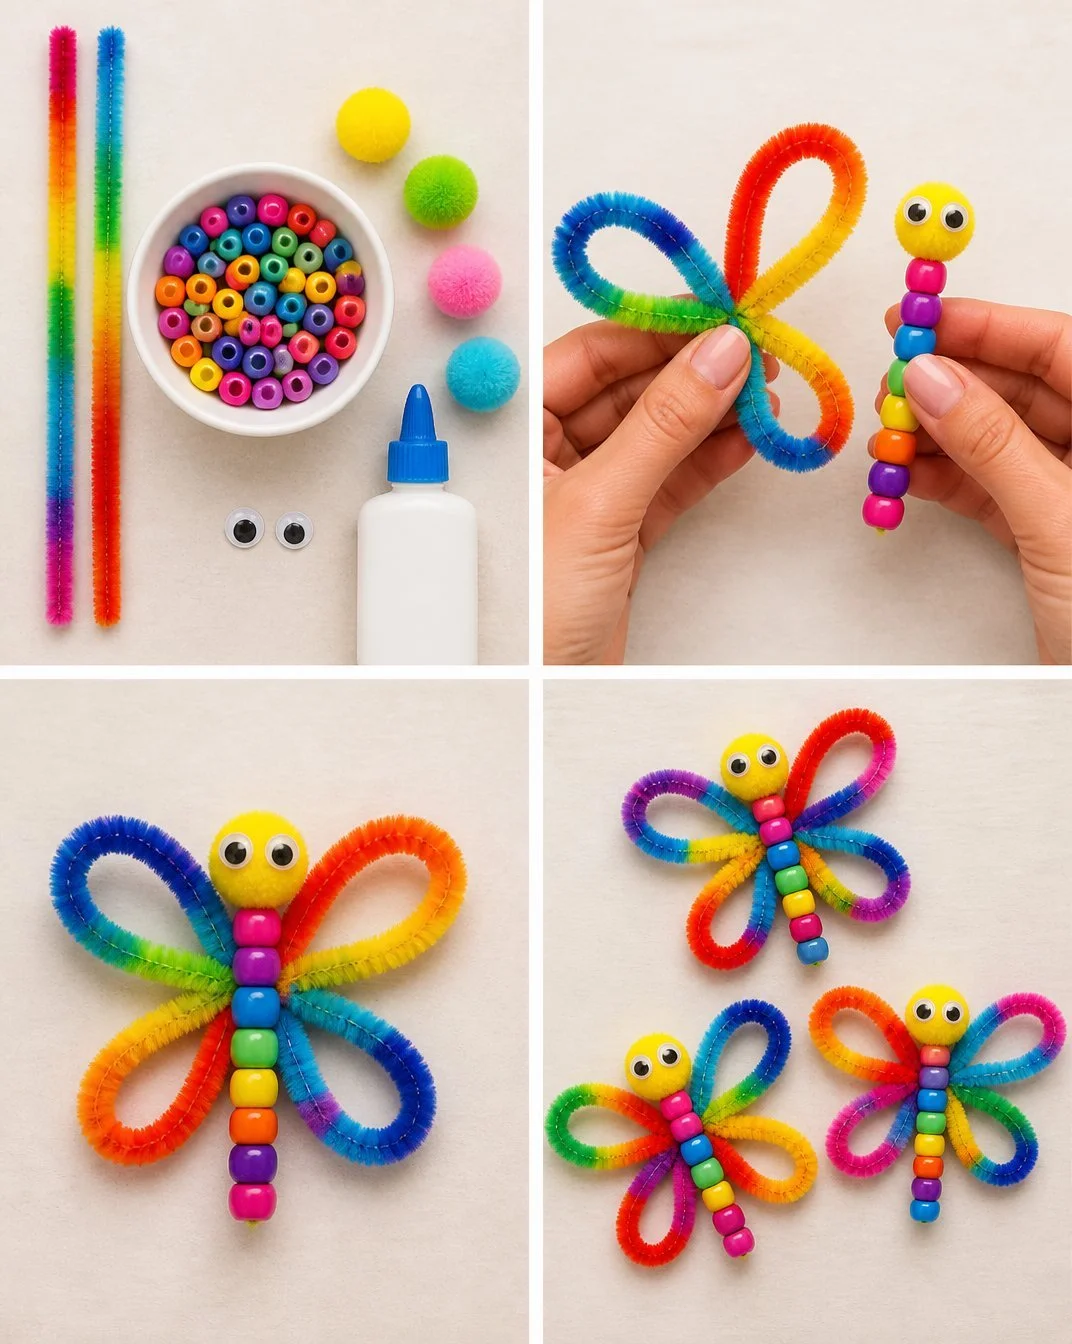
- Several pipe cleaners in various colors
- Googly eyes (optional)
- Scissors
- Small beads (optional for added decoration)

How to Make Pipe Cleaner Butterflies – Easy DIY Craft
Follow these steps to create your own pipe cleaner butterflies:
- Select Your Colors: Choose your desired colors of pipe cleaners. You can use two colors for the butterfly body and wings.
- Create the Body: Take one pipe cleaner (the color for the body) and fold it in half. Twist the two ends together about an inch from the fold to make the body.
- Make the Wings: For the wings, take two more pipe cleaners (you may want to choose colors that contrast with the body). Cut each pipe cleaner into two equal parts to form the shape of the wings.
- Shape the Wings: Take each piece and bend them into an oval or wing shape. You can make them as large or small as you like.
- Attach the Wings: Slide the wing shapes onto the body you created in step 2. Twist the base of the wings around the body to secure them.
- Add Finishing Touches: If you’re using googly eyes, glue them onto the body. You can also add small beads or embellishments for added flair!
- Display Your Creation: Your pipe cleaner butterfly is now complete! Feel free to hang them or use them as playful decorations.
If you want to explore more pipe cleaner crafts, check out this beaded pipe cleaner snail craft for another delightful project.
Helpful Tips
- Use a Variety of Pipe Cleaners: Mixing colors and textures can create unique butterflies.
- Consider Adult Supervision: If crafting with young children, you may want to assist them with twisting and manipulating the pipe cleaners.
- Display Ideas: You could attach a string to hang the butterflies from the ceiling, or create a colorful mobile with multiple butterflies.
Easy Variations
Add your personal touch to this project with these variations:
- Seasonal Themes: Use colors that represent different seasons, like pastels for spring or warm tones for fall.
- Mini Butterflies: Create smaller versions with shorter pipe cleaners for added variety.
- Nature-Inspired: Use natural materials like leaves or twigs to make a frame and attach your butterflies.
Making This Craft With Kids
This project is perfect for children of all ages, with a little help from an adult. Younger children may need assistance in twisting the pipe cleaners and securing them, while older children can enjoy the entire process independently. This is a fantastic opportunity to foster creativity and enhance fine motor skills.
How to Display or Use It
Once your butterflies are complete, consider hanging them in a sunny window to brighten up your space. You can also use them as decorations for a party or even as gift toppers for a special present.
Frequently Asked Questions
Can I make this craft with other materials?
Absolutely! You can incorporate paper wings or even fabric for unique designs.
Is this project suitable for all ages?
Yes, this craft can be adapted for different skill levels, making it suitable for children and adults alike.
How long does it take to make a butterfly?
Most people can complete this craft in about 20-30 minutes, depending on the complexity of the design.
What should I do if my butterflies don’t hold their shape?
Make sure to twist the pipe cleaners tightly enough to secure the wings and body.
Can I paint the pipe cleaners?
While it’s not common, you can use specific types of paint on the pipe cleaners; however, it may affect how they bend.
Where can I find more craft ideas?
For additional crafting inspiration, check out this easy pipe cleaner butterfly craft project that offers more fun variations.
Conclusion
Making pipe cleaner butterflies is an enjoyable craft that can bring a lot of joy and creativity into your home. Whether you create them with little ones or enjoy a peaceful crafting time on your own, these butterflies are sure to brighten up your space. For more crafting ideas involving pipe cleaners, you might find these how to make pipe cleaner butterfly rings or the adorable and easy pipe cleaner butterfly craft to be inspiring! Happy crafting!
Print
How to Make Pipe Cleaner Butterflies
- Total Time: 30 minutes
- Makes: 1 butterfly
Description
A delightful and simple craft project for making charming pipe cleaner butterflies that enhance fine motor skills and creativity.
Materials
- Several pipe cleaners in various colors
- Googly eyes (optional)
- Scissors
- Small beads (optional for added decoration)
Instructions
- Select Your Colors: Choose your desired colors of pipe cleaners. You can use two colors for the butterfly body and wings.
- Create the Body: Take one pipe cleaner (the color for the body) and fold it in half. Twist the two ends together about an inch from the fold to make the body.
- Make the Wings: For the wings, take two more pipe cleaners (you may want to choose colors that contrast with the body). Cut each pipe cleaner into two equal parts to form the shape of the wings.
- Shape the Wings: Take each piece and bend them into an oval or wing shape. You can make them as large or small as you like.
- Attach the Wings: Slide the wing shapes onto the body you created in step 2. Twist the base of the wings around the body to secure them.
- Add Finishing Touches: If you’re using googly eyes, glue them onto the body. You can also add small beads or embellishments for added flair!
- Display Your Creation: Your pipe cleaner butterfly is now complete! Feel free to hang them or use them as playful decorations.
Notes
Consider adult supervision for younger children. This project is adaptable for various age groups.