
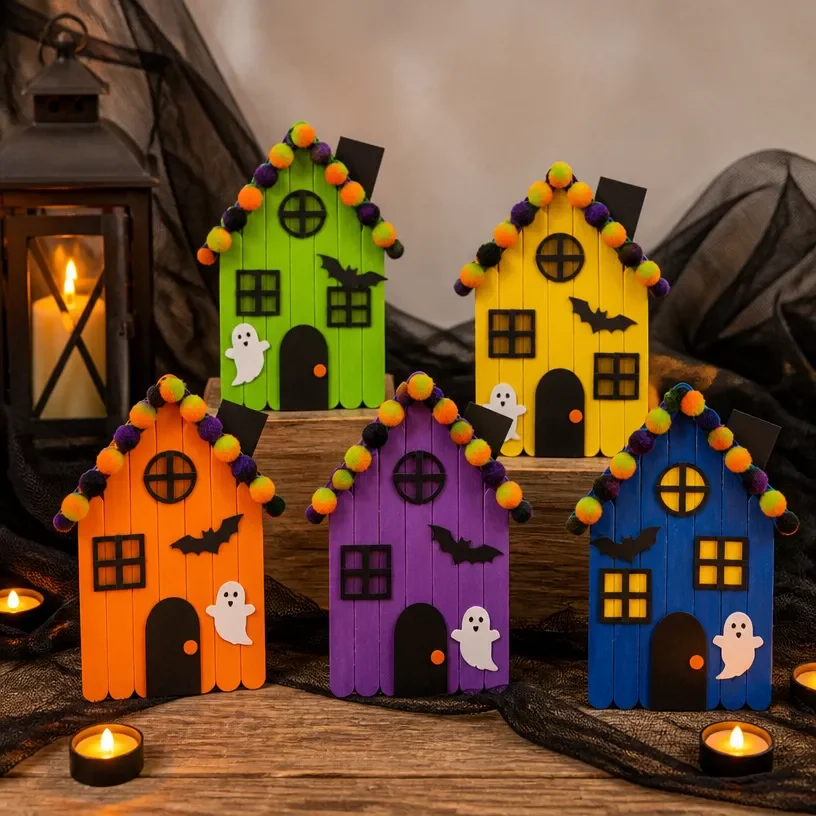
DIY Colorful Popsicle-Stick Haunted House Village for Halloween
Creating a fun and spooky DIY Colorful Popsicle-Stick Haunted House Village is a delightful way to celebrate Halloween. This craft not only brings a festive spirit to your home but also offers a hands-on activity that engages children’s creativity. With simple materials and a few easy-to-follow steps, you can build a charming village filled with colorful houses that make perfect decorations for the Halloween season. You may also find Diy Halloween Boo Basket For Kids useful.
Let’s dive into the project to see how you can craft your own haunted house village! You may also find Rainbow Crayon Haunted House Art For Kids useful.
You may also find Bubble Dough Sensory Play Diy Activity For Kids useful.
Why You’ll Enjoy This Project
- Creative Expression: This project encourages imagination, allowing kids and adults to design their spooky homes as they wish.
- Easy to Customize: Use various colors and patterns to make each house unique, enhancing the decorative potential of your village.
- Quality Family Time: Building this project together can strengthen bonds through shared creativity and fun.
- Low-Cost Materials: You likely already have most supplies at home, keeping this craft budget-friendly.
- Enduring Decorations: Once completed, your colorful village will become a lauded Halloween centerpiece for years to come.
Materials You’ll Need
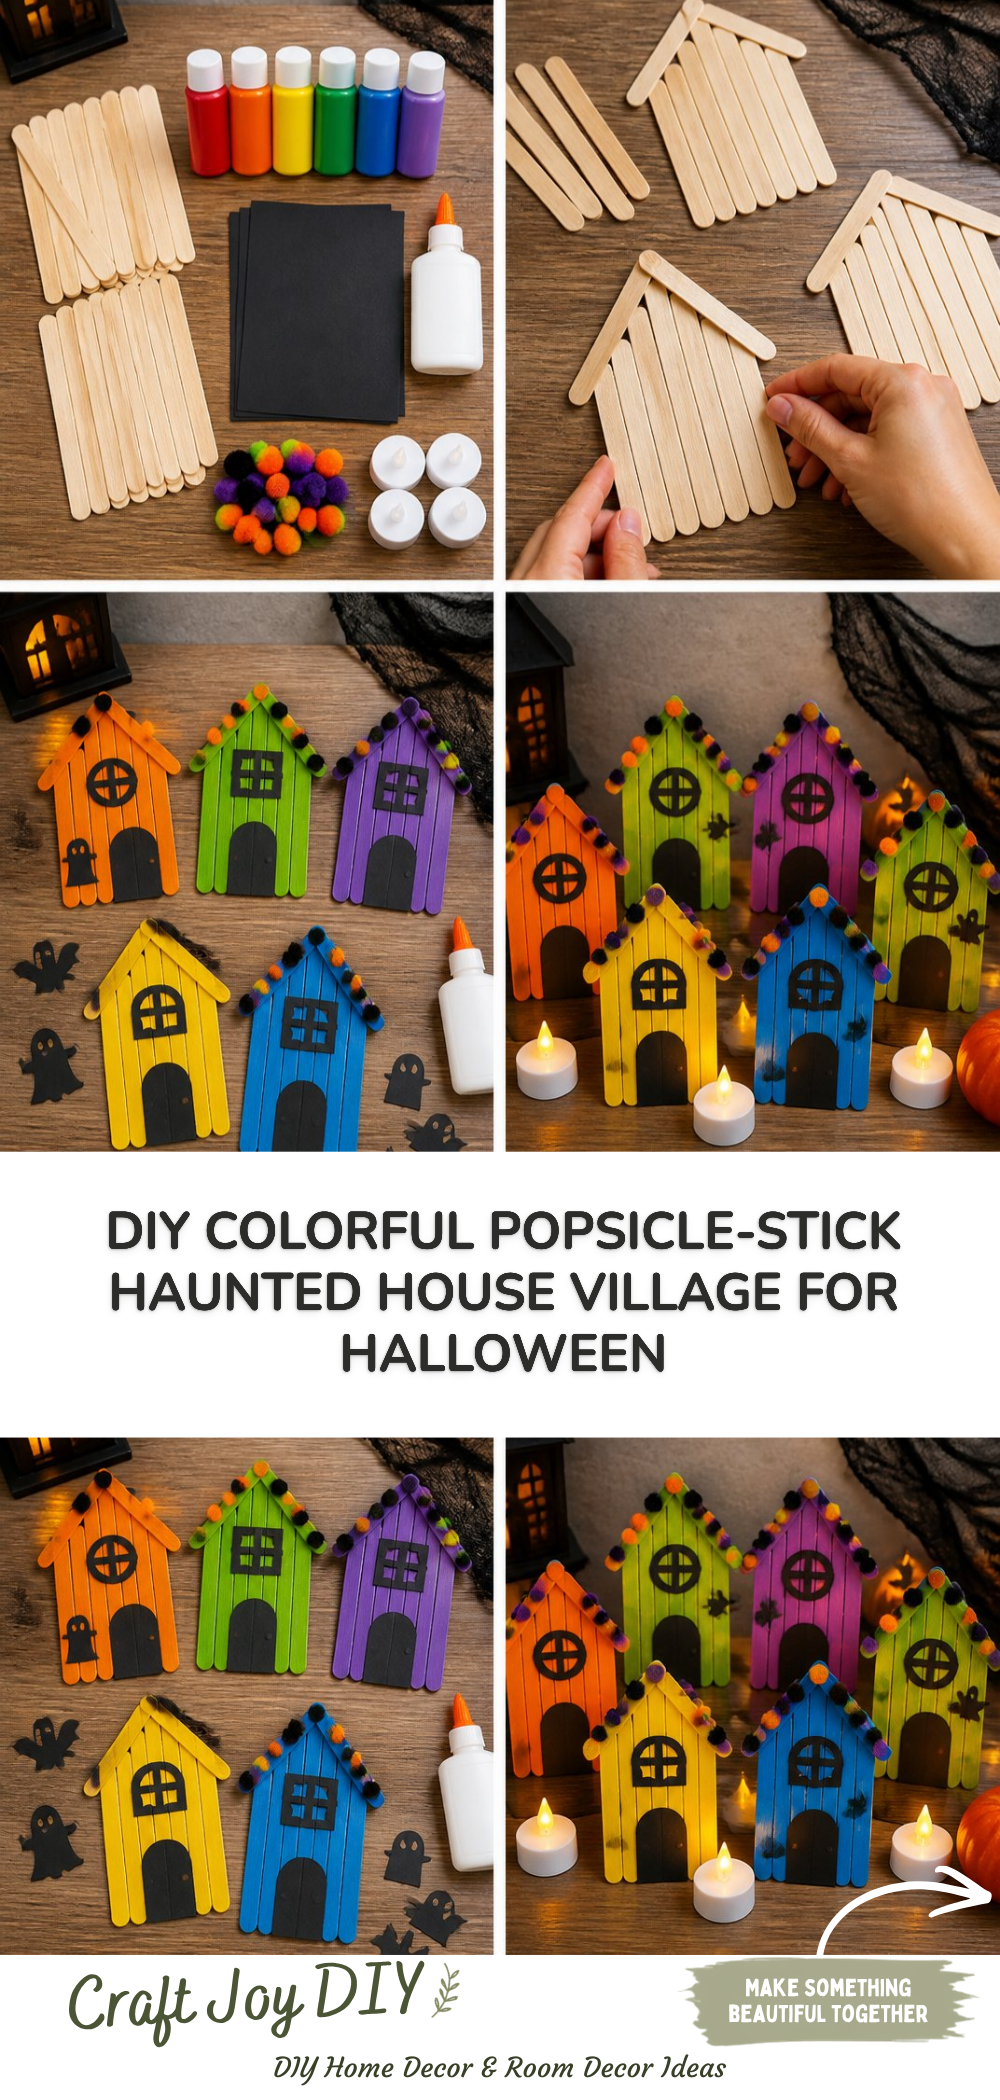
Gather the following materials to get started: You may also find Cornstarch Suncatchers For Kids Colorful Window Art useful.
- Craft sticks (popsicle sticks)
- Craft paint in various colors
- Glue (hot glue or craft glue)
- Scissors
- Decorative items like googly eyes, stickers, or mini decorations
- Cardboard base or a tray for display
How to Make DIY Colorful Popsicle-Stick Haunted House Village for Halloween
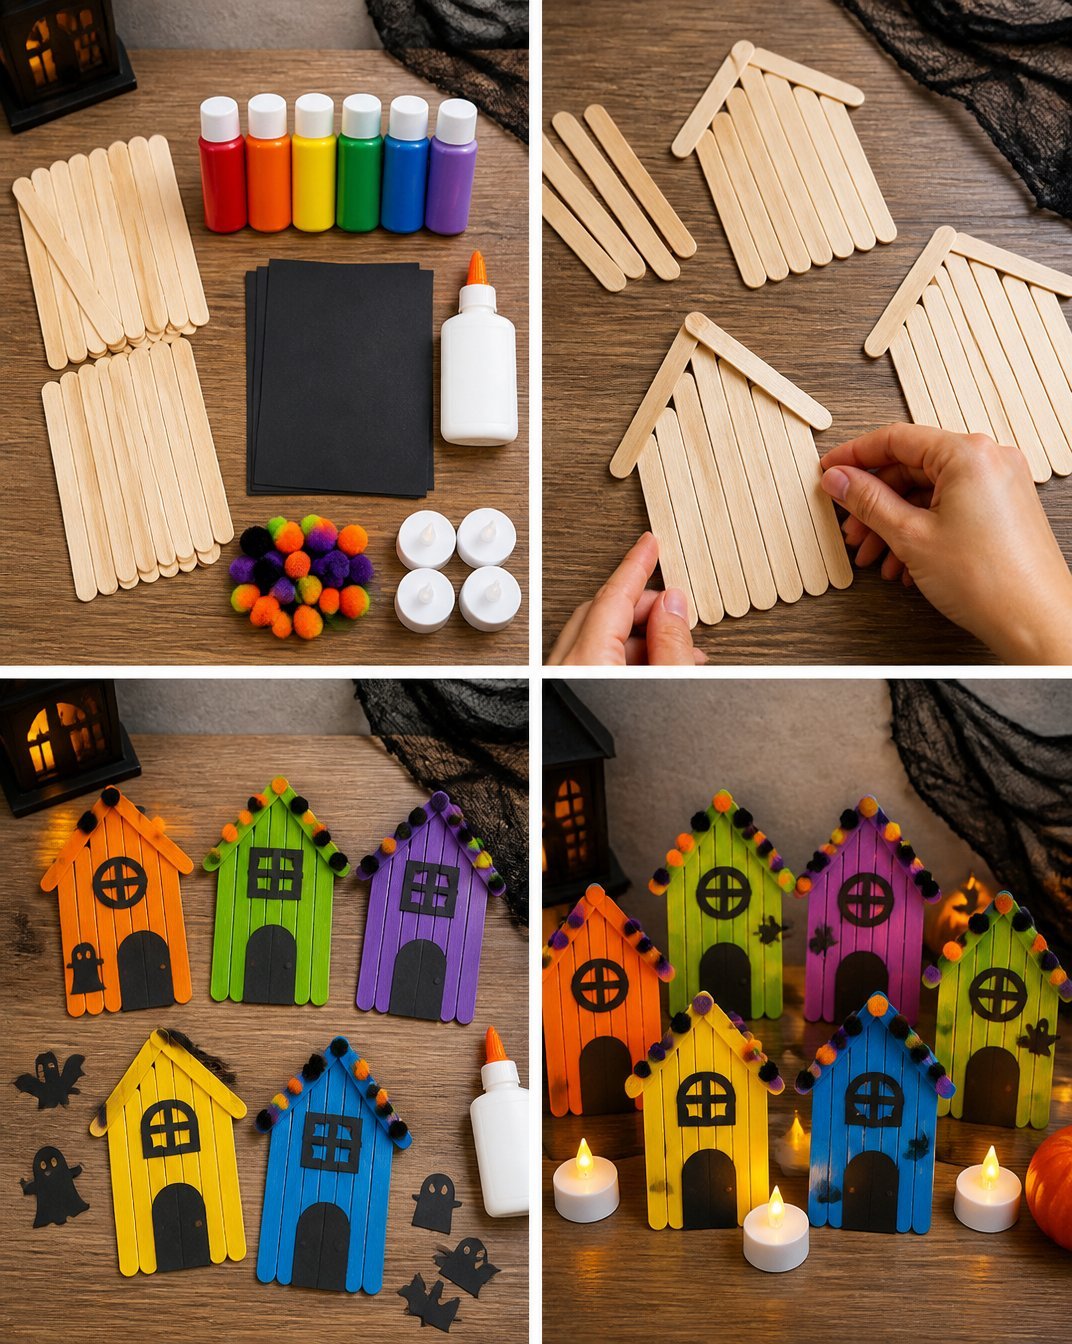
Prepare the Craft Sticks: Start by painting your craft sticks in different colors. You can choose spooky colors like purple, green, and black or go with bright colors based on your theme. You may also find Diy Rainbow Popsicle Stick Flower Wheel Craft useful.
Create the House Structure: For each house, use six sticks to form a rectangle for the walls. Glue the ends of the sticks together securely.
Build the Roof: Take two more sticks to create the roof. Place them diagonally across the top of the walls to form a triangle and glue them down.
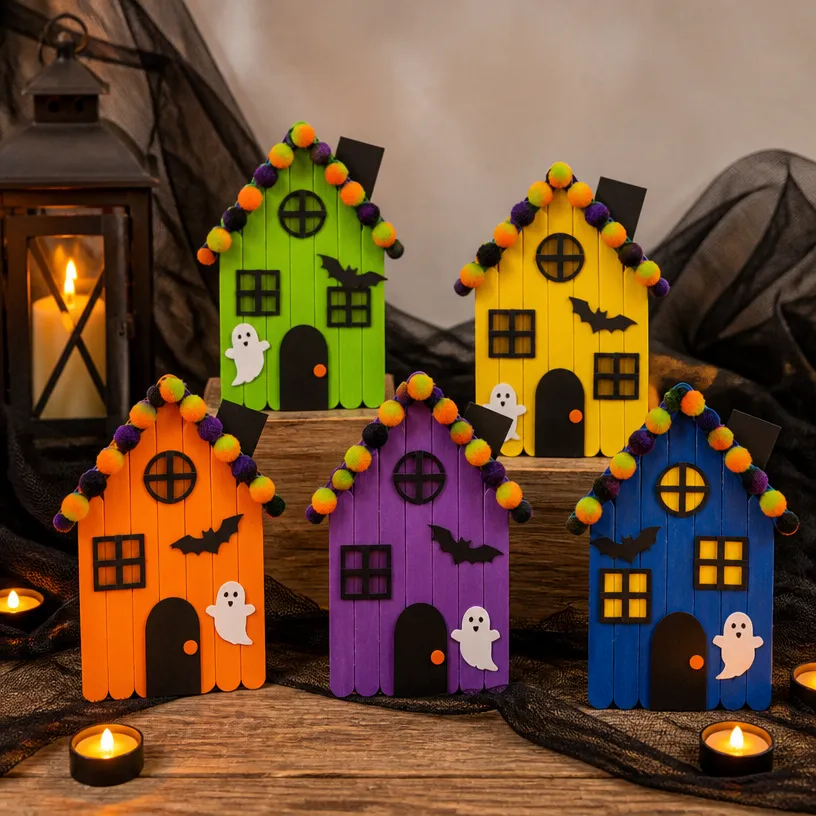
Add Details: Once the house structure is dry, let your creativity shine by adding decorations. Use smaller sticks to create windows and doors. Don’t forget to attach googly eyes or stickers for a fun touch.
Arrange the Village: Once each house is complete, arrange them on your cardboard base or tray to create your haunted village layout.
Helpful Tips
- Drying Time: Allow each painted surface to dry before gluing additional pieces to avoid smudges.
- Supervision for Younger Crafters: If young kids are involved, be sure to supervise them when using scissors and hot glue.
- Display Ideas: Place your village on a table or shelf where it can be admired, and consider adding some faux cobwebs for added spookiness.
Easy Variations
- Themed Houses: Create themed houses, such as a witch’s home with a pointed roof or a pumpkin house.
- Use Natural Elements: Incorporate leaves or twigs to embellish your village further, making it more unique.
- Seasonal Changes: After Halloween, you can transform the village for fall or winter by adding autumn leaves or snow details.
Making This Craft With Kids
This craft is perfect for families, but be sure to supervise when it comes to using scissors or hot glue. Younger children can help with painting and designing simple decorations, making this an inclusive project for all ages.
How to Display or Use It
Consider placing your finished haunted house village on a mantle or a dining table for Halloween festivities. You can also incorporate them into party decorations or use them as a centerpiece during Halloween gatherings.
Frequently Asked Questions
1. Can I use any type of glue for this project?
Yes, you can use craft glue or hot glue, but be cautious with hot glue if children are involved.
2. How long will the paint take to dry?
Drying time varies depending on the type of paint, but usually, it takes about 30 minutes to an hour for the paint to set.
3. Can I store my village for future use?
Absolutely! If stored in a cool, dry place, your popsicle stick houses can last for many Halloween seasons.
4. What if I don’t have craft sticks?
You can substitute with thin wooden dowels or even cardboard cut into similar shapes.
5. How much supervision do children need?
Children should be supervised for cutting and using glue. Older kids can handle these tasks better than younger ones.
6. Are there other crafts for Halloween?
Along with this craft, consider making a DIY Halloween Boo Basket for kids or a colorful window art project.
Conclusion
Crafting your own Colorful Popsicle-Stick Haunted House Village is a rewarding and enjoyable activity for families looking to celebrate Halloween creatively. You can find more inspiration and ideas for your crafts by checking the Michaels Makers Archives or explore a detailed guide on building a Halloween village at Small Halloween Village: 14 Steps (with Pictures). Happy crafting!
Print
DIY Colorful Popsicle-Stick Haunted House Village
- Total Time: 45 minutes
- Makes: 1 haunted house village
Description
Create a festive and spooky haunted house village using colorful popsicle sticks, perfect for Halloween decorations.
Materials
- Craft sticks (popsicle sticks)
- Craft paint in various colors
- Glue (hot glue or craft glue)
- Scissors
- Decorative items like googly eyes, stickers, or mini decorations
- Cardboard base or a tray for display
Instructions
- Prepare the craft sticks by painting them in various colors.
- Create the house structure using six sticks to form a rectangle for the walls.
- Build the roof with two more sticks placed diagonally across the top.
- Add details by incorporating smaller sticks for windows and doors, and attach decorative items.
- Arrange the completed houses on your cardboard base or tray to display the village.
Notes
Supervise younger crafters when using scissors and hot glue. Allow painted surfaces to dry completely before gluing additional pieces.