

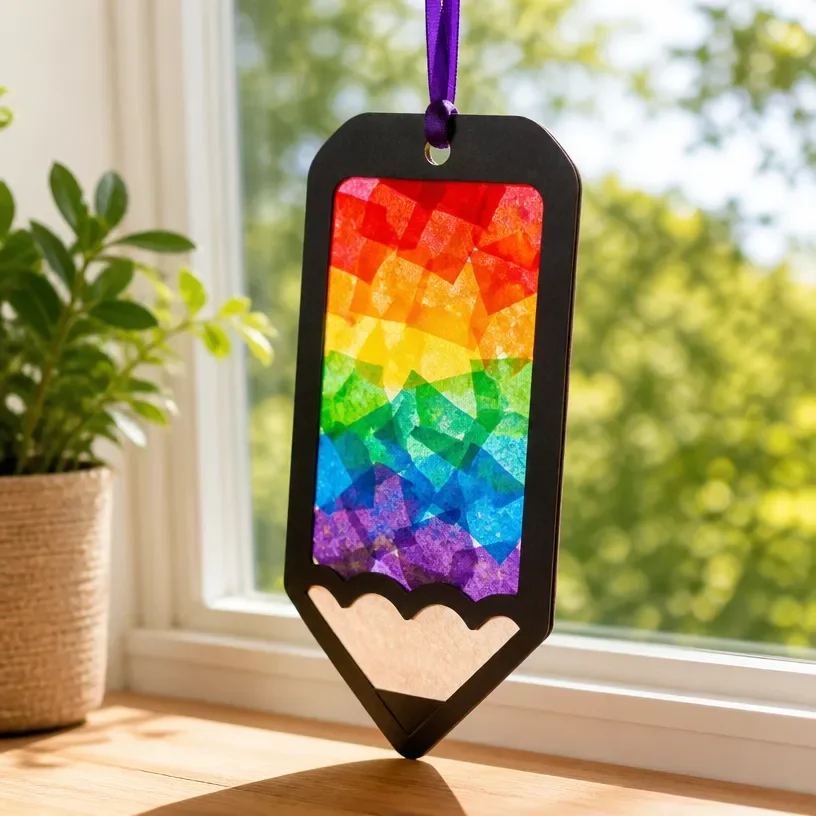
DIY Rainbow Pencil Crayon Suncatcher Craft for Kids
Creating a rainbow pencil crayon suncatcher is a delightful way for kids to explore creativity while making a beautiful art piece that brightens up any space. This project combines color, design, and a bit of science as the sunlight interacts with the colors you create. Not only is it fun, but it also encourages children to express themselves through art, making it a wonderful activity for family craft time. You may also find Rainbow Monster Pencil Holders Diy Craft For Kids useful.
In this guide, you’ll learn how to make a DIY Rainbow Pencil Crayon Suncatcher Craft for Kids using simple materials you likely already have at home. This project is perfect for a sunny day when you can hang the finished suncatcher in a window to watch the colors come to life. You may also find Rainbow Pencil Butterfly Suncatcher Craft For Kids useful.
Why You’ll Enjoy This Project
- Easy and Fun: This craft is straightforward and engaging for kids of all ages, allowing them to use their creativity.
- Brightens Up a Space: Once completed, these suncatchers add a burst of color to any room, especially when exposed to sunlight.
- Encourages Fine Motor Skills: The process of melting crayons and assembling the suncatcher helps improve dexterity and hand-eye coordination.
- Learning Opportunity: Kids learn about color mixing and can experiment with different designs for a more personalized touch.
- Use Recycled Materials: This craft fosters sustainability by using old crayons that might be lying around the house.
You may also find Diy Rainbow School Bus Photo Frame Craft For Kids useful.
Materials You’ll Need
- Old crayons (preferably in various colors)
- Wax paper or clear plastic sheets
- A pencil sharpener or grater
- Iron (for adult use)
- Scissors
- Sunlight for display
Each of these materials plays a significant role in bringing your suncatcher to life. You can replace wax paper with clear plastic sheets if you prefer a sturdier option. You may also find Melted Crayon Rainbow Butterfly Suncatcher For Kids useful.
How to Make DIY Rainbow Pencil Crayon Suncatcher Craft for Kids
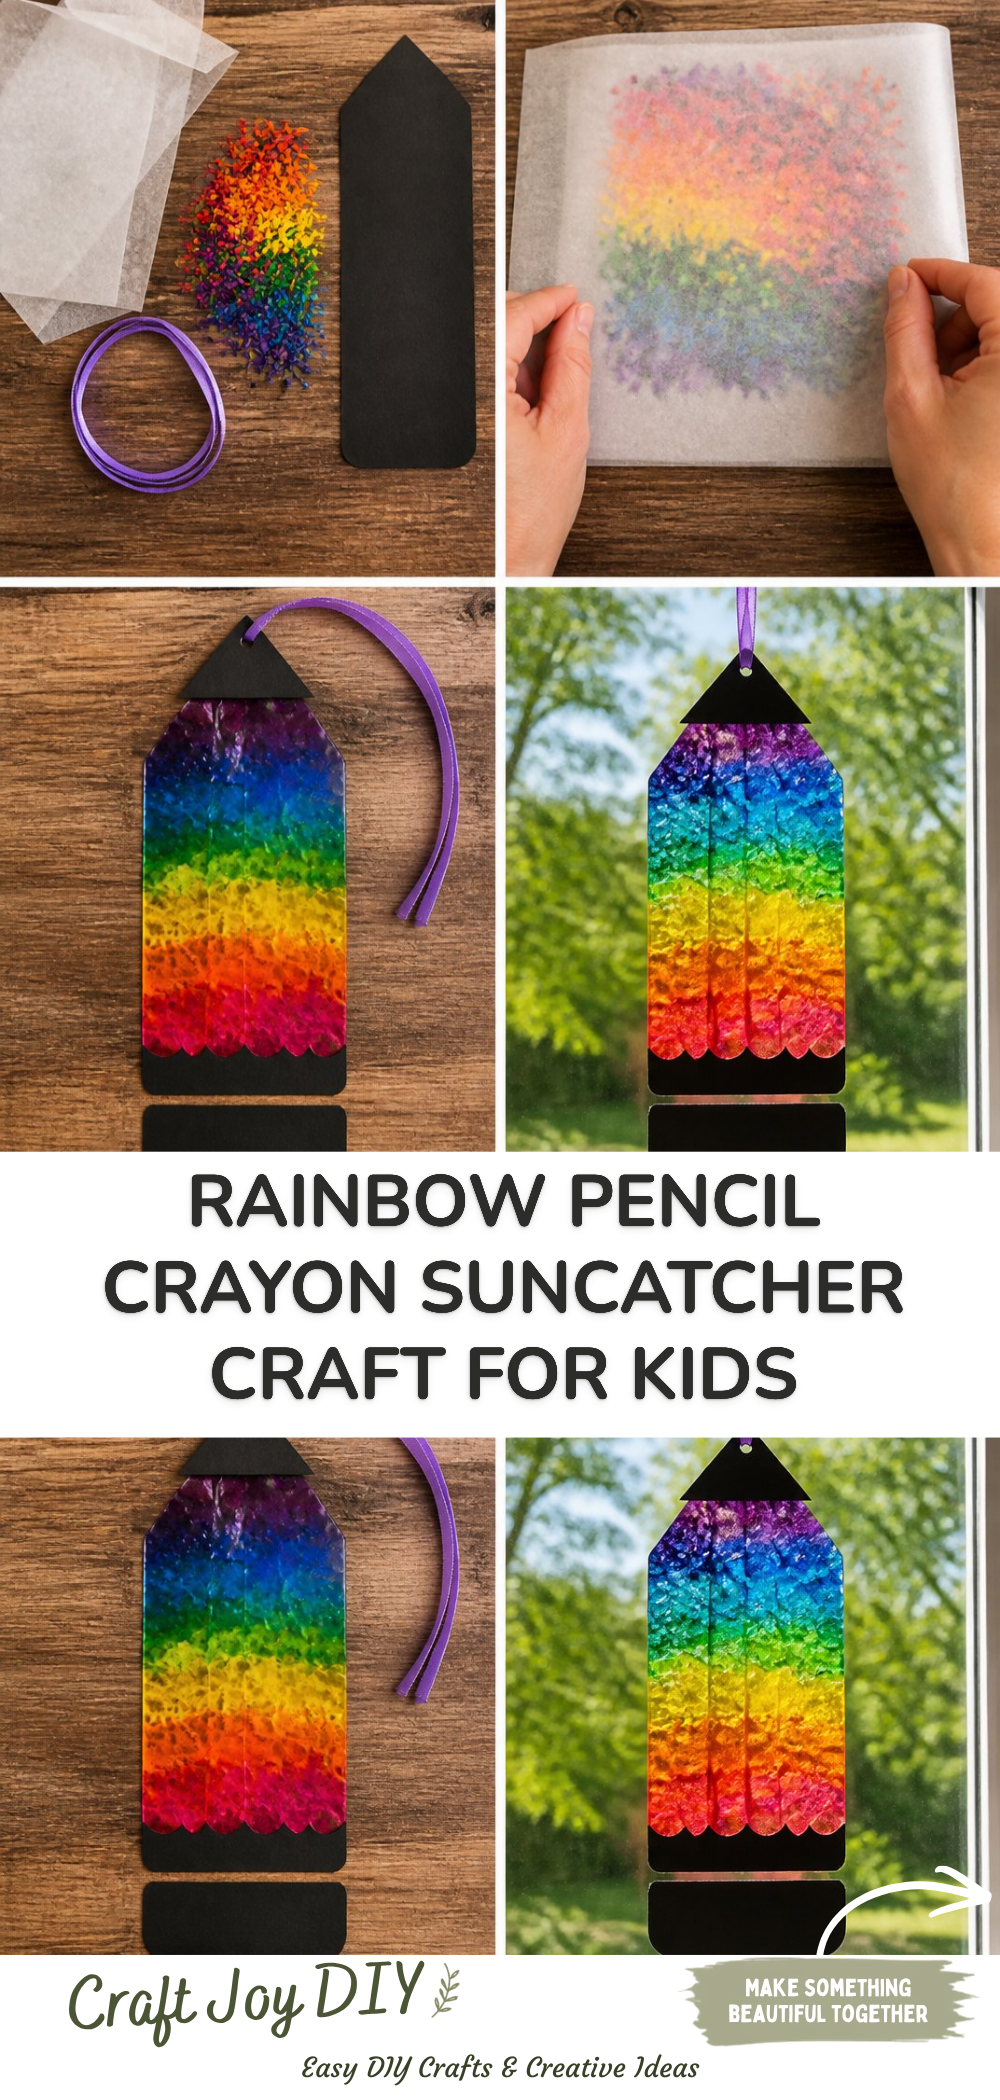
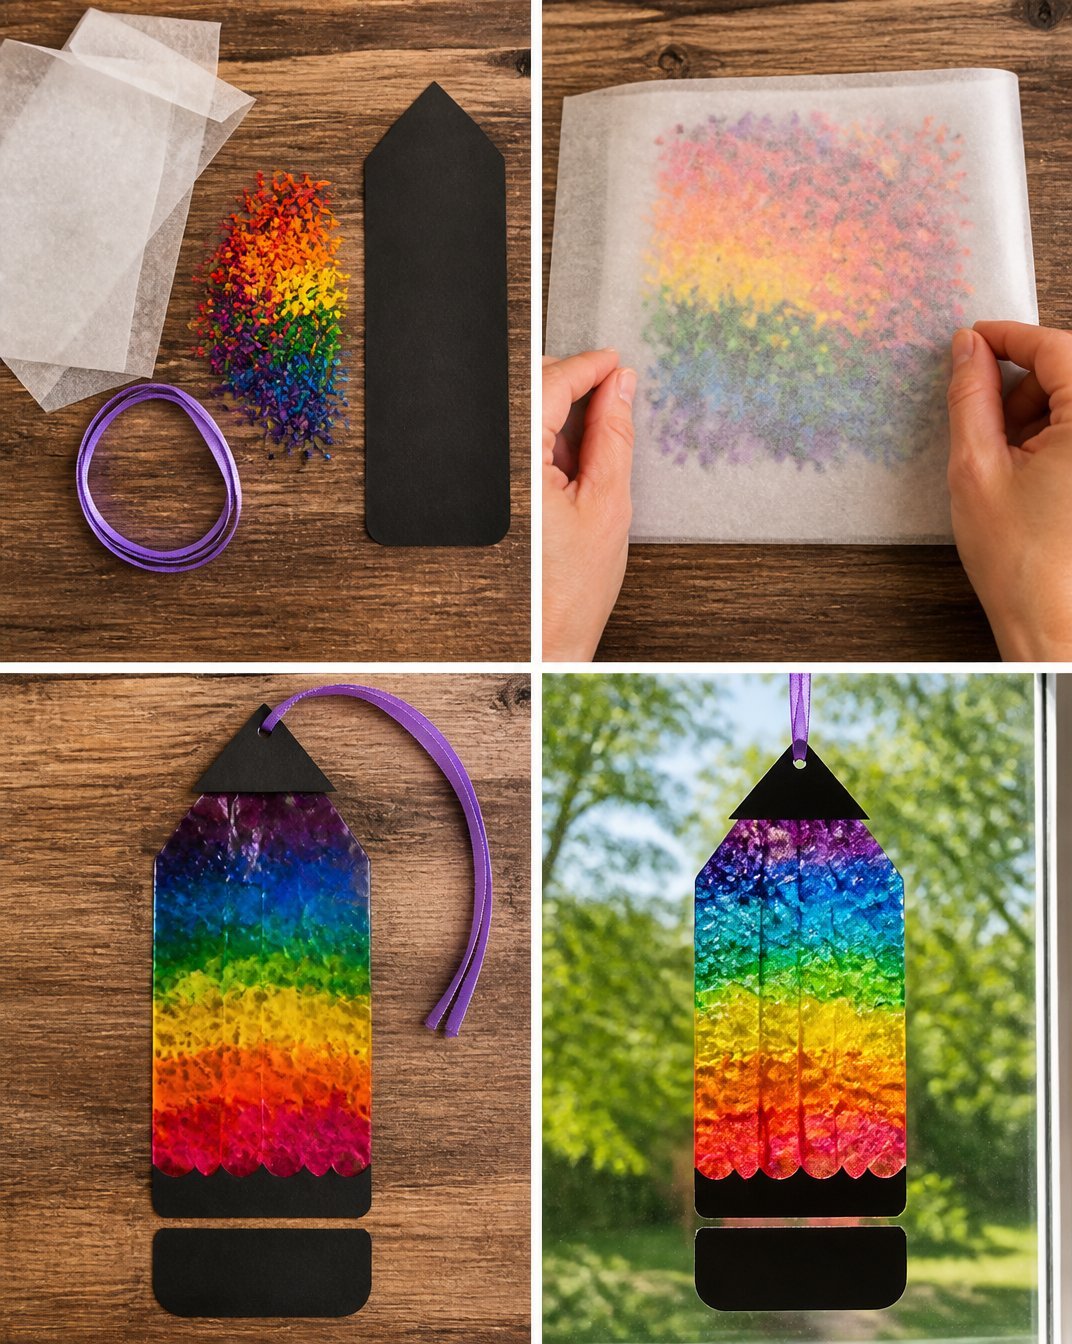
- Prepare Crayons: Start by removing the paper from the crayons. You can help younger kids with this part if needed.
- Shave or Grate: Use a pencil sharpener or grater to create shavings of the crayons. Gather at least a handful of crayon shavings in various colors.
- Layer the Colors: Take a piece of wax paper and pour the crayon shavings onto one half of the sheet, layering the colors into a rainbow pattern or however you like.
- Fold and Seal: Fold the wax paper over the crayon shavings to cover them completely.
- Melt the Crayon Shavings: With an adult’s help, place a piece of cloth over the folded wax paper and use an iron set to a low temperature to gently melt the crayons. Be cautious and ensure an adult supervises this step.
- Let Cool and Cut: After melting, allow the paper to cool completely. Then, cut the suncatcher into fun shapes, such as hearts or butterflies.
- Display: Finally, hang your colorful creations in a window where they can catch the light and shine beautifully.
Helpful Tips
- To make the melting process smoother, keep the iron moving continuously to avoid burning the wax paper or crayons.
- If your crayon mixture doesn’t melt evenly, you can reheat it to ensure all colors blend seamlessly.
- Make sure to cut the shapes quite carefully for better results; you can use cookie cutters as guides if desired.
- Encourage kids to experiment with colors; mixing different hues can create unique effects in the finished project.
Easy Variations
- Seasonal Themes: Use colors that match different holidays, like red and green for Christmas or pastel colors for Easter.
- Different Shapes: Instead of traditional shapes, try making geometric patterns or even letters to spell out words.
- Layering Techniques: Create multiple layers of crayon shavings for a more vibrant effect.
- Mixed Medium: Incorporate other materials like dried flowers or glitter to personalize the suncatcher even more.
Making This Craft With Kids
This craft is especially fun for kids, and there’s plenty of room for creativity. Adults may need to assist mostly with the melting process, as using an iron requires supervision. Be sure to explain safety to children when handling the iron! You may also find Melted Crayon Rainbow Heart Suncatcher For Kids useful.
How to Display or Use It
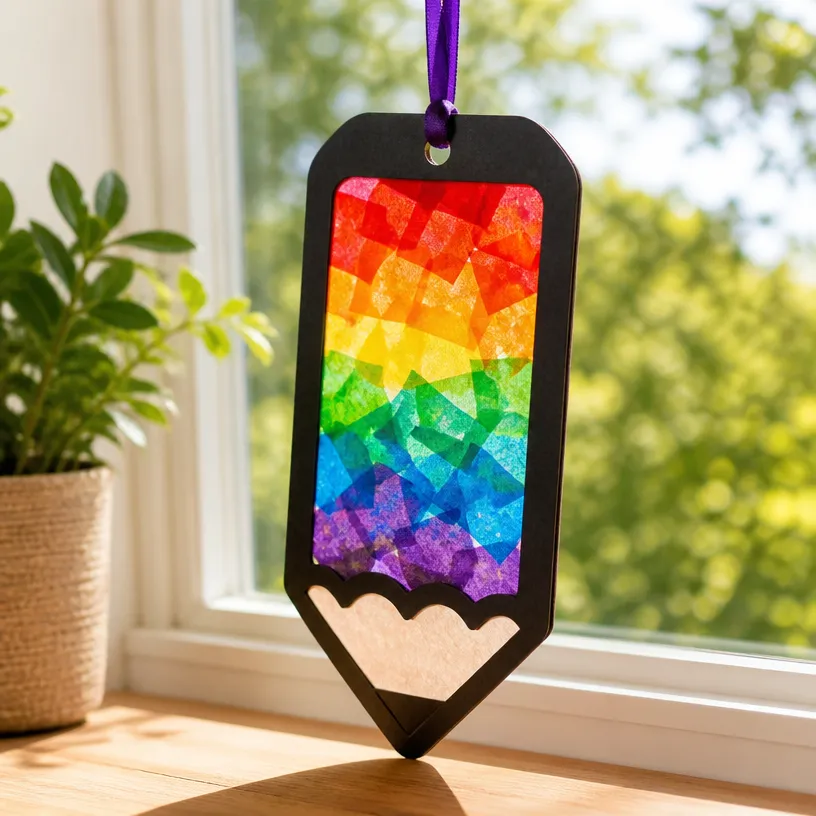
Once your suncatcher is complete, hang it in a sunny window to see it sparkle and shine. You might also consider gifting them to friends and family as colorful, handmade presents.
Frequently Asked Questions
How long will the suncatcher last?
With proper care, your suncatcher should last for months. Keep it away from extreme heat or direct sunlight for extended periods to prevent warping.
Can I use any type of crayon?
Yes, both wax and colored pencils can be used, although traditional wax crayons melt the best.
What if the crayons don’t melt completely?
If melting doesn’t occur thoroughly, return the craft to the iron for a few more seconds of heat.
Is this craft safe for all ages?
While kids can do most of the project, adult supervision is crucial during the melting phase to ensure safety.
What else can I use for the background besides wax paper?
Clear plastic sheets work great and can hold up better than wax paper.
Conclusion
Creating a DIY Rainbow Pencil Crayon Suncatcher is an enjoyable and colorful activity for artists of any age. The process is simple yet gratifying, with beautiful results that can enhance any room. For even more fun suncatcher ideas, consider checking out other tutorials like Suncatcher Craft for Kids Using Crayon Shavings – Buggy and Buddy or learn about Recycled Crayon Suncatchers | DIY for Beginners – KiwiCo to expand on this creative venture. Happy crafting!
Print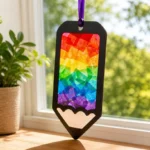
DIY Rainbow Pencil Crayon Suncatcher Craft for Kids
- Total Time: 25 minutes
- Makes: 4 suncatchers
Description
A delightful craft project for kids, creating colorful suncatchers using melted crayon shavings.
Materials
- Old crayons (various colors)
- Wax paper or clear plastic sheets
- Pencil sharpener or grater
- Iron (for adult use)
- Scissors
- Sunlight for display
Instructions
- Prepare crayons by removing the paper from them.
- Shave or grate the crayons to create shavings.
- Layer the colors on one half of the wax paper.
- Fold the wax paper over the crayon shavings to cover them.
- Melt the shavings using an iron set to low temperature, with an adult’s supervision.
- Let the paper cool completely before cutting it into shapes.
- Display your creations in a sunny window to enjoy the colors.
Notes
Adult supervision is necessary during the melting phase. Encourage kids to experiment with colors and shapes.